
Gear Guide for Landscape and Scenic Photography
What You Need to Succeed

Gearing Up
I have a confession to make: I could almost care less about photography gear. Why, then, would I write an entire article about it? Because I think I have a unique perspective as opposed to the many articles you'll read about the latest camera technology and gadgets. I think anxiety about not having the right gear or not using the correct camera settings get in the way of enjoying photography for many of us. I want to empower those of you with limited budgets to understand the limitations of some of our gear and really hammer home the essentials. I prefer to keep things very simple. I hope this helps some of you, wherever you are on the journey!
Let me also get this out of the way right off the bat: Better gear will not make you a better photographer. Practicing photography will.
Many of us, myself included, start small and grow into a system that works for us over time. I’m not a gear-head by any means, but I respect the fact that photography is a gear-intensive pursuit and a few nice tools can go a long way.
I worked first with a Canon Powershot, and then a Canon Rebel, for the first few years of being a photographer. I didn’t have a lens other than the one it came with, an 18-55mm kit lens with a maximum aperture of f/3.5-f/5.6. I used the heck out of that setup, and made some of my favorite images with it.
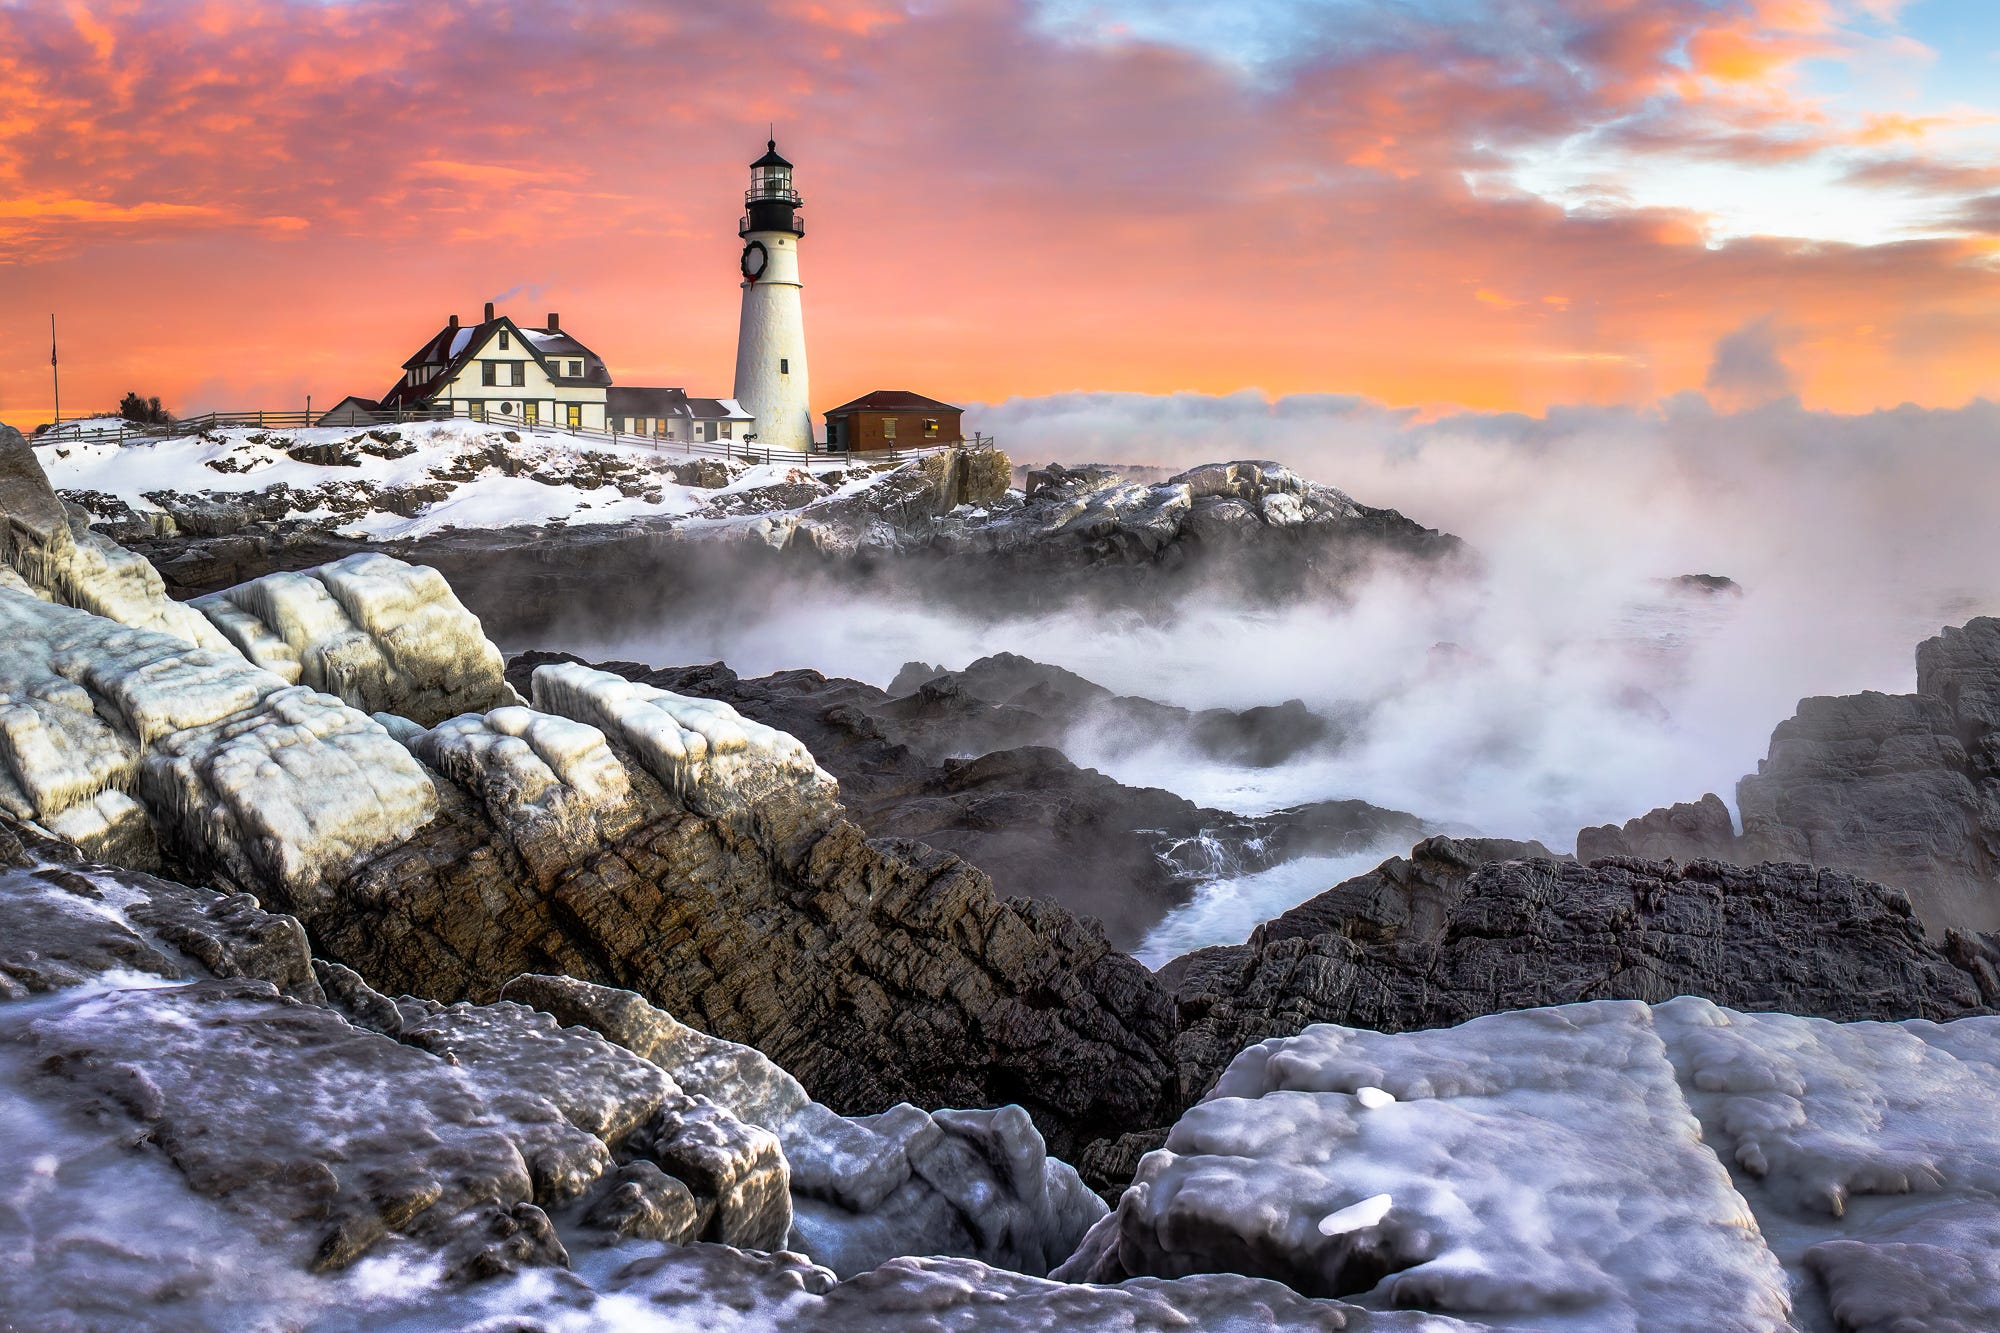
I was happy to hear that my friend Dominic Trapani used the same camera until just a few months ago for his photography. He even published a beautiful book full of his amazing lighthouse images using this setup!
I say this as a means of empowerment to those of you who might not have the means to jump right in with tons of cash to lay out on gear when getting started. I certainly didn’t. Do your best with what you have.

What do you need to take it to the next level? Well, that depends on your individual needs, and your budget, but here are a few things I think most of us can agree on. A big thanks to my friend Dean Bugaj for helping me here.
Basic Photography Setup
Camera Body - This is the machine that attaches to a lens and creates images. DSLR stands for digital single-lens reflex, the most common design of the past 50 years, and mirrorless denotes not having a mirror. Mirrorless camera bodies are quickly replacing DSLRs. See below for more information.
Lenses - Lenses allow light to enter the camera body. They come in focal lengths from around 10mm to 800mm, with the standard focal lengths being from 16mm to 200mm. Bigger numbered, longer focal lengths help us ‘zoom’ in to smaller sections of what’s in front of us. Smaller numbered, shorter focal lengths encompass a larger, wider field of view and take in more of the scene in front of us. See below for more information.
A STURDY Tripod - A tripod is a three-legged support platform for a camera, providing stability for long exposures and sharper images. It’s connected to the camera by a ball-head in landscape photography. See below for more information.
Memory Cards - Memory cards write image information from the camera into a format that can be read by a computer. They can be fast, which can be useful for high-speed photography, or slower to write. They vary in capacity, with 64 GB and 128 gb cards seeming to be a sweet spot for many photographers for holding enough images for an entire day’s worth of photography. They are not meant to be permanent storage devices, although some folks treat them as such. I keep two 128GB SD cards and write to both simultaneously for a redundant backup in a dual-slot camera body. The standard memory card format is SD, though some of the latest Nikon bodies can write to much more advanced XQD memory cards.
Extra Batteries - One extra battery is a necessity.
Photo Backpack - Photo backpacks work better than a tote or sling for most photographers, allowing us to carry gear long distances and even allowing us to access our cameras without putting the bag down in some cases.
Circular Polarizing Filter - A polarizer cuts through reflections and haze, allowing the true tones and colors of water, leaves, and other reflective surfaces to come through. It also noticeably darkens the sky at a 90 degree angle from the sun. See below for more information.
L-Bracket - While I worked for many years without an l-bracket, I appreciate the easy ability to turn the camera vertically on a tripod thanks to my l-bracket. Make sure that it fits your camera model, and allows access to the ports on the side!
Rain Covers - I use them on both my camera and camera backpack.
Lens Cloths
Blower Bulb - This is for blowing dust and grit off of lenses before wiping them with a lens cloth and for blowing dust off the camera sensor. Never touch a camera sensor with your finger or even a cloth.
Sensor Cleaning Kit - Learning how to clean your own sensor is important, for both DSLR and mirrorless camera bodies. Make sure you order the kit with the swabs that fit your camera.
Remote Shutter Release - While working on a tripod, in scenarios where a two-to-ten-second self-timer won’t work, I use either a cable or a wireless remote to trigger the shutter without touching the camera body so that I can achieve the sharpest possible images. This is especially helpful when timing waves and other events while making long exposures. The reason the images come out sharper is that pushing the shutter on the camera introduces vibrations that can cause camera shake and blurry images, even on the sturdiest tripods. You either need to use a self-timer, remote shutter release, or don’t even bother using a tripod.
Neutral Density Filters - I think they can be useful for making longer exposures, especially in daylight, but I find them to be unnecessary and I see them go unused for the majority of photographers. Don’t buy these unless you are sure you need them.
First, Some Background
RAW vs JPEG
What is RAW capture? RAW is the highest-quality file that a digital camera can produce. I believe that most photographers will get the most from their images by capturing them in RAW. The catch is that these files will require editing. They don’t look great straight out of the camera. That’s because there are no filters applied to make the contrast and color pleasing in the way that a .jpeg file is written. You’ll think it looks flat, de-saturated, and dull when you first bring it up on the computer. You might wonder why you bothered when your old photos looked so much better straight out of the camera.
That’s because when a camera writes a .jpeg file, an algorithm applies contrast, color, and sharpening in ways that most users find pleasing. It also bakes those changes into the files in ways that cannot be easily altered after the fact. I think of it like having your film developed at Wal-Mart. For many folks, that’s just fine.
You probably want more from your photos. You have an idea of what you want to show that only you can bring to life, not some algorithm. You want to capture your images in RAW. Continuing with the film analogy, for that, you’re going to have to build your own darkroom and develop your images yourself.
Just kidding about the darkroom. We’re talking about digital photography, after all! These days we can develop images ourselves, with slightly more ease than in a darkroom, using RAW conversion software such as Adobe Lightroom, among many others. However, like the darkroom of old, it’s true that this is going to require more effort, but the results are going to be much closer to what you intended when you clicked the shutter, not what the camera, or photo lab, intended.
Dynamic Range
RAW files also give you the most dynamic range. This is another term you’ll want to familiarize yourself with. Dynamic range refers to the values of light, from the darkest blacks to the lightest whites, that the camera can capture in a single exposure. Newer camera bodies, especially full-frame, flagship models from the major manufacturers, have lots of available dynamic range.
The practical application of this is that when you expose for the brightest parts of the scene, without overexposing, information in the darkest parts of the scene, the shadows and blacks, can be brightened without degrading the image quality because of digital noise. It used to be that darkening shadows just a little would produce noticeable digital artifacts or noise, but these days, the latest software driving image capture is making this less and less of a problem.
The term f-stop refers to a camera setting that measures the size of the aperture in a camera lens, which controls how much light enters the lens. The human eye can see 10–14 f-stops of dynamic range at a time, which is similar to digital SLR cameras but surpasses most compact cameras. My Sony a7r5 has 15 stops of dynamic range, the Nikon z8 has 14.2. My old Canon Rebel, about 8. None of these compare, however, to the ability of the human eye to process even greater dynamic range than any camera body is capable of. When allowing the eyes to adjust to different parts of a scene, human vision can surpass 25 stops of light. As you scan a scene, your eyes can dedicate 10 stops to each part, and your mind combines them into a complete scene.
That’s why we used digital darkroom tools to brighten and darken different parts of the image, and even combine multiple exposures, to try to approximate the way we ‘see’ things, which is really building a mental picture using multiple ‘exposures’ as our eyes dilate and contract to take in different parts of the scene, light and dark. That’s why having a lot of available dynamic range in a single exposure is important to many of us.
ISO Performance
ISO performance refers to a setting that boosts the charge going through the camera sensor, allowing it to pick up more light, at the expense of image quality. The base ISO, usually 64-200, will give you the sharpest possible image, while higher ISOs will start to take on digital noise and artifacts. This used to be called ‘grain’ on film.
Generally, newer camera bodies can handle ISO values up to 800 with ease. Once you approach 3200 and 6400, and certainly at values like 12800, digital noise will begin to noticeably degrade the quality of the image. It’s a trade-off when you are photographing in low light and still want to freeze moving objects in the scene. That’s when we often need to boost our ISO to keep the shutter speed where we want it. That’s true even for stars at night, which start looking like streaks, not points of light, at exposures longer than 12 seconds with wide-angle lenses.
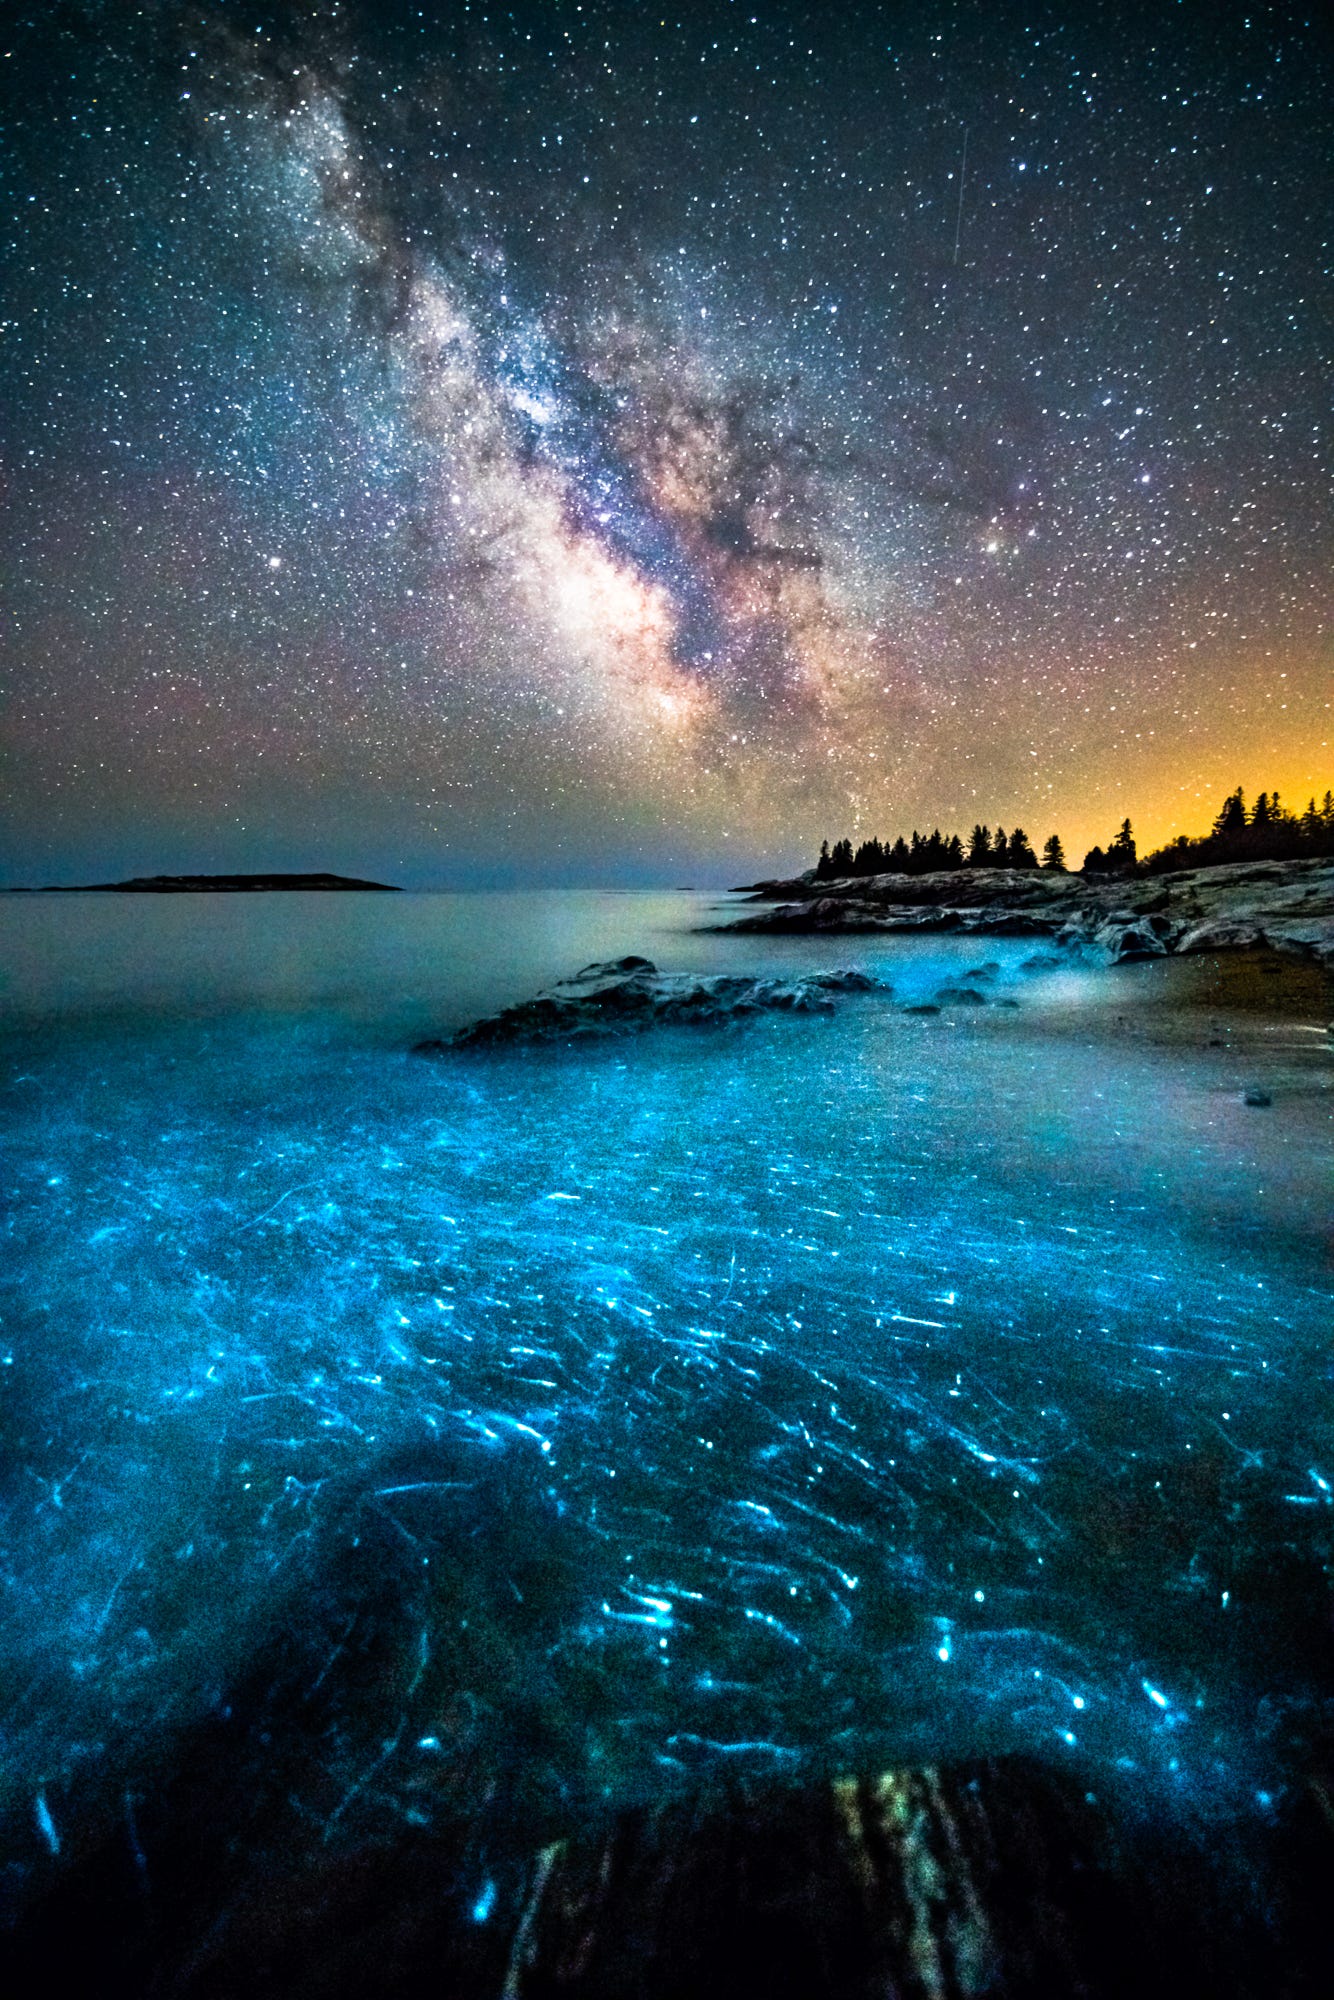
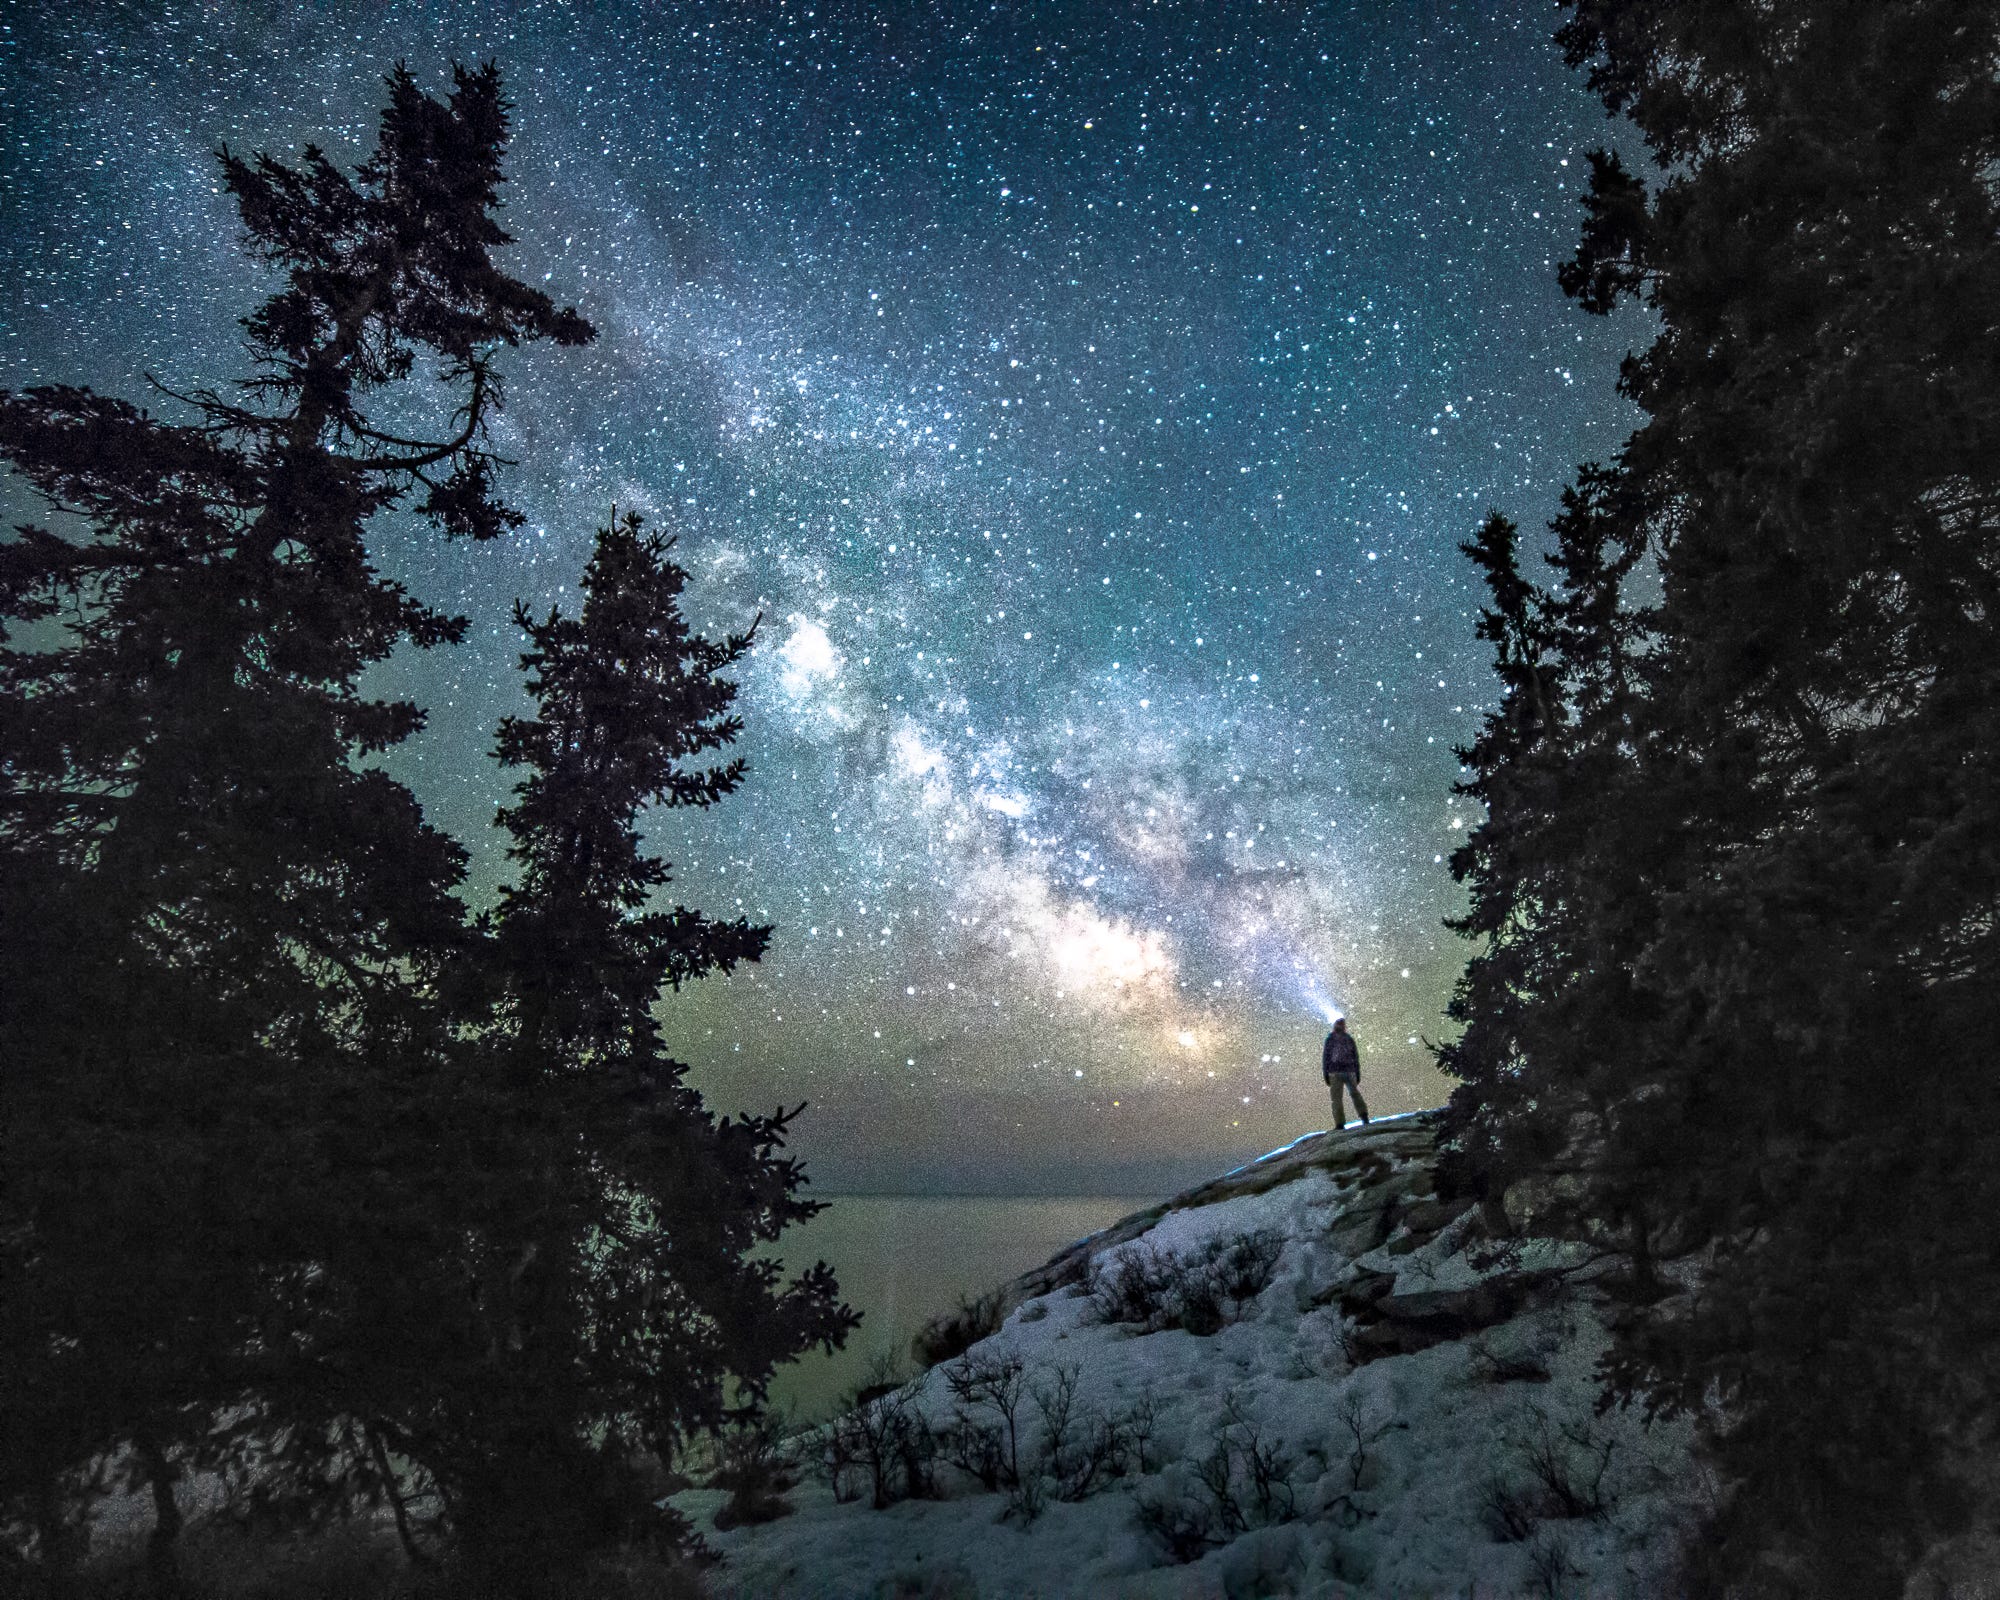
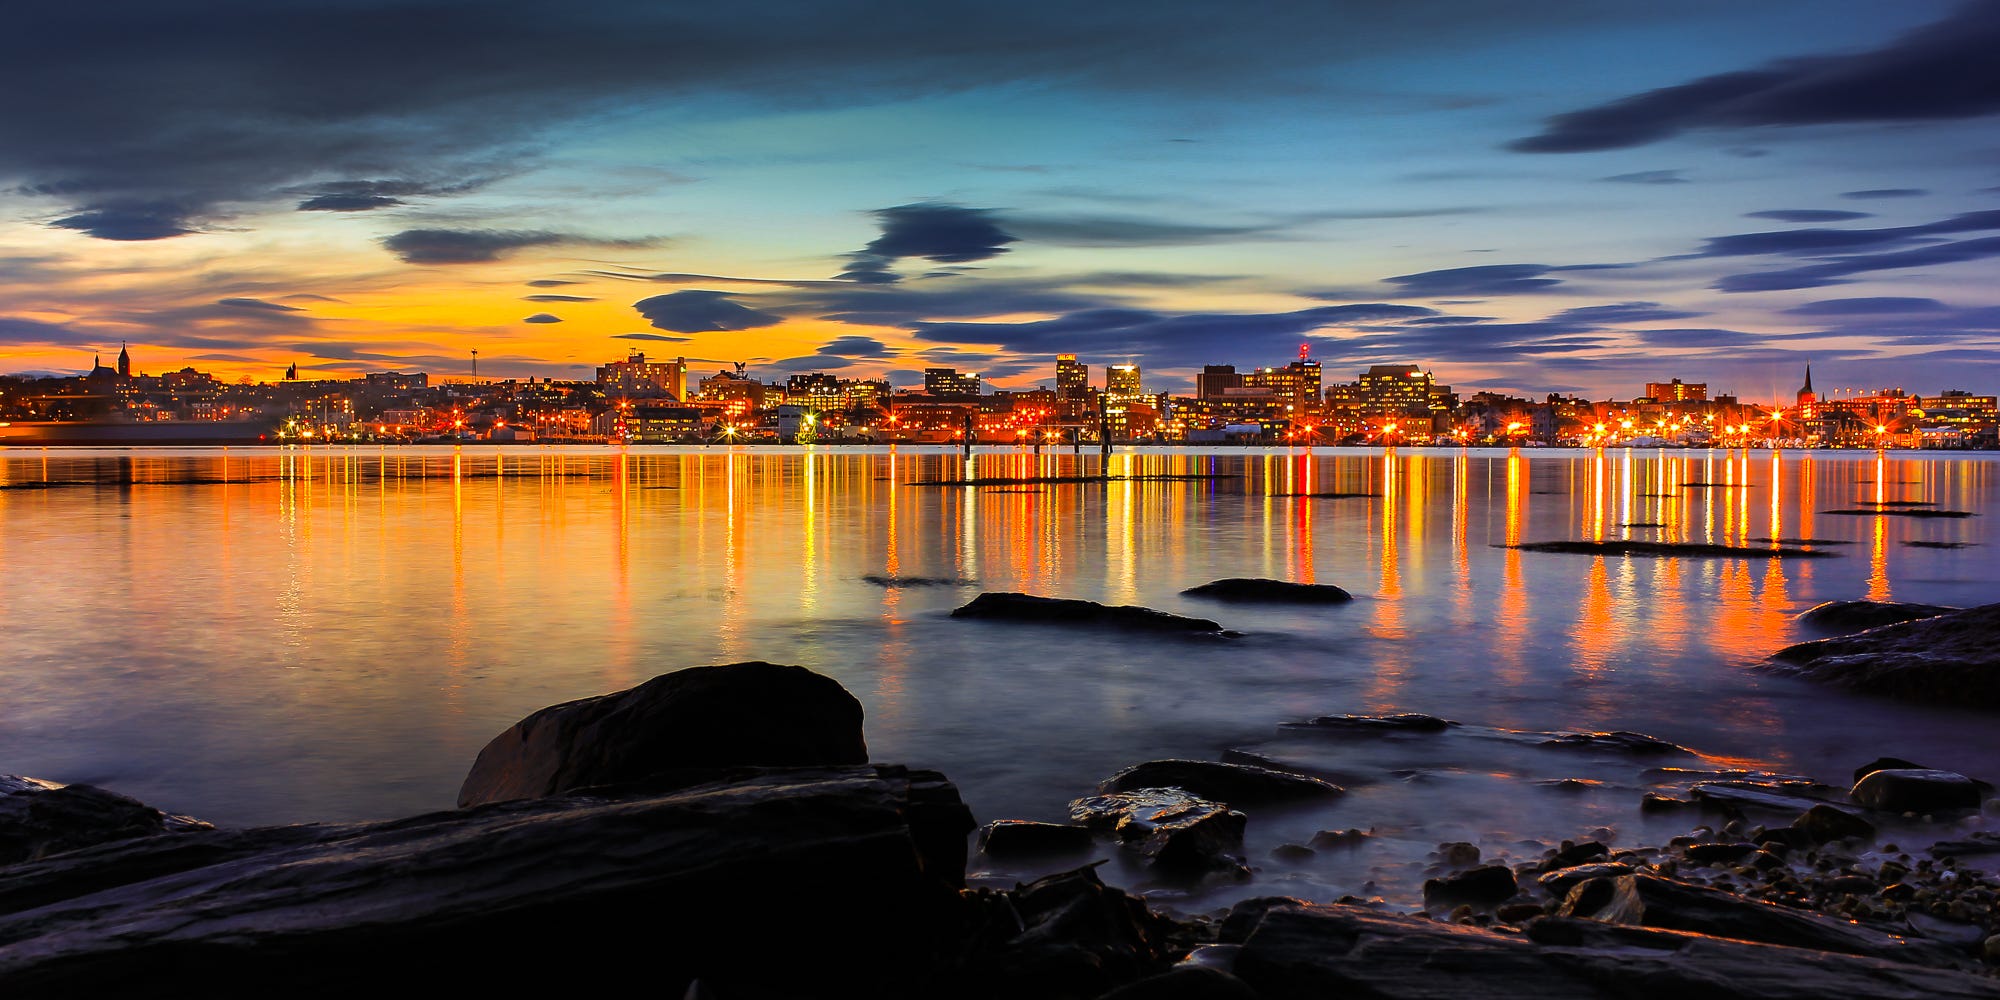
The image below was taken at ISO 6400 on a Sony a7r2. Because it was extremely dark and I had to brighten the image even more to bring out the foreground, it’s a fairly noisy image, but, like most quality concerns in photography, minor compared to what’s going on in the photo and how it makes us feel.
Choosing a Camera
You may be wondering if you should purchase a camera, or just keep using your cell phone to make images. I say, definitely, buy a ‘real’ camera! You’ll see giant improvements, right off the bat, in images that are zoomed-in and ones taken in low light, which, in my opinion, is often the most interesting light. The ability of crop sensor and even micro 4/3 sensor cameras to gather light and render zoomed-in images with longer focal-length lenses are so much stronger than cell phones, it’s still astonishing.
That said, mobile devices are getting better at image-making, mostly because of advances in the software that drives them. The lenses are tiny and the sensor sizes are tiny, but you’ll do fine in daylight conditions as long as you don’t need to zoom. Some of the latest mobile devices even have the ability to capture in RAW, which is a great feature. Some also have fairly advanced digital zooms, but still, a digital zoom is just cropping, which creates a lower-quality image.
Choosing between camera manufacturers when you are starting out can be daunting. It’s a big commitment, mostly because you are going to be purchasing a number of lenses and accessories that only work with the brand you choose. The investment adds up quickly, and jumping ship to a new brand can be very expensive since you have to buy a whole new set of lenses and accessories to go along with the new camera body. Just ask my buddy Kurt Budliger, who’s done this three times! He’s gone from Canon, to Sony, to Nikon.
The biggest thing to remember, a point that I cannot stress enough, is that you can make great photos with almost any camera. My friend Dave Dostie told me that he keeps an old Nikon body is in his car with some 30+ year-old lenses to be ready for any situation, and is so glad he does for the times he’s out without any intention of making photographs, but something comes up! As he says, the best camera is the one you have.
Surprisingly, the differences between entry-level camera bodies and even most of the flagship models from Nikon, Canon, Sony, Fuji, etc., are going to be smaller than you’d think. Perhaps the most obvious piece of advice is to choose a camera brand that your photography peers have. That way you can come to them with any questions you might have. Heck, sometimes you can even borrow lenses and accessories from them to test before purchasing. For similar reasons, choosing a camera from one of the big four, which I believe are Nikon, Canon, Sony, or Fuji, is going to immediately plug you into a network of great online resources and support.
Nikon and Sony are both known for their highly technologically advanced mirrorless bodies and amazing sensor technology. They also have some of the most incredible lenses to choose from when it comes to sharpness, clarity, and contrast, especially in their zoom lenses, which used to be compromised due to the versatility required in the design, but are thankfully now comparable to prime lenses. One slight niggle for me is the Sony menu system, which I think is complicated and sometimes overwhelming compared with others.
Canon is well known for their rock-solid weather sealing, incredible lens selection, and their support system for repairs—Canon Professional Services. It seemed for a long time that most professional photographers, especially sports and event photographers, used Canon. I think that’s mostly still true today.
There was a point in the early 2010s when Canon sensor technology was slightly behind other manufacturers. For that reason, many nature and wildlife photographers jumped ship to Nikon and Sony with the release of the Nikon D800 and Sony a7r camera bodies, which featured sensors that were superior in low light and had incredible dynamic range. I was one of them. That has since changed and Canon is now neck-and-neck with the other major manufacturers in all regards.
Fuji has both some of the most exciting cameras, such as the X-series mirrorless and GFX medium-format camera bodies, but also a somewhat more limited lens selection and less-than-ideal integration with Adobe Lightroom, the industry standard editing software. I think the color science in Fuji cameras might be a slightly better than other manufacturers, especially when used with Capture One, which is the editing software most aligned with Fuji.
Fuji X-series cameras employ a rangefinder-type button layout, which a lot of 35mm film photographers love because of how it mirrors the mechanical controls of earlier eras. For some beginning photographers, and I’ve seen this firsthand with my workshop students, all of the buttons are incredibly overwhelming and they often push buttons and have no idea what they did or how to reverse it.
All are great systems with a lot to recommend for each. All will have a number of entry-level, often crop-sensor camera bodies as well as advanced professional full-frame camera bodies. Most of the students in my workshops work with full-frame Nikon mirrorless systems, but I see plenty of Canon and Sony systems, and the occasional Fuji, too.
The Rise of Mirrorless Cameras
The latest shift in camera technology is a move to mirrorless camera bodies. According to my friend Rick Berk, both Nikon and Canon have stated that they are no longer producing DSLRs or EF- and F- mount lenses. The days of the DSLR are essentially over.
What are the differences between DSLRs and mirrorless camera bodies? Here’s the description from the Adobe website:
“When light enters the camera lens of a digital SLR camera, a photographer sees their subject in the optical viewfinder via a reflection of that light from a mirror inside the camera body. As the photographer snaps the photo, the mirror swings out of the way, and the light goes through to the digital image sensor to capture the photo on an SD card. This is different from mirrorless cameras, where the light goes directly to the image sensor, and the photographer sees what they’re shooting via a rear LCD screen or an electronic viewfinder.”
That explains things pretty well, with the one of the main points being, the image on a mirrorless camera is projected on a digital LCD screen vs. the optical viewfinder in a DSLR. Many of us were already relying more on the lcd screen of our DSLRs and less on the optical viewfinder already, because it gives us important information about the image being taken and actually renders a preview of the digital image we are about to capture, or a review of what we have already captured. Alas, some will miss the optical viewfinder, with its clear framing of the ‘reality’ we can see with our own eyes. It’s hard to approximate this with a digital LCD screen. It’s also true that mirrorless cameras have to be turned on to look through the viewfinder.
Another big factor in switching to mirrorless is the fact that they can be lighter than DSLRs, although newer mirrorless bodies, packed with new technology, are getting heavier. Also, because of the shorter space between the sensor and the opening to affix the lens to a mirrorless camera, lens designs can also be made lighter.
One of the drawbacks of mirrorless cameras is the fact that the sensor gathers dust and other particles more easily, since it isn’t covered by a mirror, therefore requiring more frequent cleaning. That issue is now being addressed by camera manufacturers, and my Sony a7r5 now has a cover that closes over the sensor when I remove the lens, which certainly isn’t the case with most mirrorless bodies. It also used to be true that mirrorless cameras were more fragile and had shorter battery life than DSLRs, but I find that is no longer a serious issue thanks to recent advances.
Full Frame vs. Crop Sensor
There are many differences to note between full-frame and crop-sensor camera bodies. Perhaps the most obvious thing to note is that full-frame sensors are larger. Because of this, they can gather more light, utilize more wide-angle lenses, provide shallower depth-of-field, cram in more megapixels, and take up more space in your camera bag. Camera bodies with full-frame sensors are usually higher quality, more expensive, and come with a larger selection of high quality, more expensive, lenses.
Crop-sensor cameras can be an affordable alternative to full-frame cameras for casual shutterbugs, especially those who don’t need exceptional low light performance. Crop-sensor cameras are smaller, lighter, and cheaper, and come with smaller, lighter, cheaper lenses.
Some photographers, especially wildlife and sports photographers, appreciate the ability to get extra ‘zoom’ out of their lenses with a crop-sensor camera body. In truth, this is an illusion. The lens itself doesn’t change, nor does the focal length. The visual data is simply hitting a smaller target. I think of it more like cropping in, which in turn gives the illusion of zooming, but really just produces a smaller image.
Full-frame sensors usually have better ISO performance than crop sensors, although that has narrowed in recent years with advances in technology. Newer crop-sensor cameras rival older full-frame models for low-light and high-ISO capabilities, but still don’t match the latest flagship full-frame models from the major camera manufacturers.
Lenses
I recommend starting with lenses ranging from 16 mm to 200 mm on a full-frame camera and 12 mm to 150 mm on a crop sensor. As I mentioned above, when I started in photography, I only had an 18-55 mm lens on a crop-sensor body, and did just fine for two whole years. I wouldn’t recommend doing this, but don’t fret if you don’t have the cash to lay out on a bunch of lenses when you start out. They can be very expensive. If you can only purchase one, I would recommend that same range, 18-55 mm, which on a full frame is 24-70 mm. This is the focal length that is closest to human vision, and therefore perhaps the most intuitive when it comes to relating what’s in front of us.
All lenses have a maximum aperture, and in the case of zoom lenses, that’s usually f/2.8, f/4, or f/5.6. The f/2.8 lenses will gather more light, which is helpful in low light scenarios, but are both more expensive and heavier. It’s also important to note, especially for landscape and scenic photography, that we often don’t use apertures wider than f/8 because of depth-of-field concerns. For this reason, many of us opt for zoom lenses with a smaller maximum aperture, saving both weight and money. It used to be true that the f/4 lenses weren’t as sharp or high-quality as the f/2.8 versions, but now many of the f/4 lenses are getting to be just as good. The variable aperture zooms, such as f/2.8 or f/3.5 to f/5.6, are sometimes lower quality, but have seen notable improvements with the latest designs.
On that subject, you may want to consider purchasing what is known as a ‘travel’ zoom. It used to be that these lenses, with their wide range of focal lengths, variable and somewhat limited apertures (not very wide), were vastly inferior to the flagship f/2.8 zooms from the major camera manufacturers. These days, they have improved to the point that even professional photographers are employing them more and more, especially when they need to lighten their load. The Nikon 28-400mm f/4-8 and Tamron 28-200mm f/2.8-f/5.6 are great examples of these very capable new ‘travel’ zooms. I’ve found that the biggest drawback with the Tamron, which I own, is some pretty awful vignetting at wide apertures. That’s only a problem in certain scenarios, though.
After a while, you might want to add an ultra-wide, long telephoto lens, and/or a dedicated macro lens to your kit, depending on the type of photography you most enjoy. If you enjoy capturing giant fields-of-view from inside tight spaces, then a lens in the 12-14 mm range can be a lot of fun. You’ll be surprised at how much more you can see at 14 mm than 16 mm! If you are really getting into photographing wildlife, or like to photograph the moon zoomed in to look giant, juxtaposed with distant objects, like I do, then a 400 mm to 600 mm or greater telephoto lens is a great tool to have. Macro lenses are used to photograph small objects at very close range, showing details that other lenses can’t. That’s because you have to position non-macro lenses further away to focus.

Tripods
A tripod is an essential tool for landscape and nature photographers. Using a tripod can help in many ways. I find this especially true if you, like me, prefer to photograph at the ends of the day. In low light, we often use slower shutter speeds to gather more light. That’s because when we keep our apertures small for depth of field, and ISO values low to maintain image quality, shutter speed becomes the variable to adjust. Tripods help in creating sharp images at any shutter speed, but are absolutely essential during longer exposures. Tripods also can help us slow down to evaluate compositions critically and methodically.
I like to use tripods that can be positioned at extremely low angles, often right against the ground, for getting ultra-low perspectives. Because of this, I look for a tripod either without a center column, or one that can be removed or turned on its side so that it can be laid flat.
I’ve used tripods with both flip locks and twist locks on the leg assemblies, and can honestly say that I don’t prefer one over the other. You may feel differently. Some folks say they like the assurance that flip lock legs provide, meaning they aren’t guessing if it’s tight enough to prevent the leg from sagging, but to be honest, even flip-lock legs can lose tightness over time and need to be re-adjusted in the field.
One of the biggest frustrations of some photographers who join me on workshops is the fact that they are struggling with cheap, poorly-built tripods. For many, this is the first time they’ve used a tripod, and they didn’t want to lay out a lot of cash on a new piece of equipment. I fully understand, but at some point, not using a tripod is almost better than struggling with a poorly made one.
Poorly built tripods can have flimsy legs that are hard to adjust. I’ve also seen many photographers purchase video panning heads with arms and knobs that aren’t designed for still photography. I did this when I started! Perhaps the most ubiquitous and maddening problem I’ve both seen with other photographers, and experienced myself, are sagging ball-heads. It sounds vulgar, but what it means is that the ball-head, when fully tightened or locked down, continues to drift and slowly move because of the weight of the camera, causing blurry images.
If you are going to commit to using a tripod, and I highly recommend doing so if you are pursuing landscape and nature photography, then I would recommend a tripod and ball-head that are built to high standards. Don’t make the mistake I’ve made, and so many others have made, and purchase one cheap tripod after another until you get a really good one that meets all of your needs and is built to last.
As my friend Darylann Leonard reminds me to tell you, you’ll want to choose a tripod that works for you based on your needs. How tall do you want your tripod to be? I like having a tripod that can actually be used at, and even above head height. That way you don’t have to bend over, which can hurt your back, especially with a heavy photo backpack on. You can also be standing on a small stepladder, a rock, or even next to the water with the tripod spread out below you and your camera still at head height.
It’s also great to have a tripod that you can lower inches from the ground. To do that, you need to look for a model without a center post, or one that flips to the side so that you can position the camera extremely low.
You’ll also want to be sure that the tripod legs and ball-head you choose can support the weight of your camera and the largest lens you might attach to it.
Finally, you’ll want to know the total weight of your tripod legs and ball-head combined to know how much you are going to be lugging on photo shoots, both in the field and when you are traveling!
A quick note on when I believe a tripod is absolutely necessary: Students often ask when they should move from hand-holding their cameras to placing them on a tripod. The rule of thumb that I like to give is that when you reach 1/x seconds, with x being focal length of your lens, you should probably move to a tripod. That means 1/50 sec. for a 50mm lens or 1/200 at 200mm, and so on. New in-body stabilization systems in newer cameras can give you a little leeway, but still, it’s better to be safe than sorry. Choose stability!
Circular Polarizing Filter
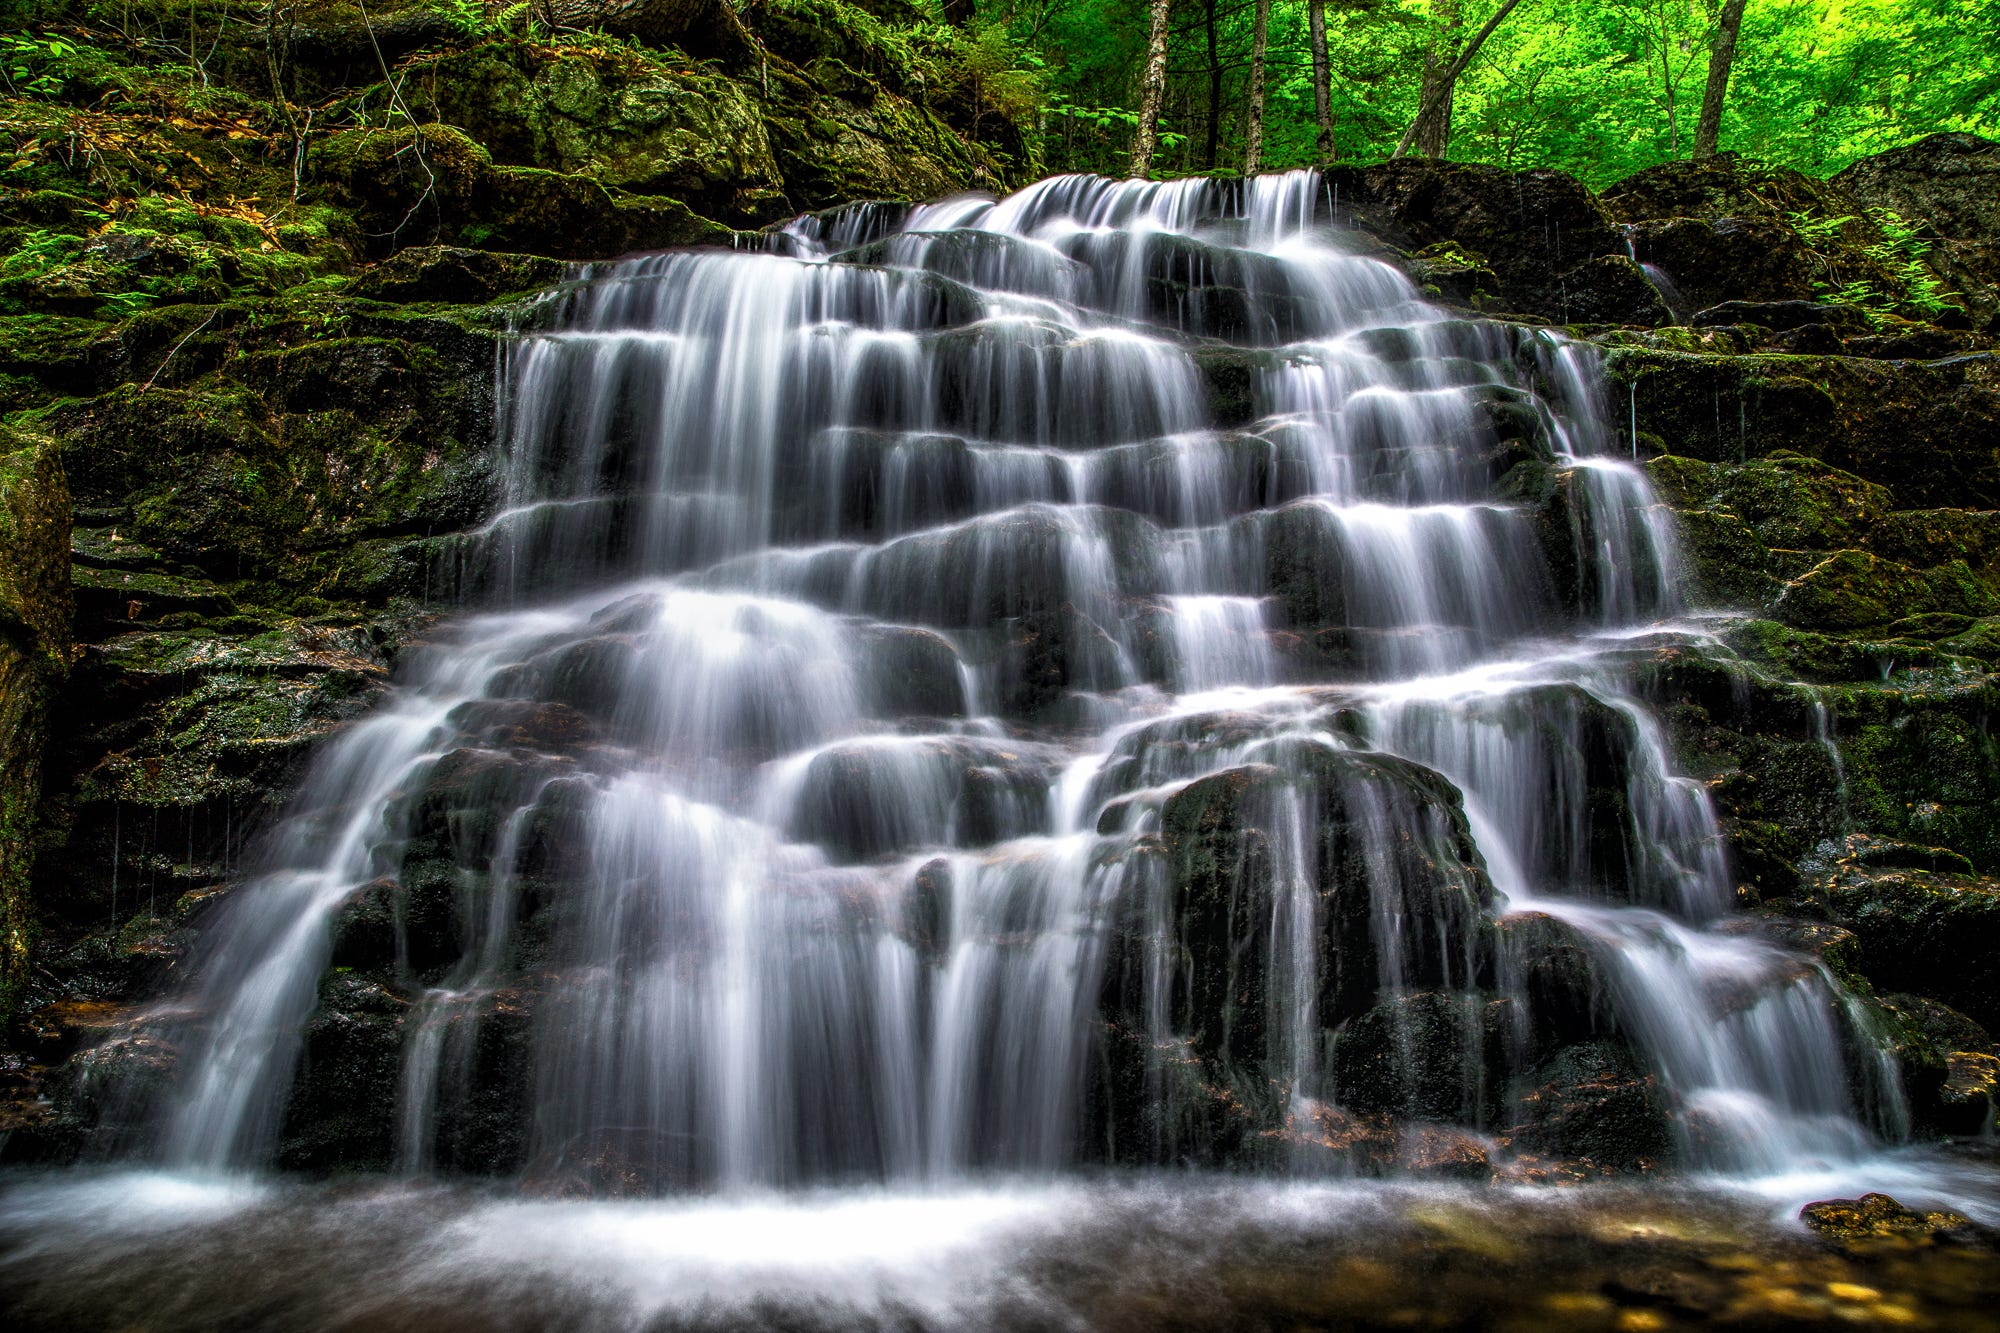
This is the one essential filter for landscape photography. That’s because of its ability to cut through glare and reflections, revealing the true tones and colors of the surface below. This is extremely useful in photographing streams and waterfalls and wet and waxy leaves. The effect is often to make water darker and foliage more vibrant. Any bubbles or white, frothy water will have amazing contrast with the still, darker water surrounding it. Most polarizers also darken the scene enough to make long exposures much easier, another added benefit when photographing streams and waterfalls and showing movement with long exposures.
You may also noticed that, like polarizing sunglasses, a polarizing filter darkens blue skies when positioned at a 90-degree angle to the sun. This is great when you want a little extra pop and contrast, but be wary of only partially polarizing your sky, which is especially easy to do at wide angles. For this reason, I only recommend using a polarizing filter on the sky at 35mm and longer focal lengths. Otherwise, you’ll be spending a lot of time in post-processing trying to match the polarized and non-polarized portions of the sky.
Some Recommended Setups for Beginners
My friend Colin Zwirner thought it might be a good idea to recommend a few basic setups based on your budget. I’m only recommending gear that I’ve seen in use in the field by my peers or workshop students. There are other guides online you can turn to, but I find them to be very confusing and overwhelming.
Extremely Tight Budget (Hey, I’ve Been There!)
Camera Bodies: Nikon D3500, Canon Rebel t7 - Note that these are discontinued, but offer an incredible value when purchased used.
Lenses: Nikon 18-200mm f/3.5-5.6, Canon 18-200mm f/3.5-5.6
Tripod: Manfrotto Befree
Photo Backpack: Ruggard Outrigger
Budget
Camera Body: Nikon d810 - Also discontinued, but a workhorse camera that you have tons of room to grow into.
Lenses: Nikon 24-120 f/4, Nikon 14-24 f/2.8
Tripod: Promaster Specialist Series SP532CK
Photo Backpack: Lowepro Fastpack Pro BP 250 AW III
Intermediate
Camera Bodies: Nikon z7 II - The latest intermediate-to-advanced mirrorless body from Nikon.
Lenses: Nikon 28-400mm f/4-8, Nikon 14-30 f/4
Tripod: Innorel RT80C, RRS BH 40 Ball-head
Photo Backpack: Mindshift Gear Rotation 180
Money Is No Object (Lucky You!)
Camera Bodies: Nikon z9, Sony a1, Fujifilm GFX100ii
Lenses: All of Them
Tripod: Really Right Stuff Ascend-14 Long Travel Carbon Fiber Tripod, RRS BH 40 Ball-head
Photo Backpack: Shimoda Designs Explore v2 30
What’s in My Bag, You Ask?
My personal setup, in case you are curious, and many are, is as follows. Again, I worked for two years and had many images published from a setup that was just a Canon Rebel t2i and the 18-55mm kit lens that it came with. Different setups work for different people.
Camera Bodies: Sony a7r5, Sony a73
Lenses: Sony 12-24mm f/2.8, Tamron 17-28mm f/2.8, Tamron 28-200mm f/2.8-f/5.6, Sony 200-600mm f/5.6-6.3
Tripod: Promaster Specialist Series SP532CK
Tripod Ball-head: Really Right Stuff BH-40
Memory Cards: SanDisk 128GB Extreme PRO UHS-I SDXC Memory Card
Camera Backpack: Mindshift Gear Rotation 180
Thanks so much for reading this post. Even if it you’ve got gear your happy with, I hope some of what I’ve written helps you on your journey.
You can see my latest workshop schedule here: WORKSHOPS
I find one of the many technological aspects of photography that folks tend to under appreciate is the level of processing skill required to create truly high quality images/prints.This is especially true when images are shot in RAW mode. The biggest improvement I've seen in my images since switching from film to digital occurred after I really buckled down and became more proficient at post processing using Lightroom. Hard as it may be for many of you believe this many of the images you create have the same quality potential as the work of pros...you just need the technical processing skill to achieve the desired result. As to camera gear I have images shot on an 8MB Olympus with a simple kit lens attached that make nearly as good 8x10" prints as my much newer and more sophisticated Nikon gear. And this past summer I worked on an extended photo essay entitled "Adventures In A Tiny Canoe" during which I shot hundreds of images with an old Point & Shoot Canon Powershot G15 that are superb on the screen and capable of producing acceptable 8x10".
Fabulous and VERY informative article! Thank you!!