

I have to credit my mom for my love of the moon. I vividly remember being a kid, on the way home at night in the car, and hearing her gasp and exclaim, “Ohhhhhhhh! WOW!”
“What, mom? What is it?”, we’d reply, wide-eyed, thinking that she’d seen something truly incredible, like a rare animal darting across the road or maybe a briefcase overflowing with 100 dollar bills just sitting there. It took what seemed like ages for her to reply, “The Mooooooon!”
“Oh, mom, not the moon again”, we’d groan, unimpressed, missing the magic she saw. Looking back, Mom was right—the moon is absolutely incredible.
Capturing the moon’s beauty takes a little know-how, but with the right techniques, you can create images that do it justice. This guide will walk you through what you need, how to plan, and how to fully execute your moon photography.
What You’ll Need
To get great moon photos, some basic gear can go a long way. Here’s what works best:
A Camera with a Zoom Lens: Newer cameras (crop sensor or full-frame) paired with a zoom lens—ideally 200mm or more, up to 400mm or 600mm—will make the moon large and detailed in your frame. Modern camera bodies offer better low-light performance and dynamic range, which are key here. For my recommended setups, check out this post: Gear Guide for Landscape Photography.
A Tripod: Stability is everything. A tripod keeps your shots sharp, especially with longer shutter speeds in dim light—which is what you’ll be working with.
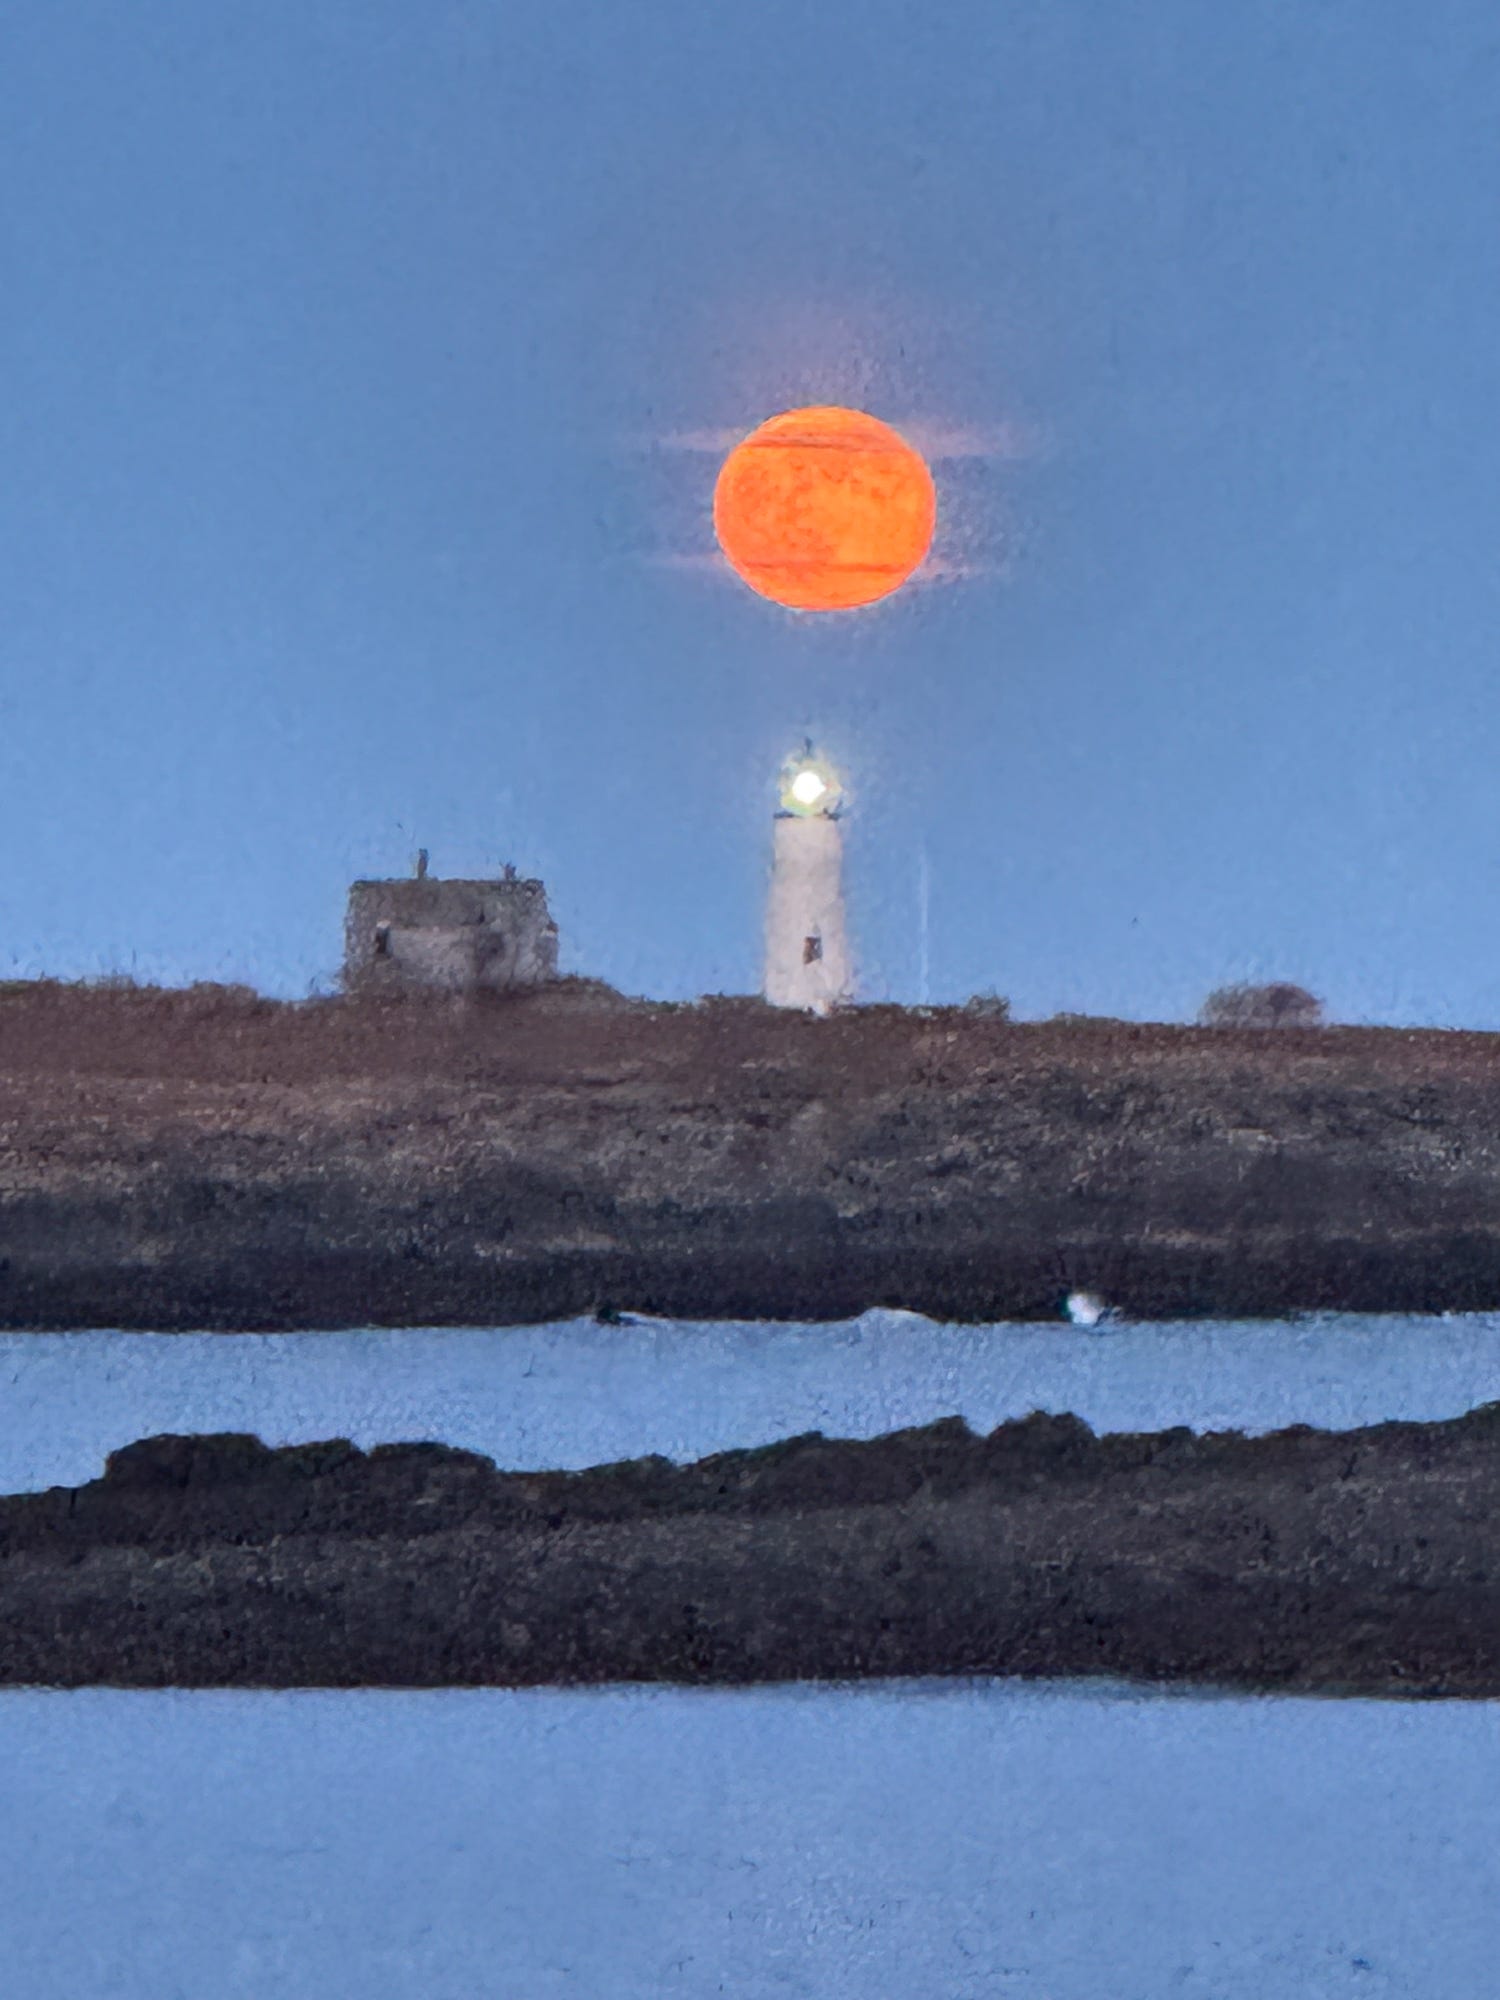
Why Skip the Phone?: Cell phones, even the latest models like my iPhone 15 Pro, struggle with the moon. Here’s a shot I took with it:

You know, I’m actually pretty amazed at how well this did. The craters on the moon are visible, the colors kinda pop. Not… awful… But compare that to this from my Sony a7r5 with a 600mm lens:
The difference is night and day (pun intended). Even an older crop-sensor camera, like my Canon Rebel T2i with a 400mm lens, holds up well:
Budget Option: Already own a pocket camera with built-in zoom? Give it a whirl with the tips below. You might be surprised and save yourself some cash.

Key Takeaway: Longer focal lengths (200mm+) make the moon appear bigger and more dramatic. But, a huge moon can sometimes look unnatural and amplify distortion caused by atmospheric haze, especially near the horizon. Smaller moons can feel more authentic and natural, but less dramatic. It’s all a matter of personal preference and often depends on the scene in front of you. Choose whatever you think works best—here’s a comparison:
Moon at 512mm:

Moon at 82mm:


I think I actually prefer the second one for its natural vibe. Bigger isn’t always better!
How to Photograph the Moon
The trick to great moon photos? Proper exposure. You want the moon’s craters and details to shine, not just a bright blob. Here’s why it’s tricky—and how to get it right:
The Exposure Challenge
In auto mode, cameras average the whole scene’s brightness with “evaluative” or “matrix” metering. The moon’s small and crazy bright compared to the dark sky or foreground, so it often blows out—losing all detail—while the rest looks okay. Like this:
Or this:
Sometimes, an overexposed moon works for artistic effect, especially in dark scenes like this where a glowing orb feels right, or when, as was the case in the second image, you are just being too lazy to get a proper exposure. Hah!
When there’s still light in the sky (say, near sunset), we expect to see lunar details—like our eyes do.
How to Nail the Exposure
Switch to Spot Metering: In semi-auto modes, change your camera’s metering to “spot” and aim it at the moon. This zeroes in the moon’s brightness, not the whole scene.
Go Manual: My go-to. Start with a fast shutter speed (e.g., 1/50s), lower ISO (100), and smaller aperture (f/8) to darken the image until the moon’s details pop. Adjust as necessary, keeping an eye on your histogram or highlight warnings to avoid clipping. The camera’s lcd should show crater details.
Phone Hack (because I still care about you lovely phone-only photographers like my mom): Zoom in on the moon, tap it on the screen to adjust focus and exposure, and swipe down to darken it if needed.
After Making Your Exposure
Exposing for the moon can sometimes leave the foreground near-black.
My Fix:
Brighten shadows in post with software like Adobe Lightroom (my fave). Editing’s a whole other beast—stay tuned for a post on that—but the results you get out of the camera often not just benefit from, but require, processing to bring out their true potential.
When to Photograph the Moon
For the sake of this article, we’re going to target the full moon rising, as opposed to setting or any of the other phases of the moon. The full moon is the go-to, but the days around it offer unique opportunities. Timing affects both light and mood.
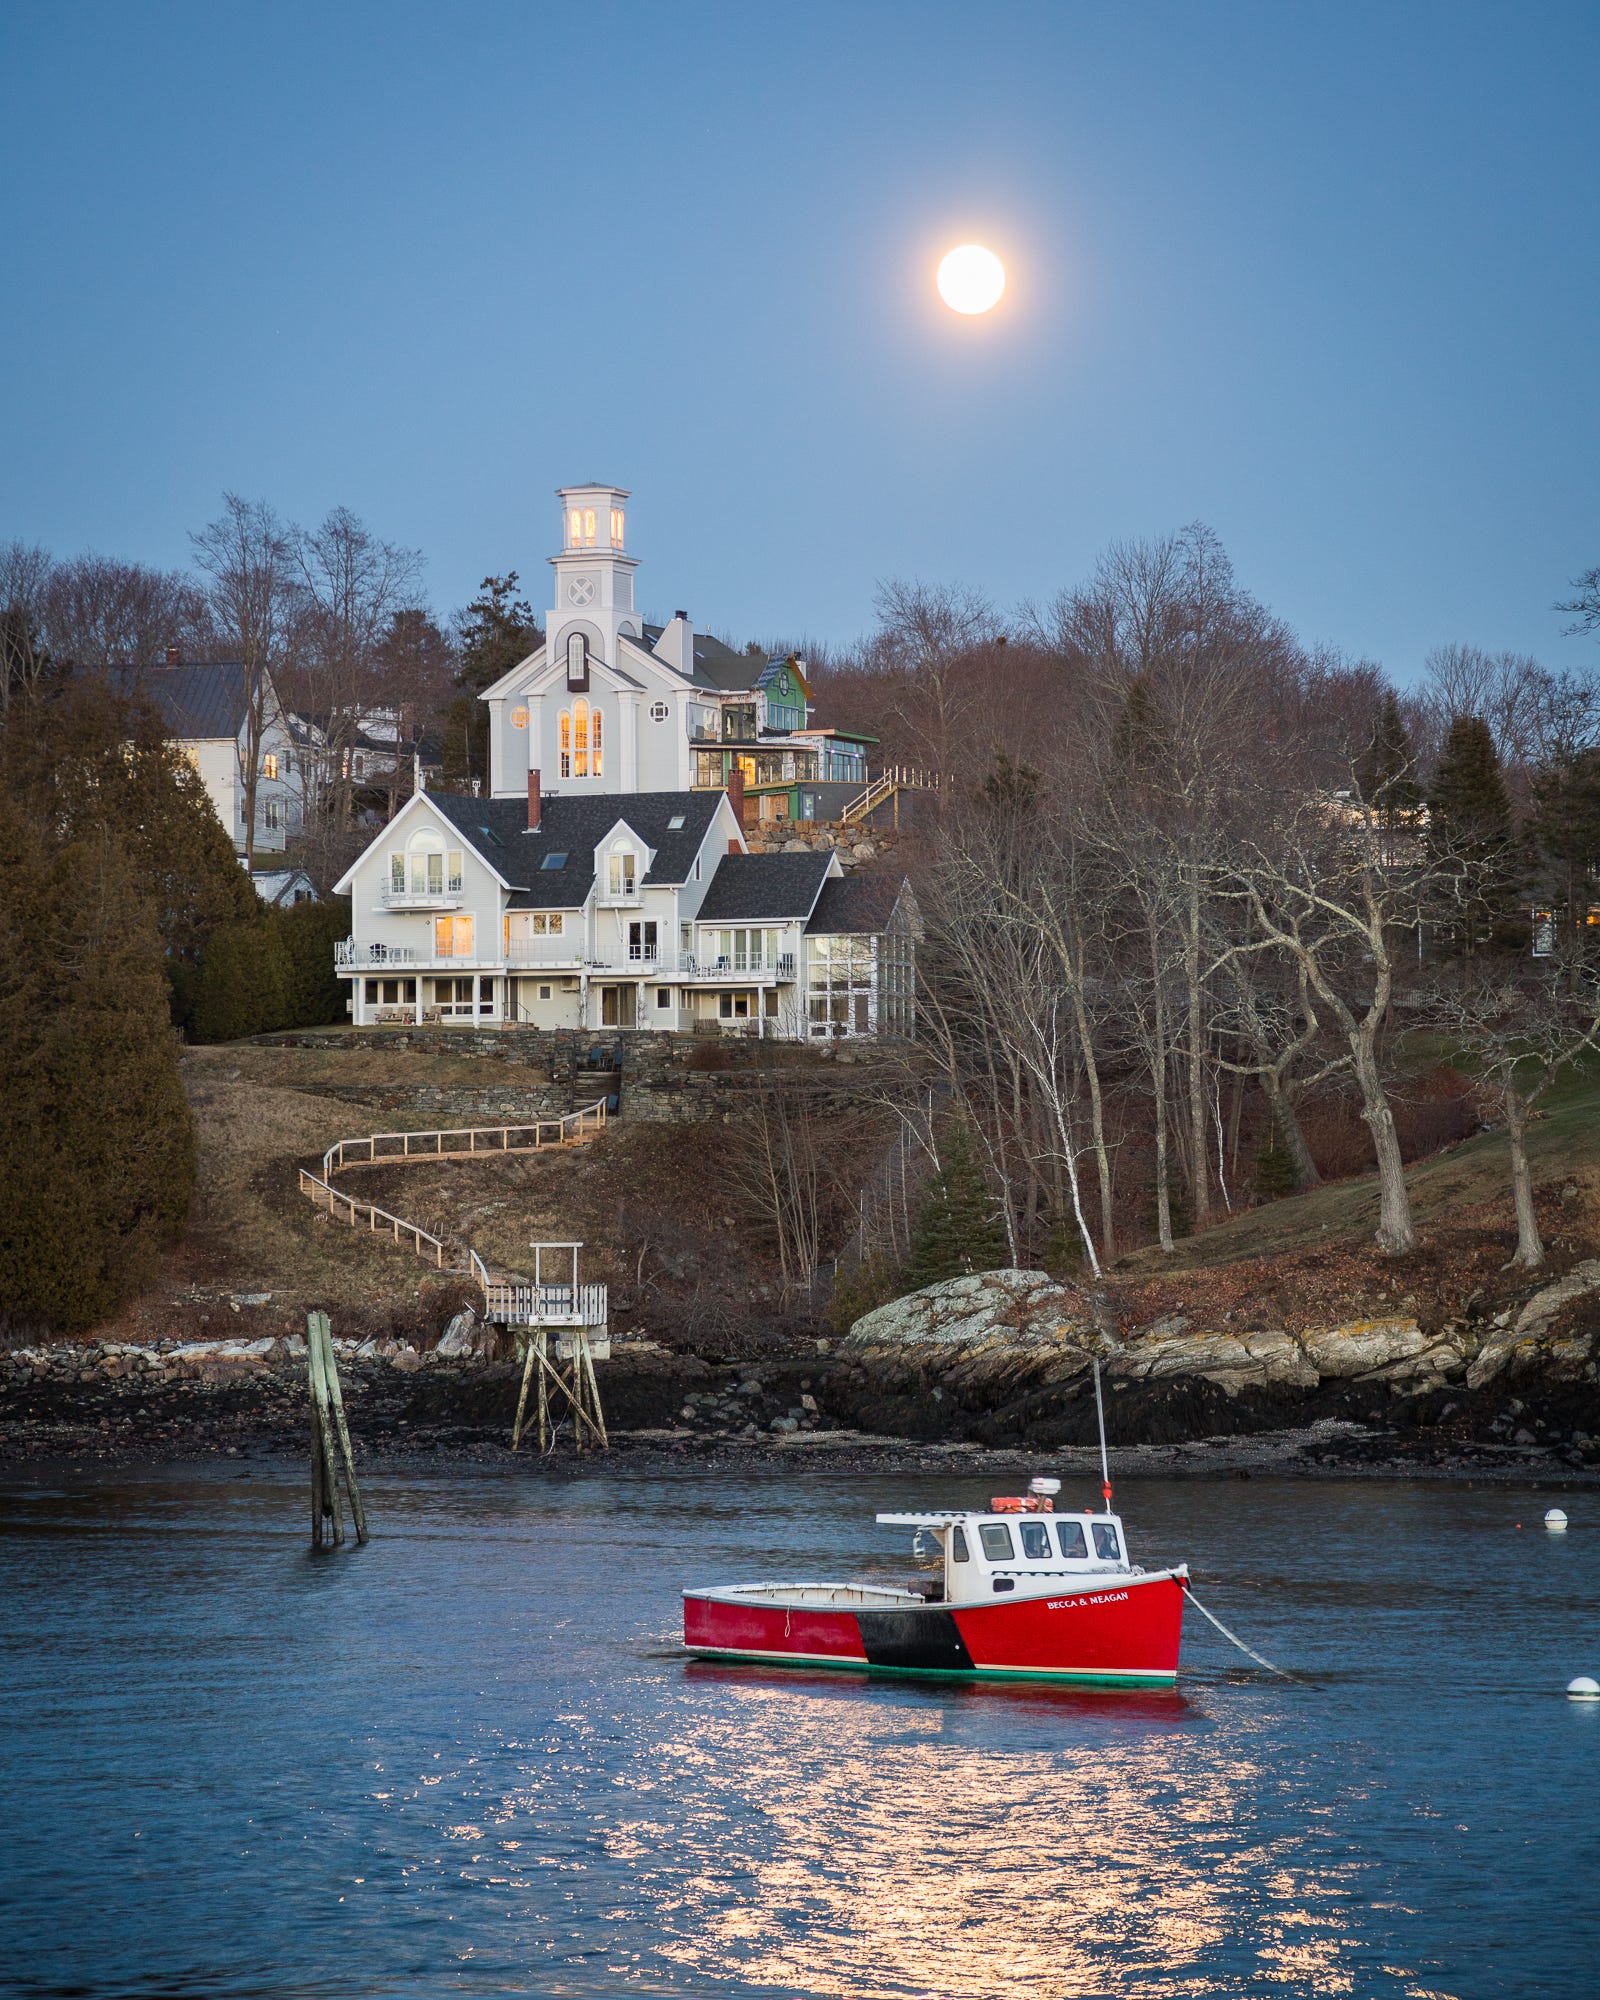
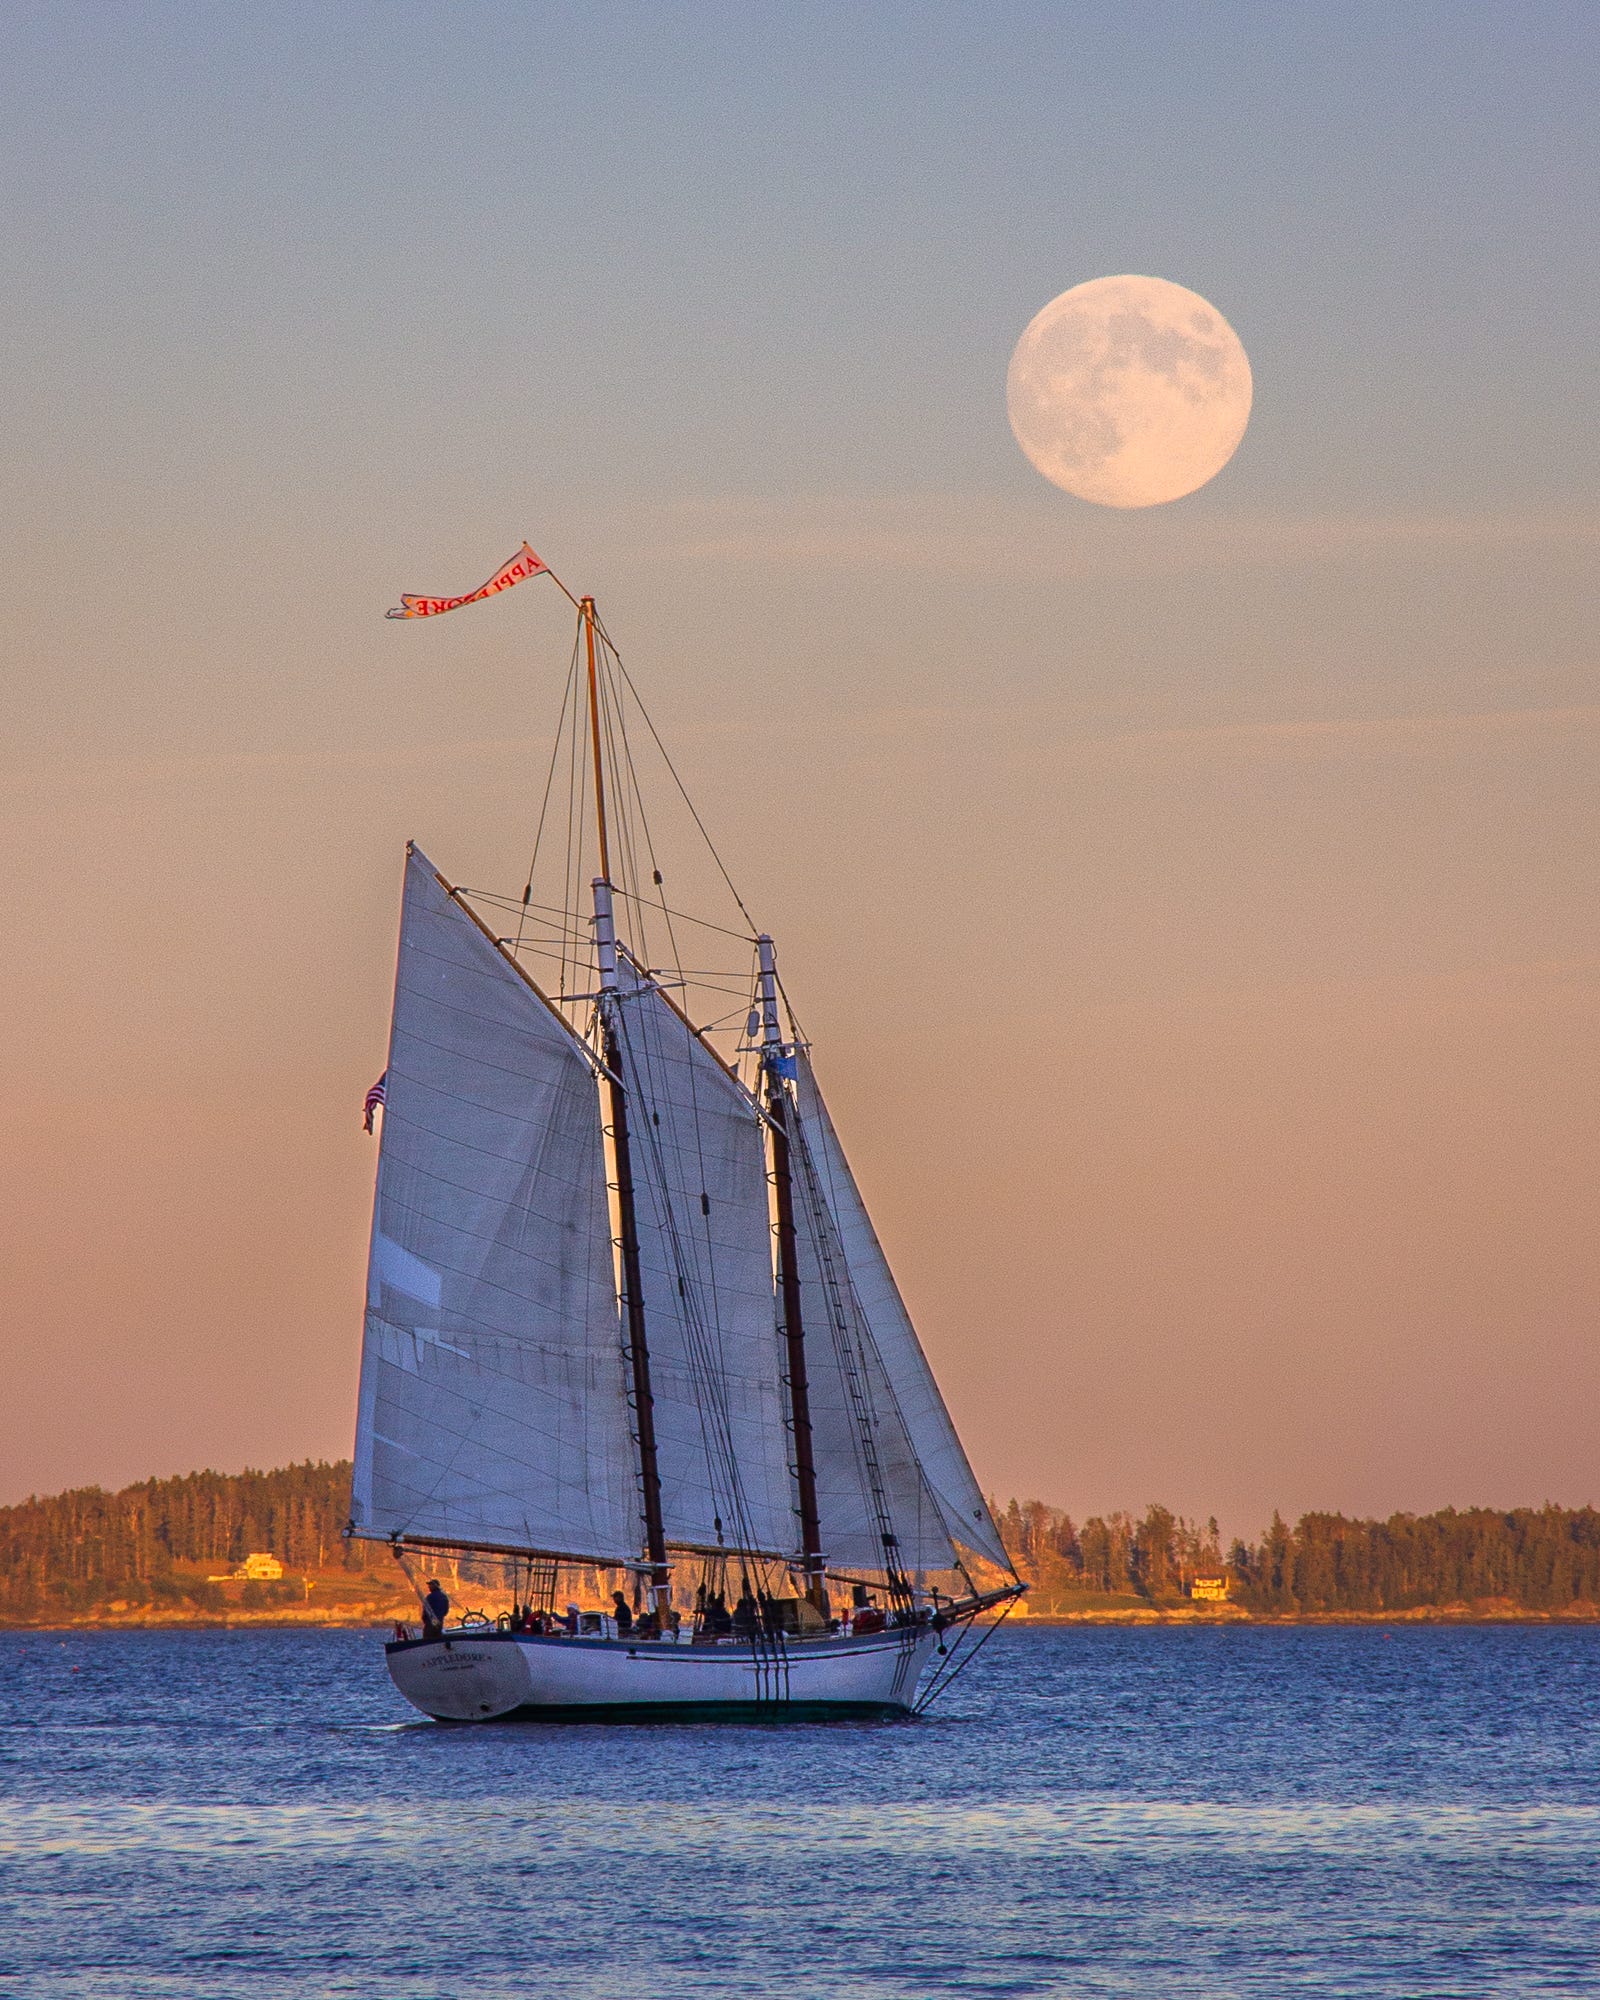
Days Before Full Moon
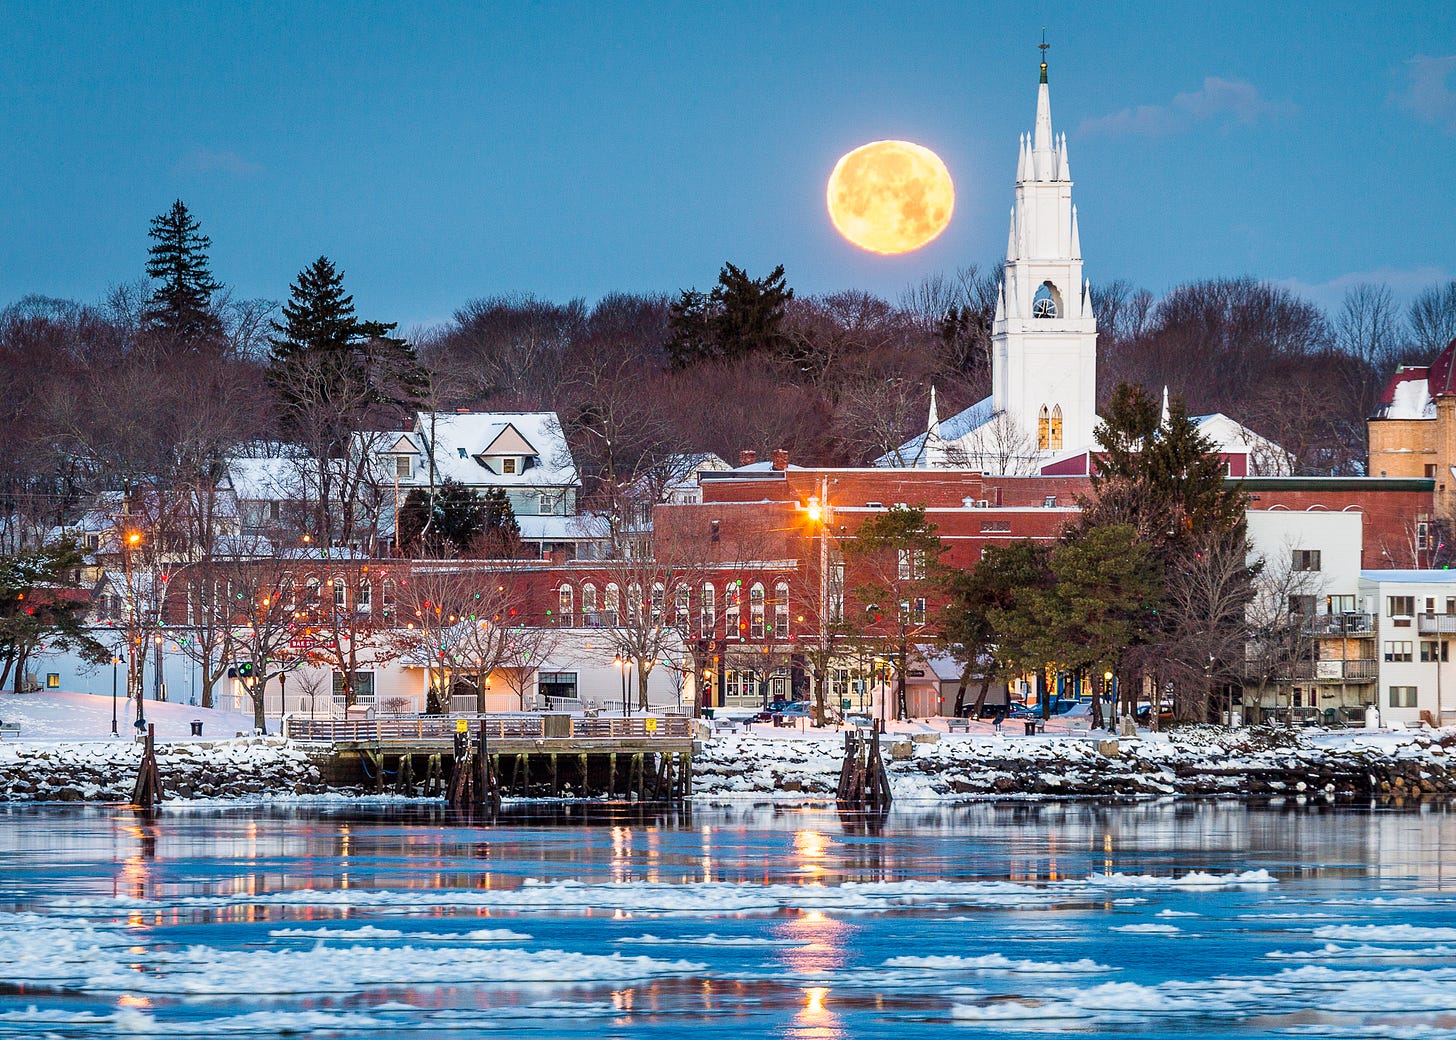
On days before the moon is 100% full, the moon rises before sunset, bathing the sky and foreground in golden light. This makes for easier exposures because of the low contrast—but it can feel “daytime-y” and less moody.
Day of Full Moon
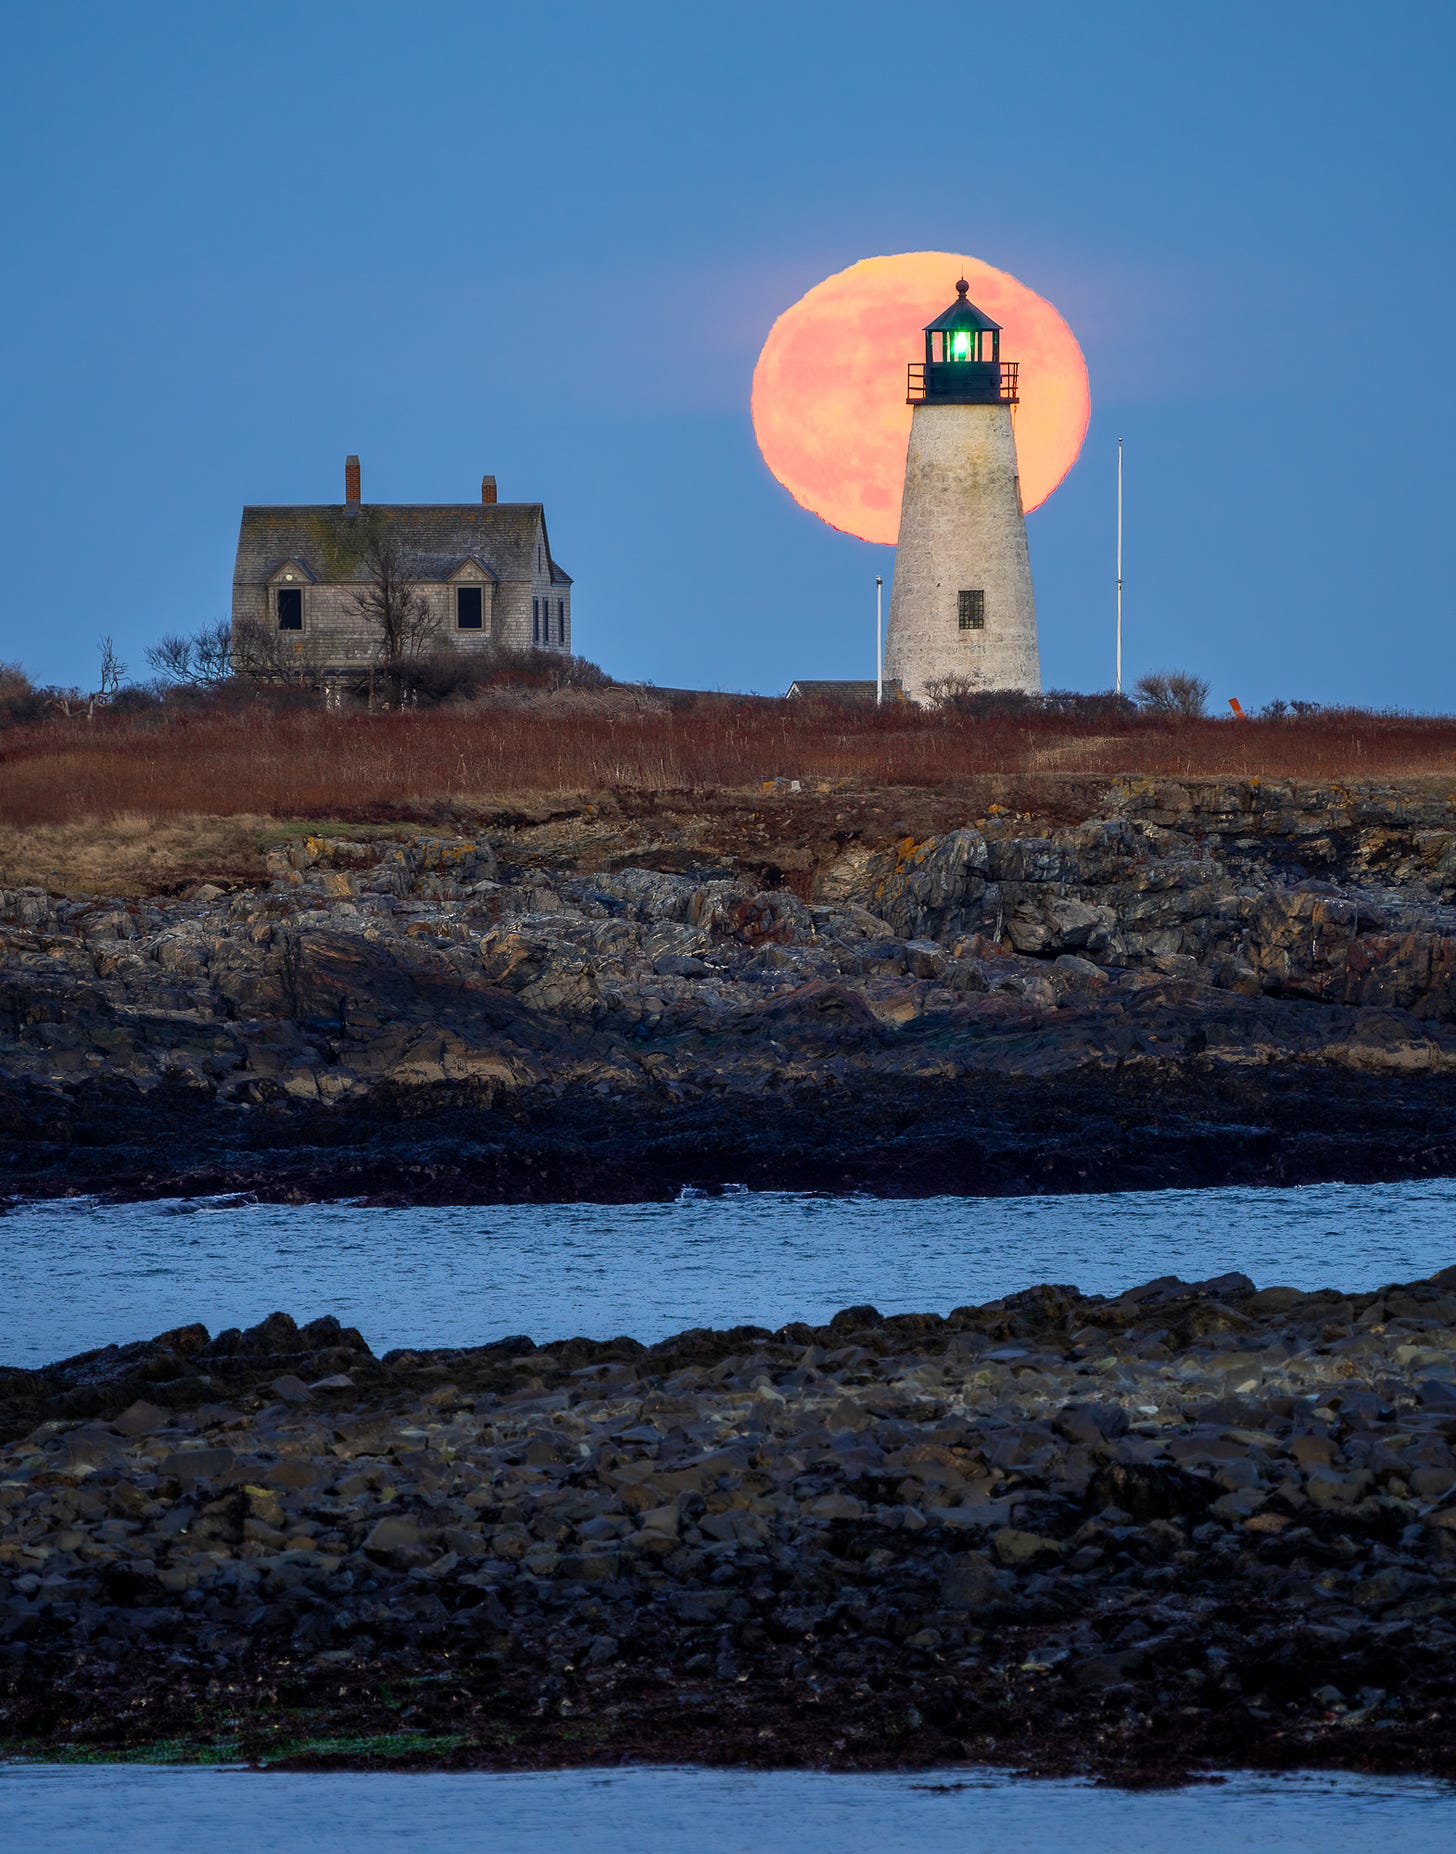
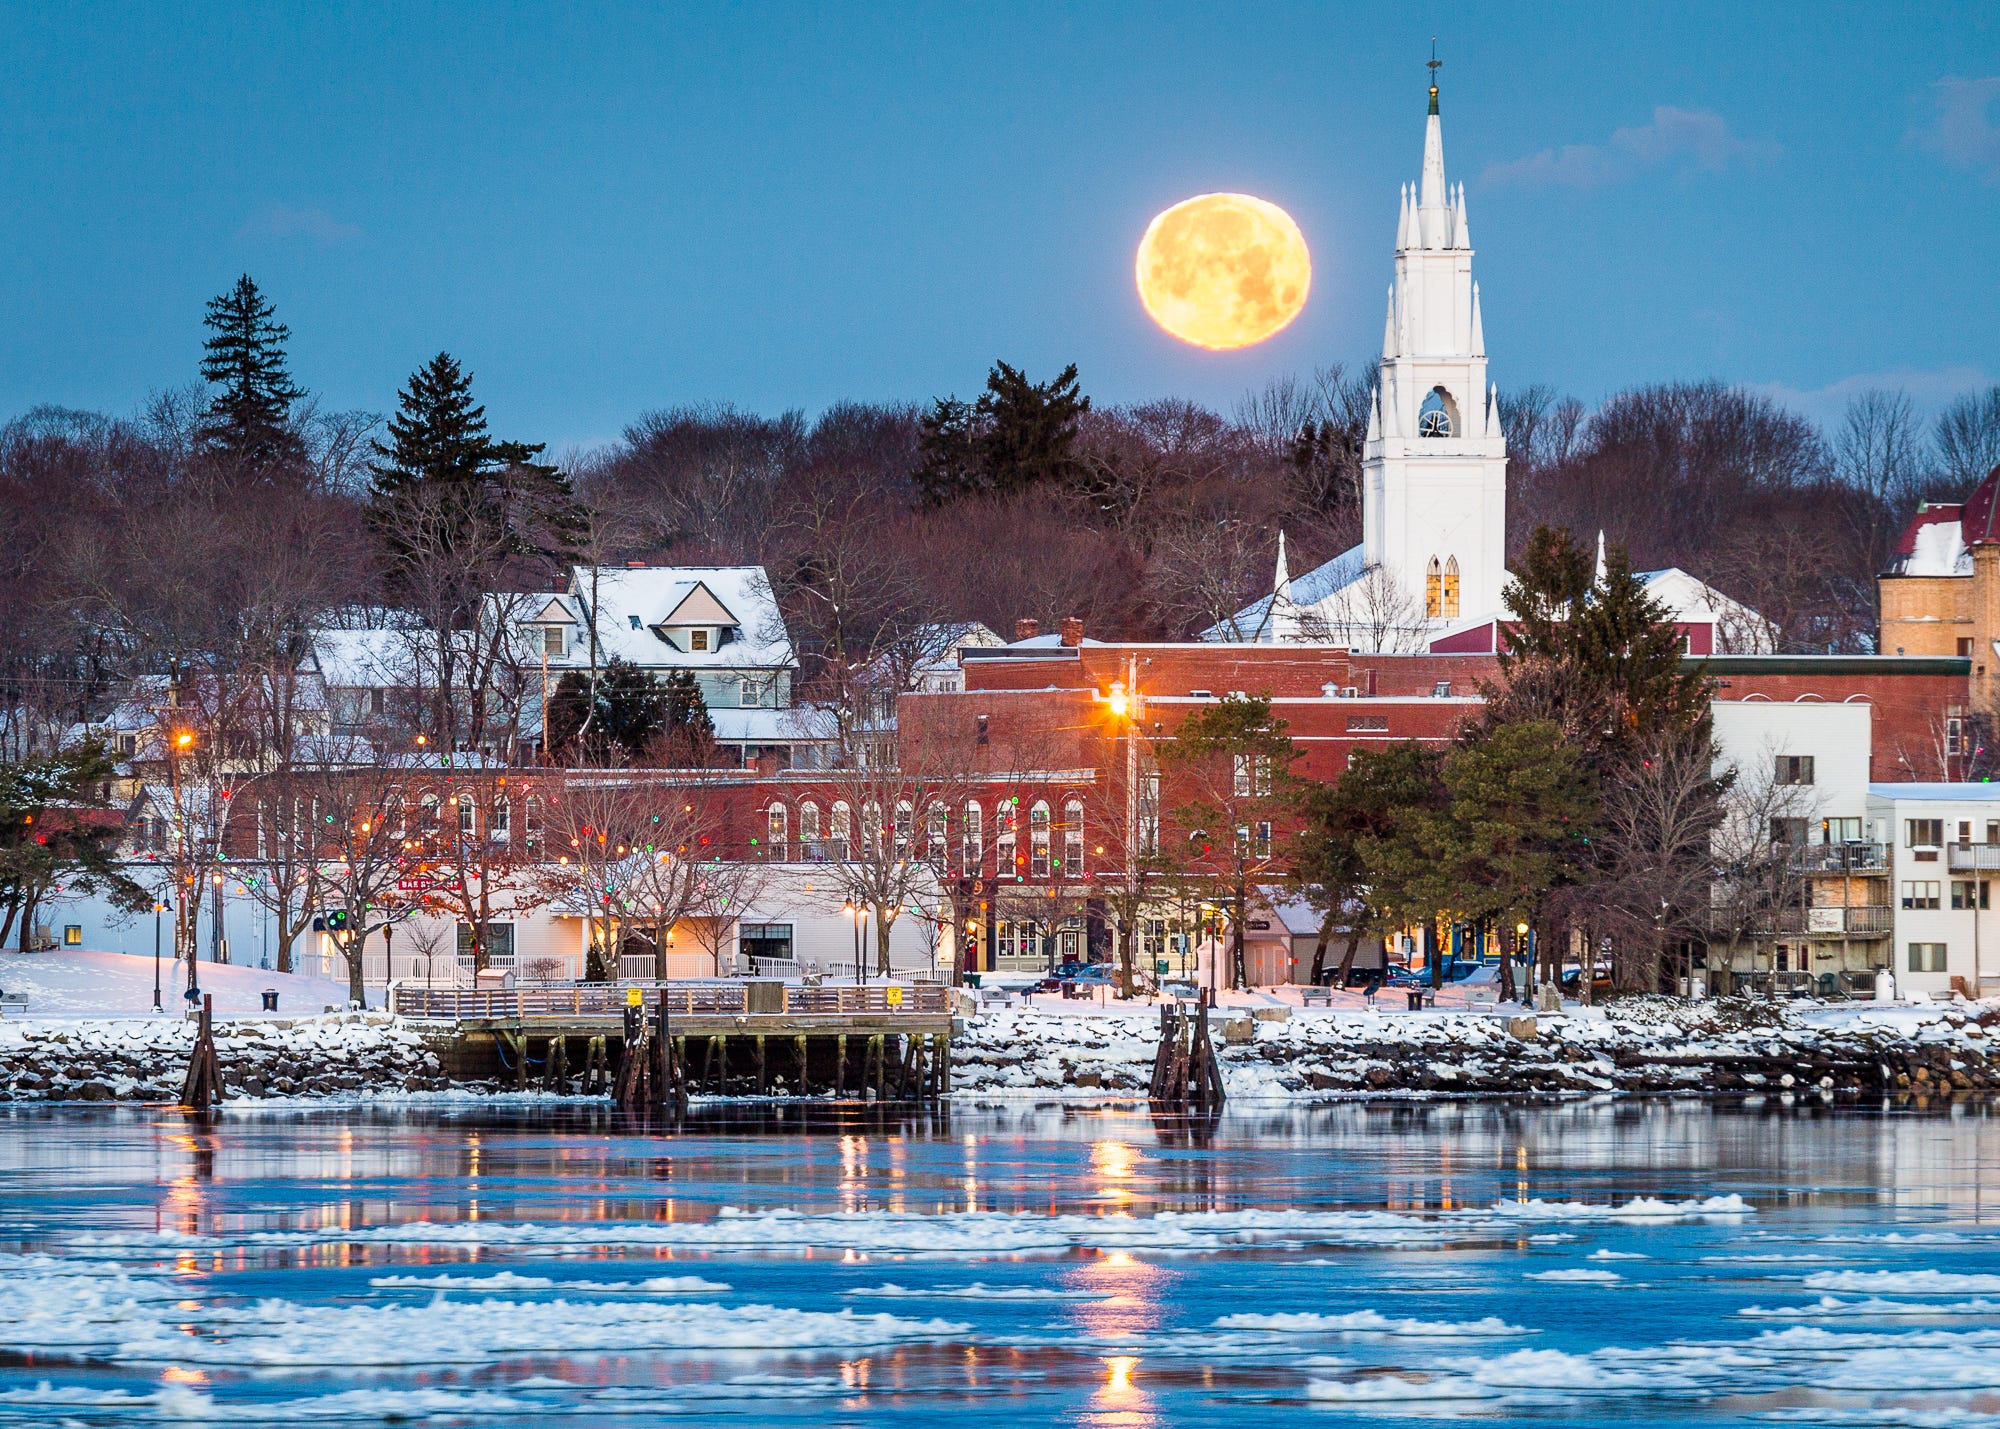
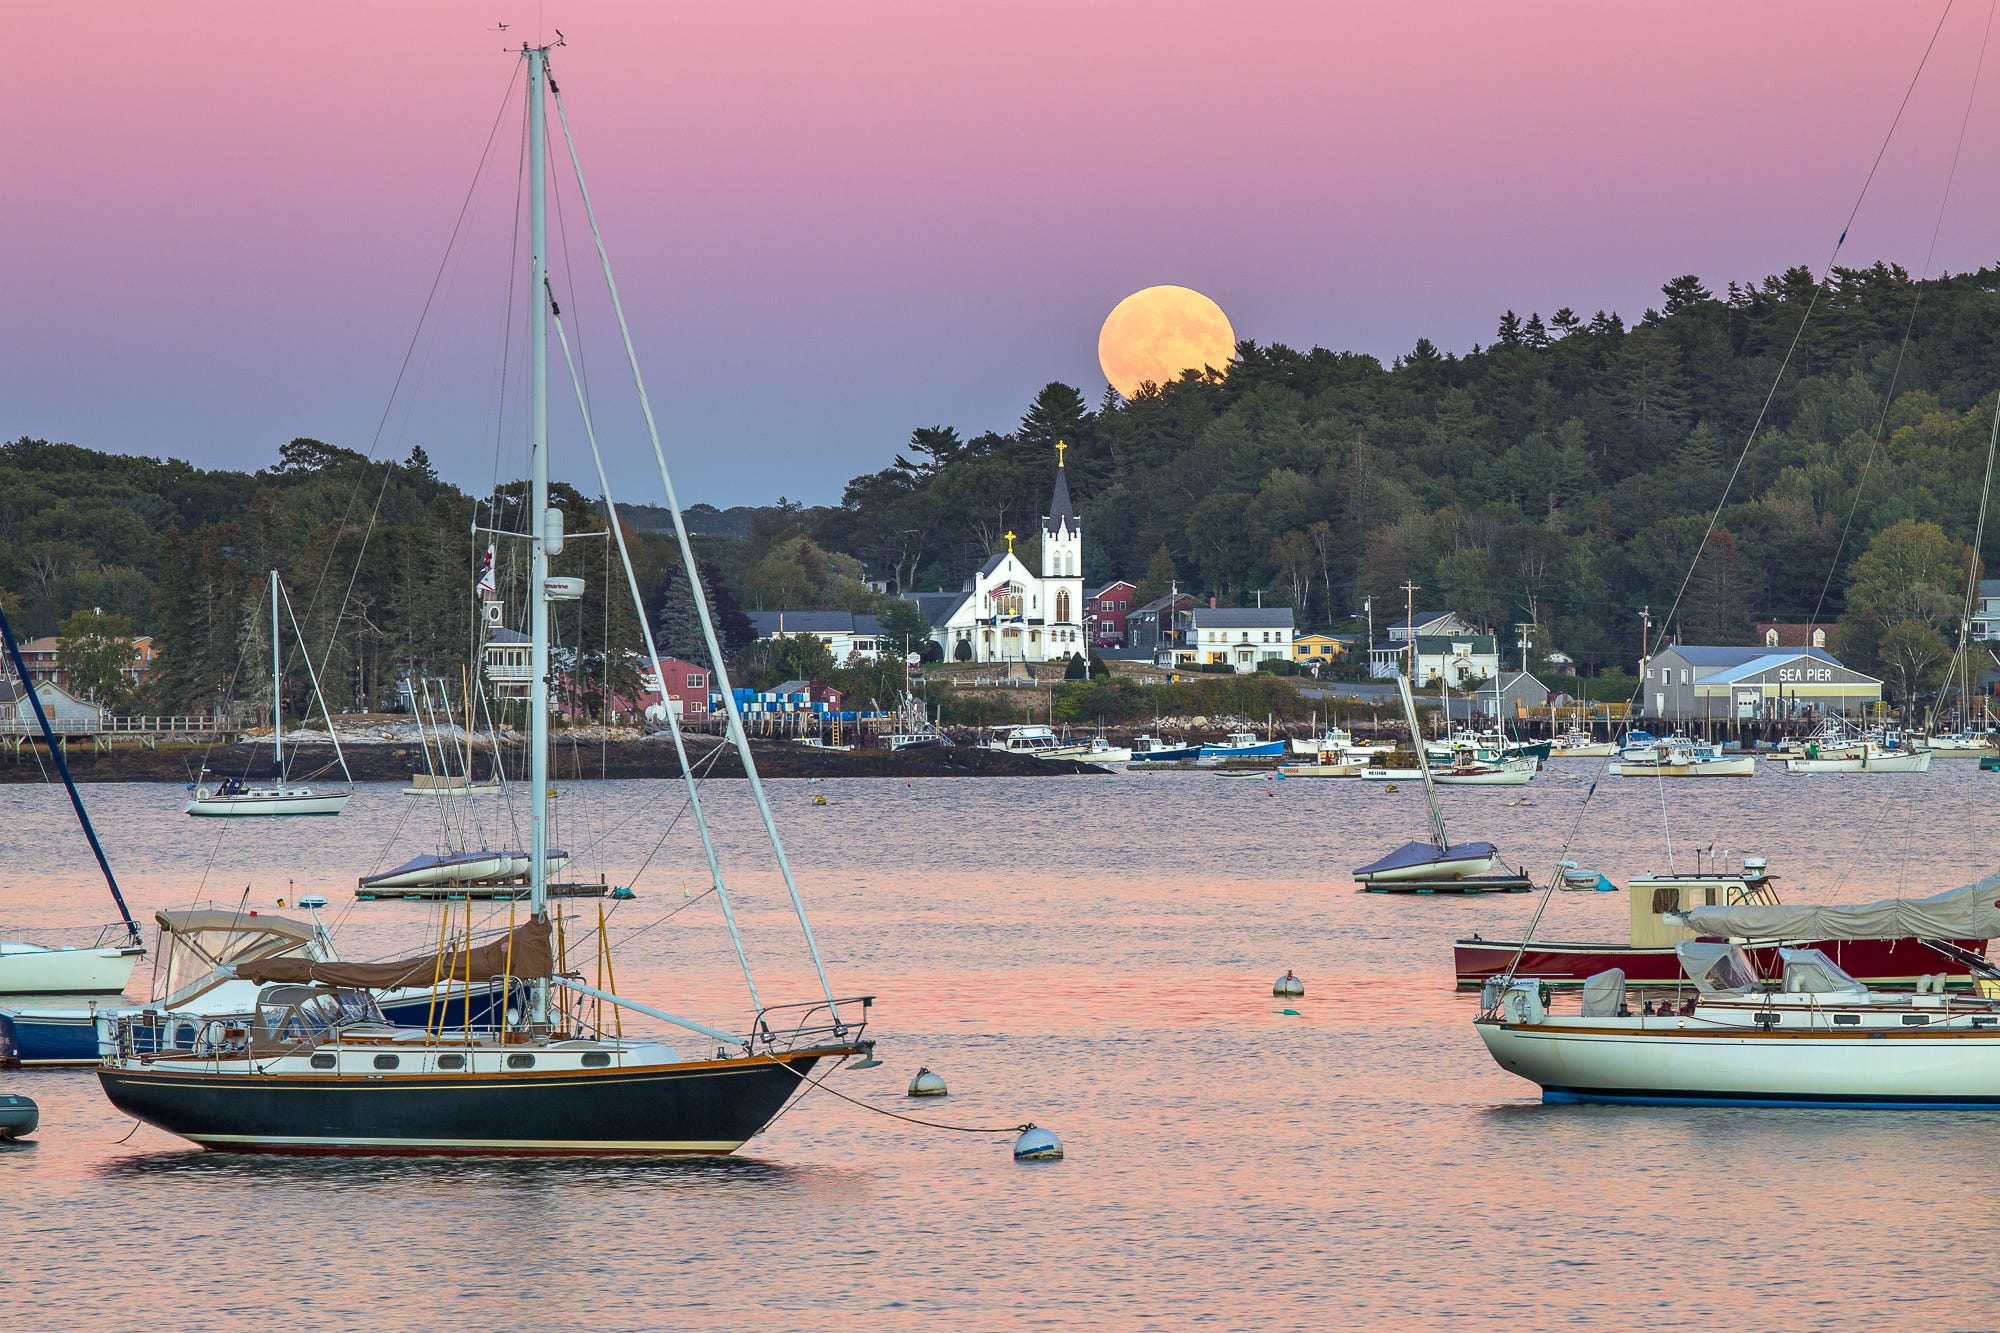
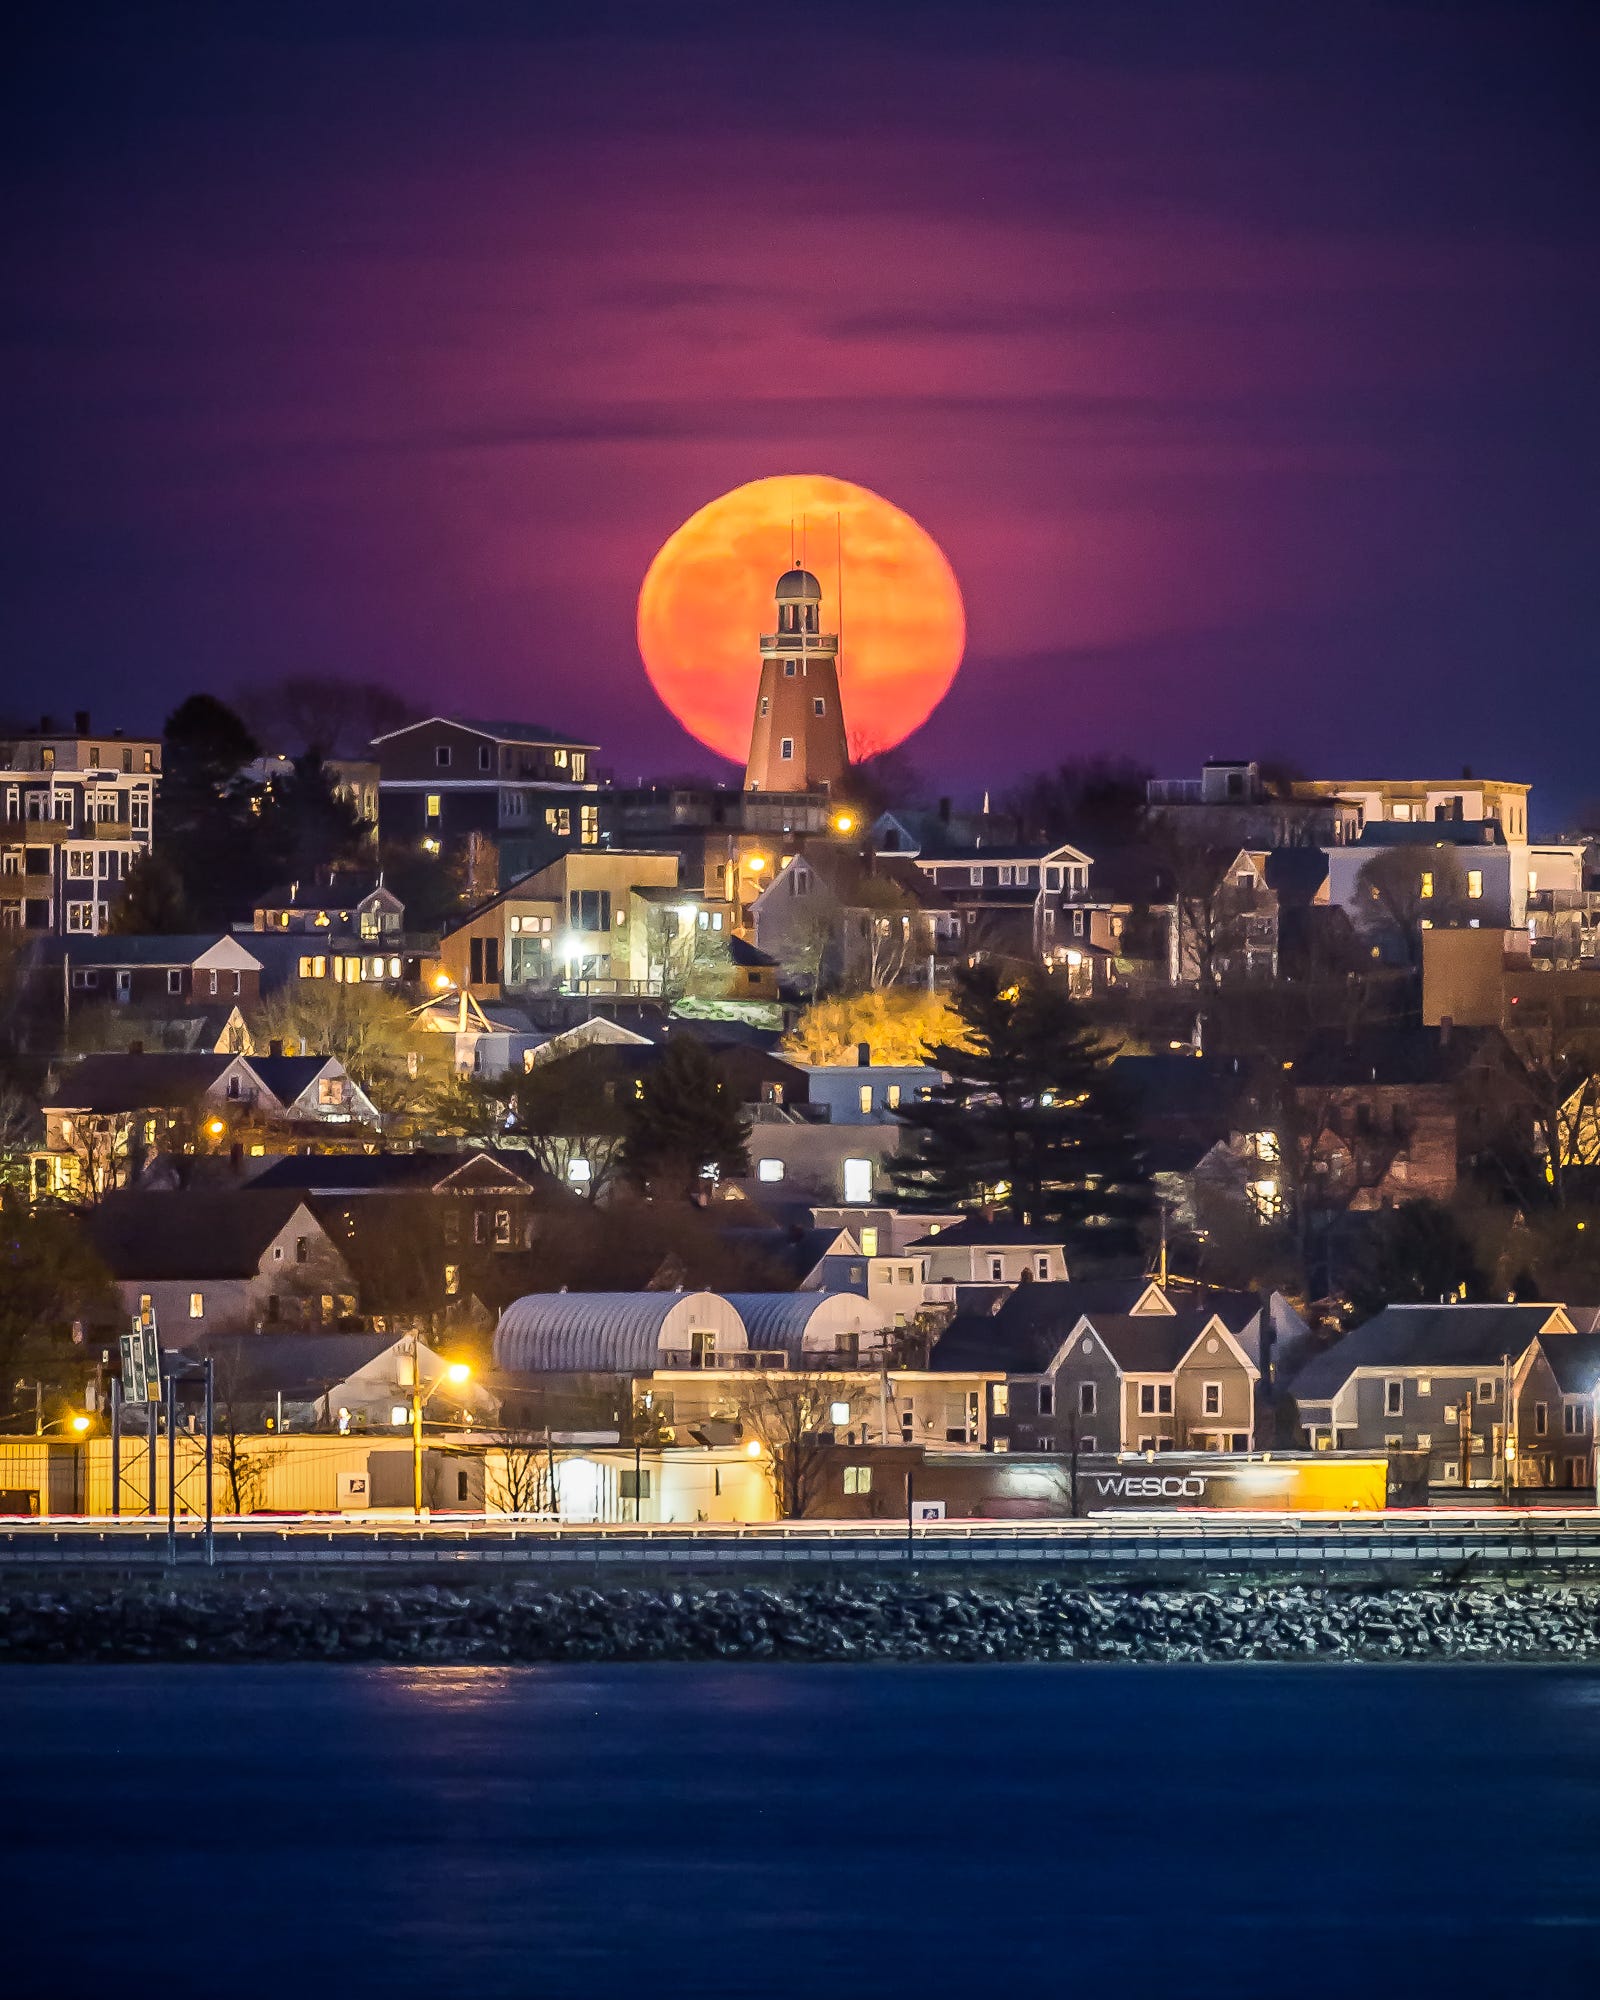
Prime time. There’s usually a nice balance between light on your foreground and the light of the moon. I like the contrast between the blue light of early twilight and the yellow-orange moon. It’s easy to expose and aesthetically pleasing.
Sometimes you’ll see what’s known as the Belt of Venus, a band of pink light transitioning to blue that’s actually caused by the earth’s shadow. It can add even more beauty to the scene!
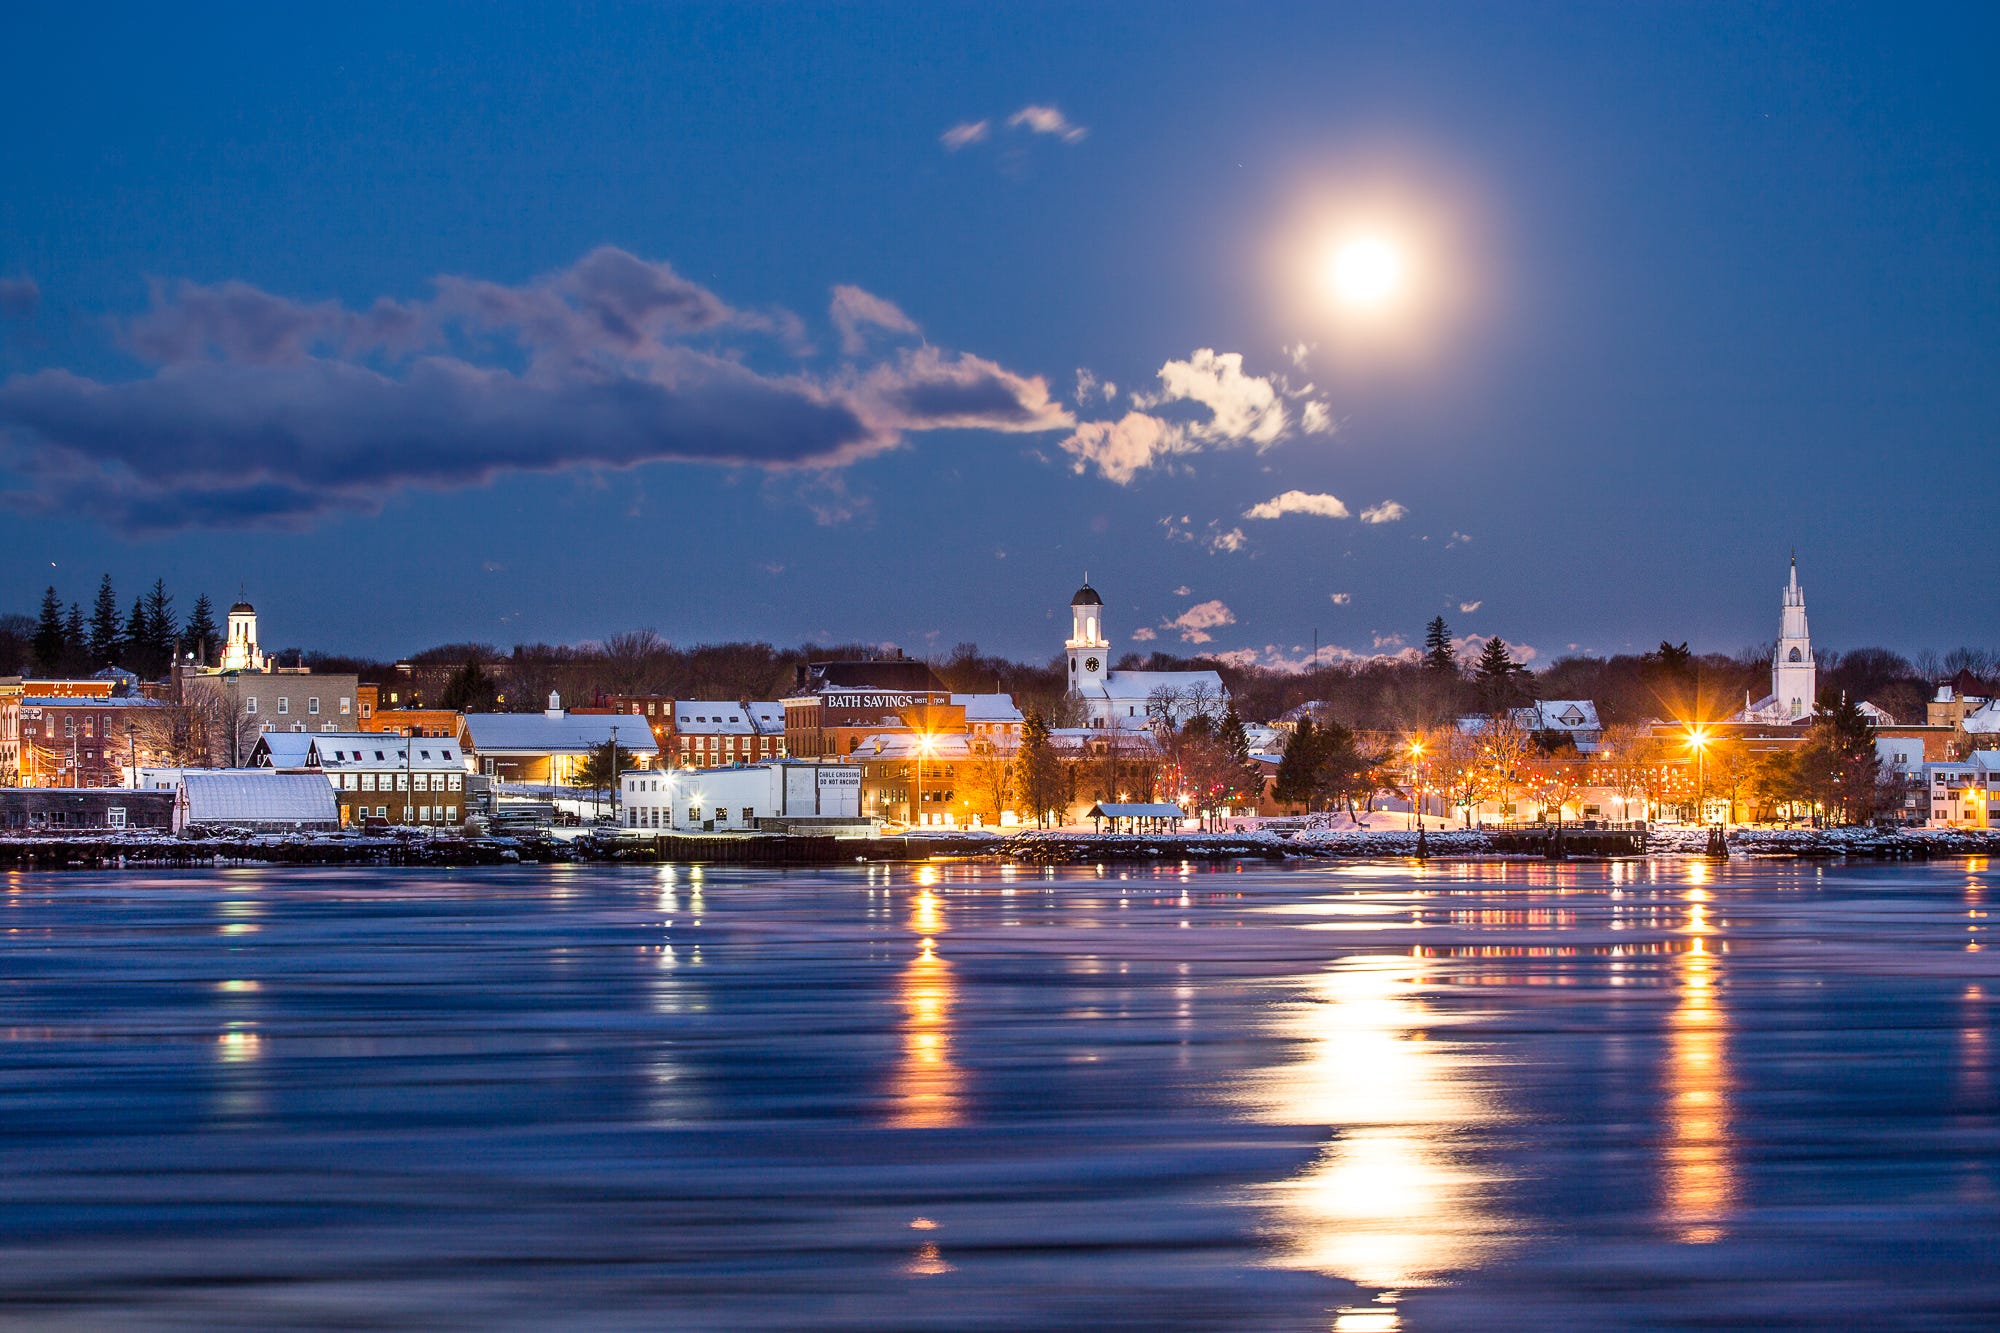
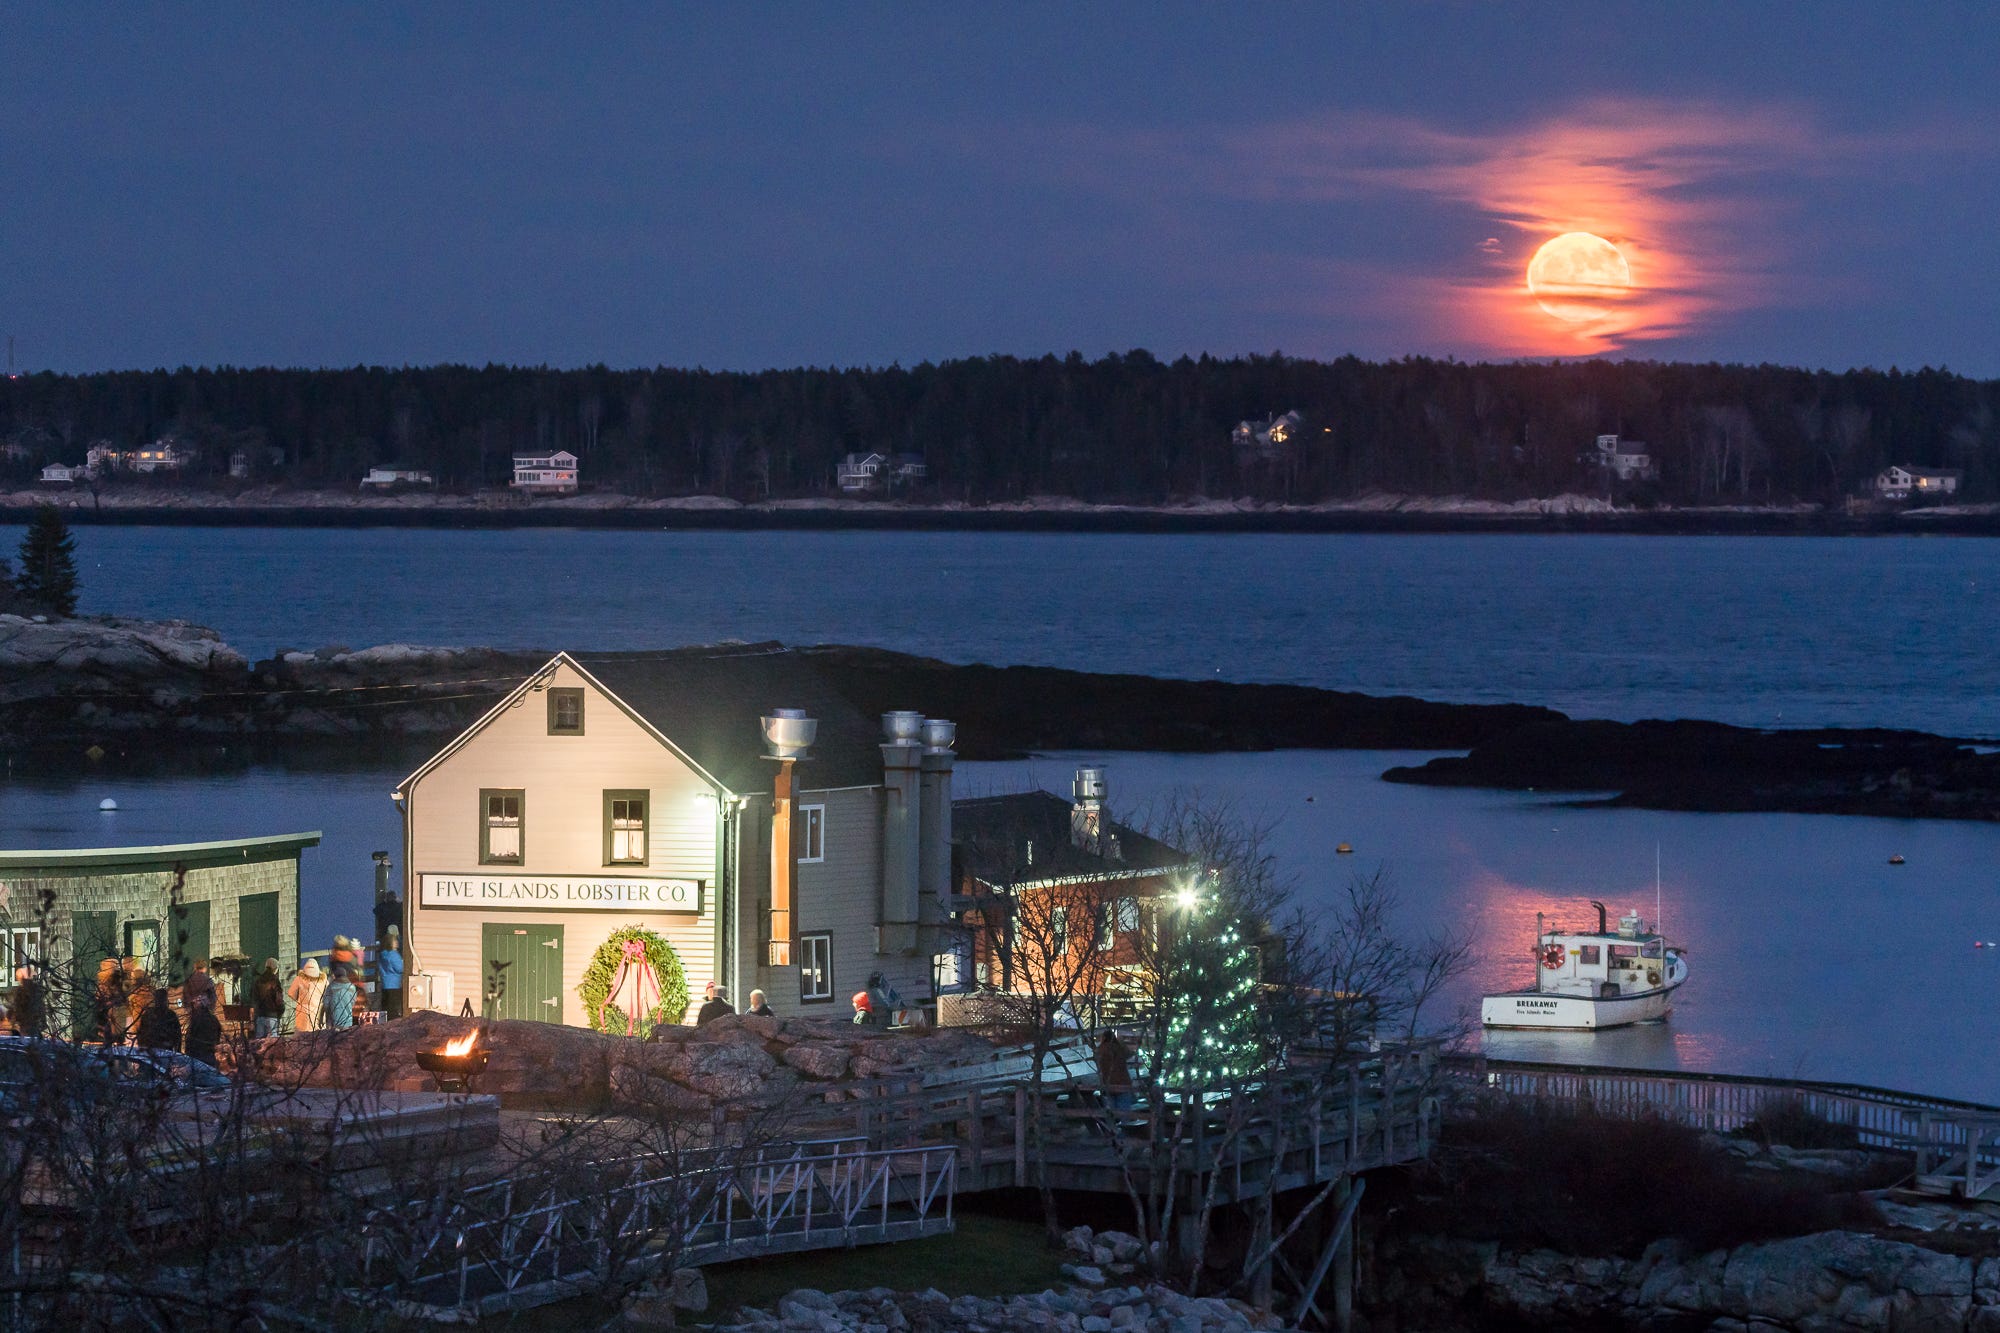
Days After Full Moon
Hello darkness, my old friend. The day after the 100% full moon, the moon rises later, creating high contrast between its brightness and the night. It’s harder to expose, especially if you are hoping to show detail in your foreground, but the “nighttime” mood is one we naturally associate with the moon. I love it.
Big Takeaway: A full moon spans multiple days. If it peaks at 2 AM Monday, you’ve got Sunday and Monday evenings—maybe even Tuesday—to capture it.
Where to Stand
It’s up to you where you want to capture a full moon, but keep in mind some of these things when planning where you’d like to see a full moon:
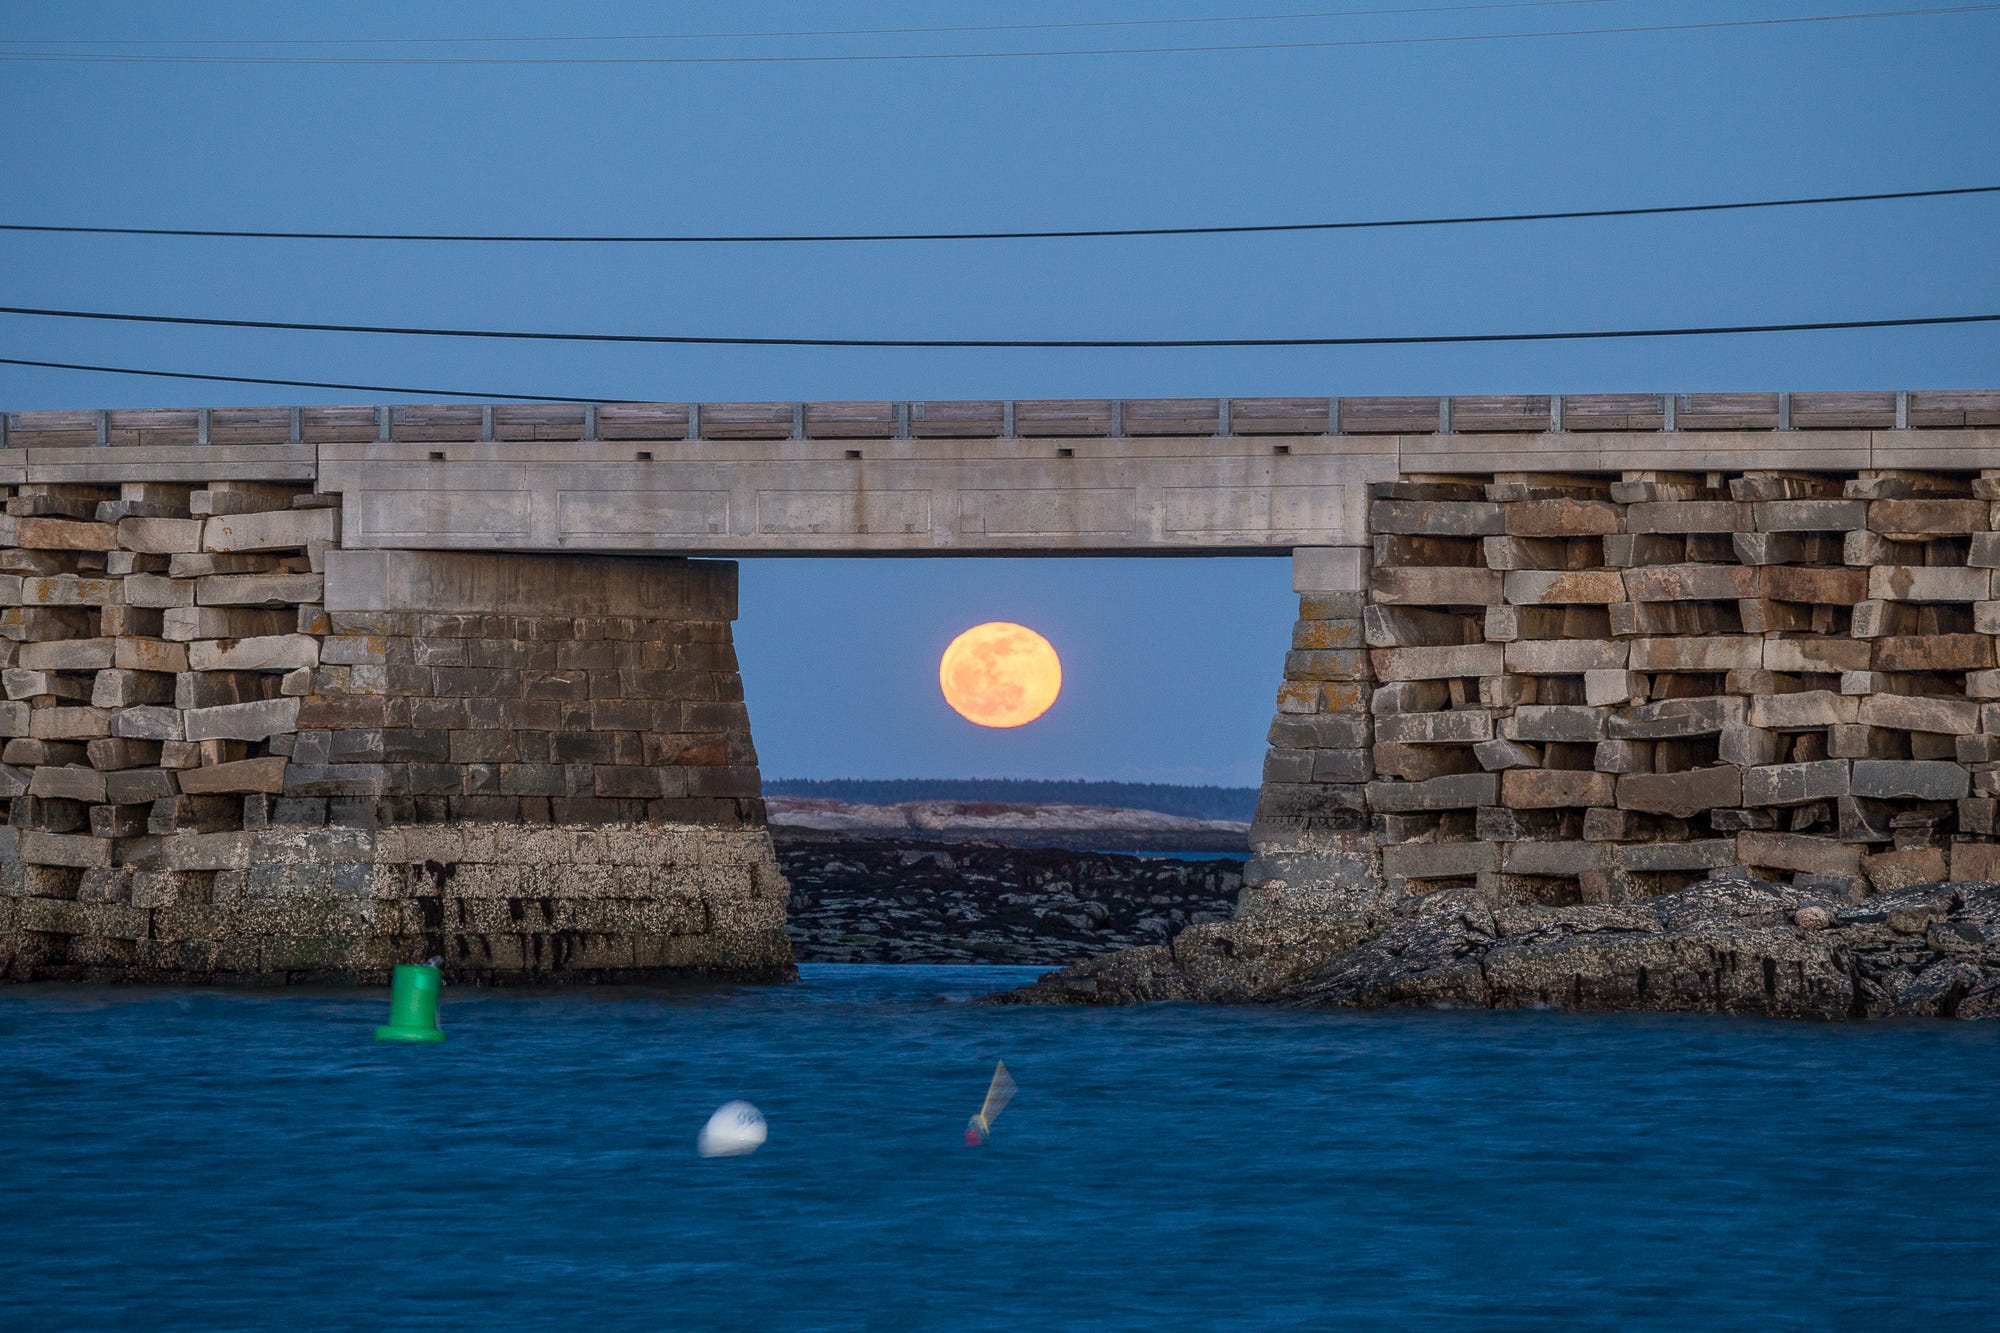
Locations with low horizons are your best bet for easily capturing the moon. Usually that means you want to be on the edge of a body of water, in an open field with no obstructions on the horizon, or on a hill, ridge-line, or mountaintop with a clear view of the horizon.
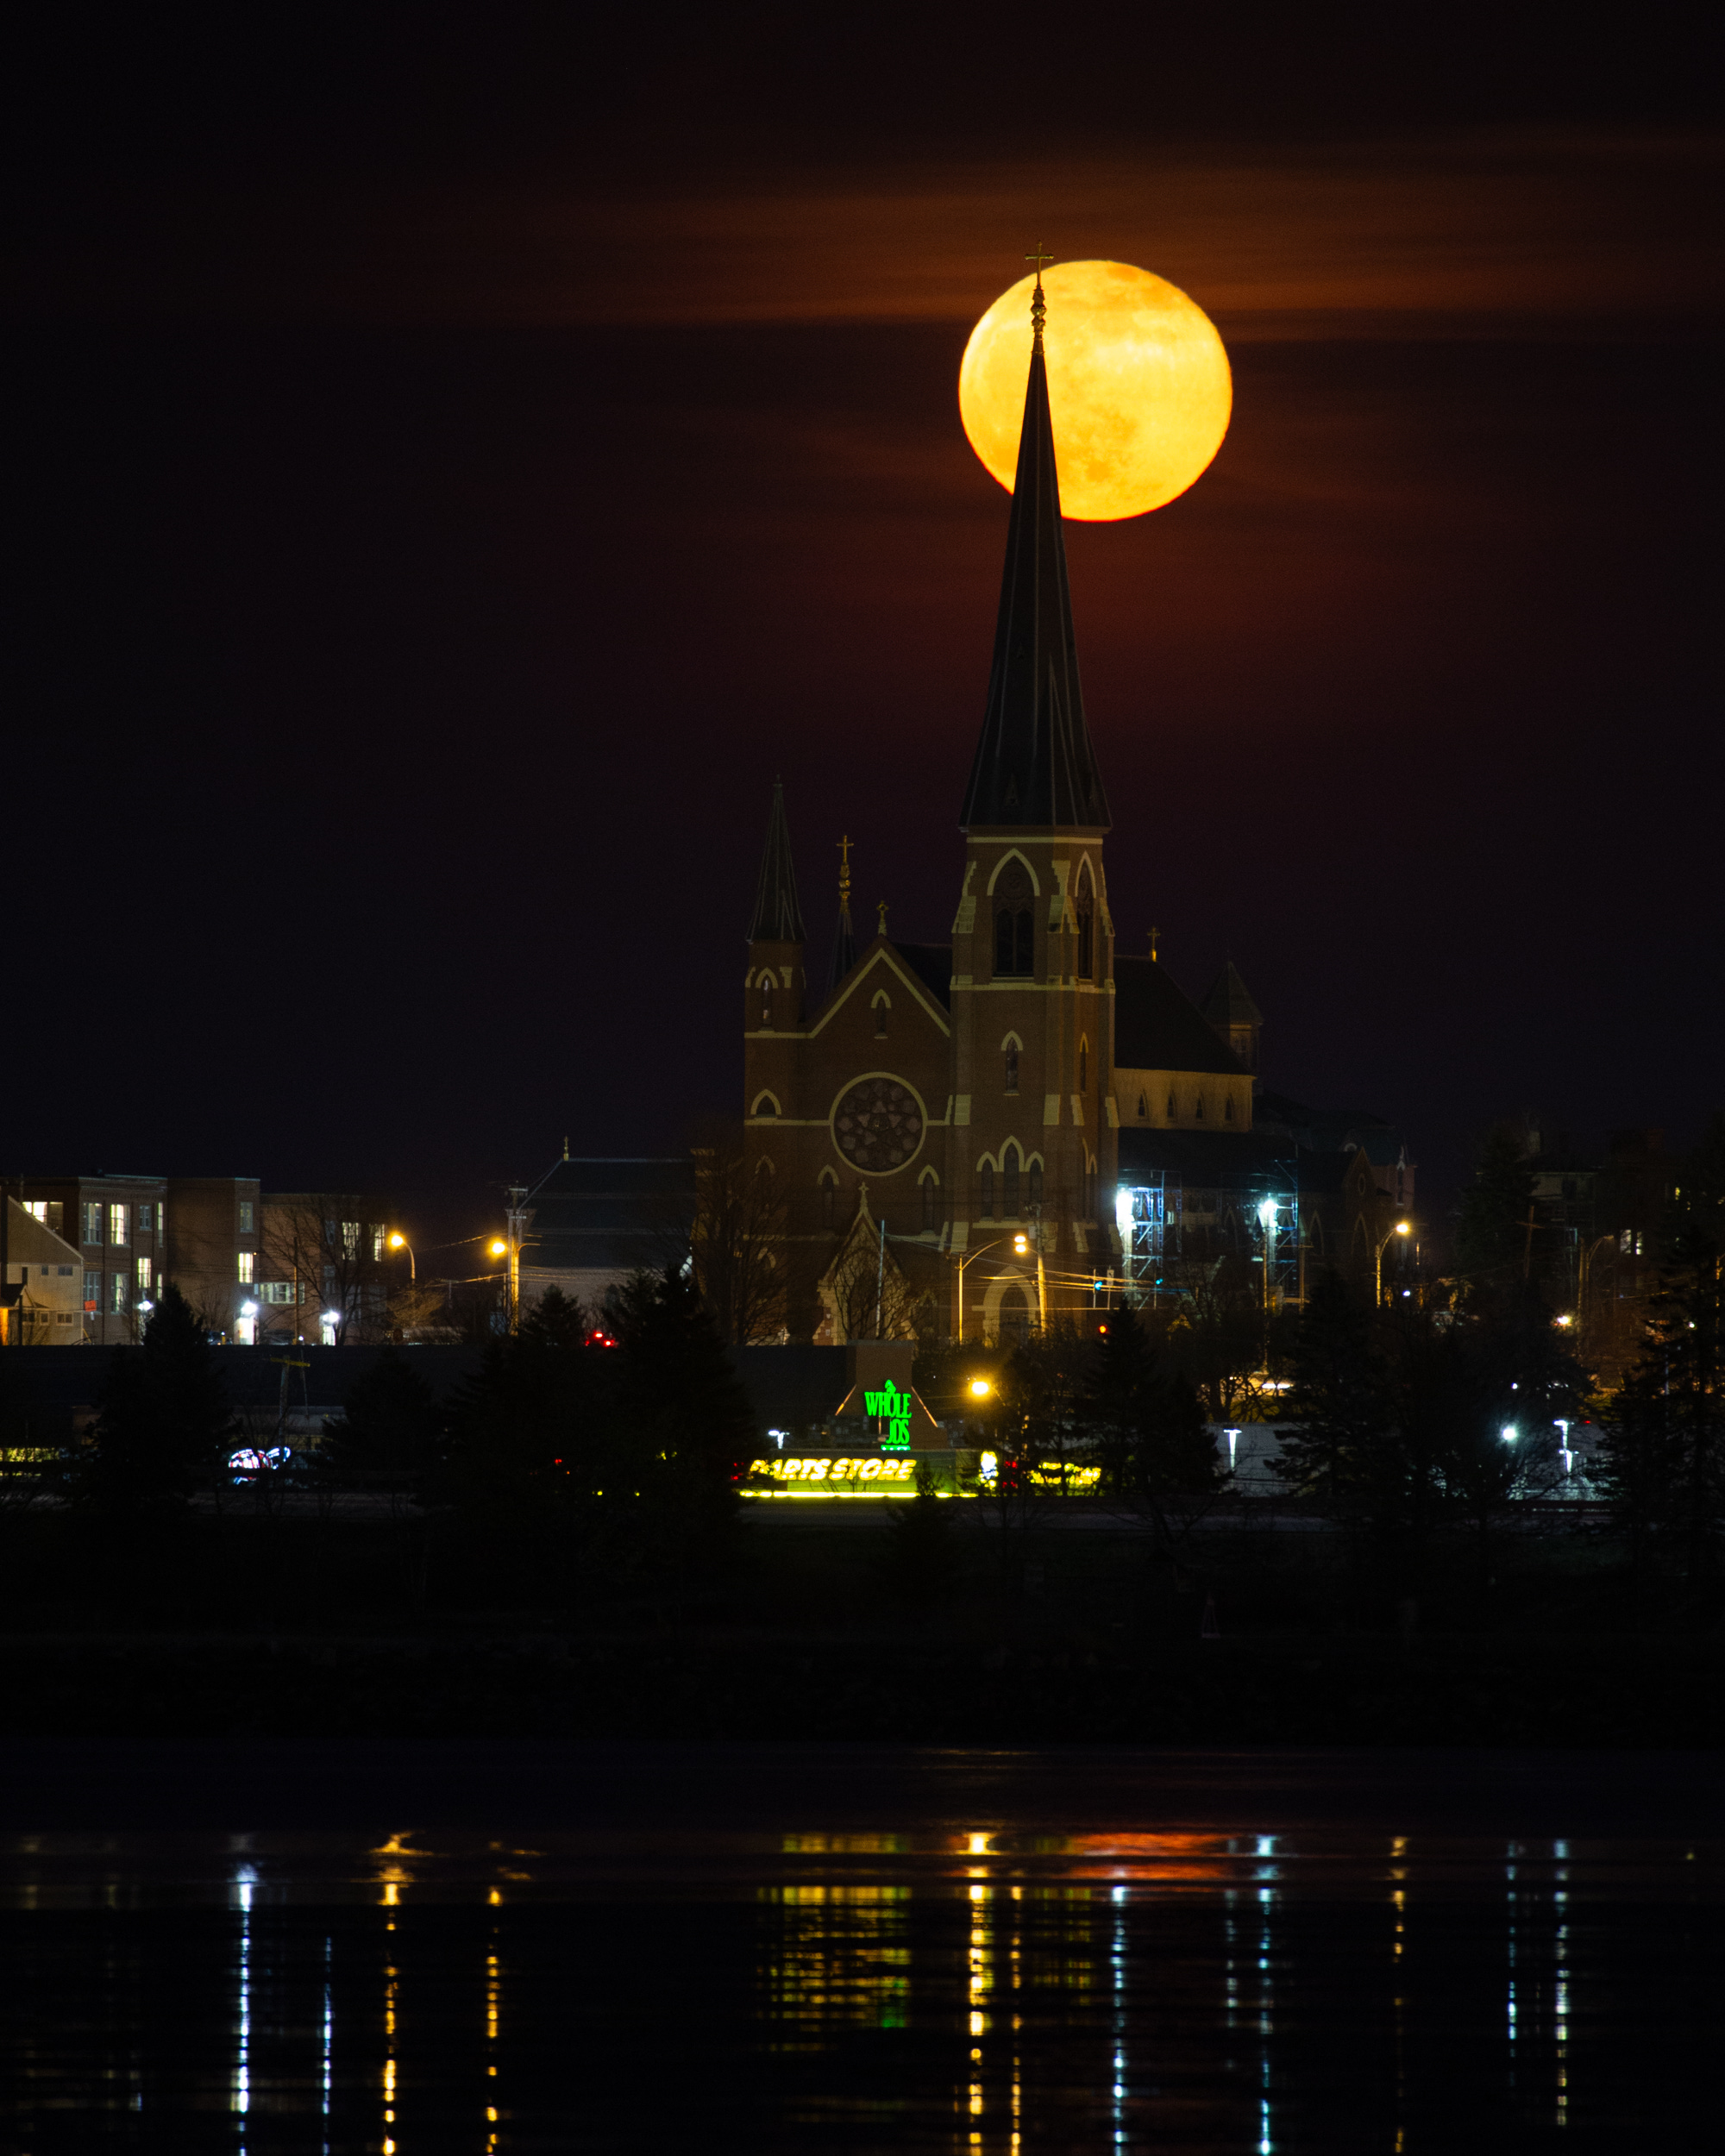
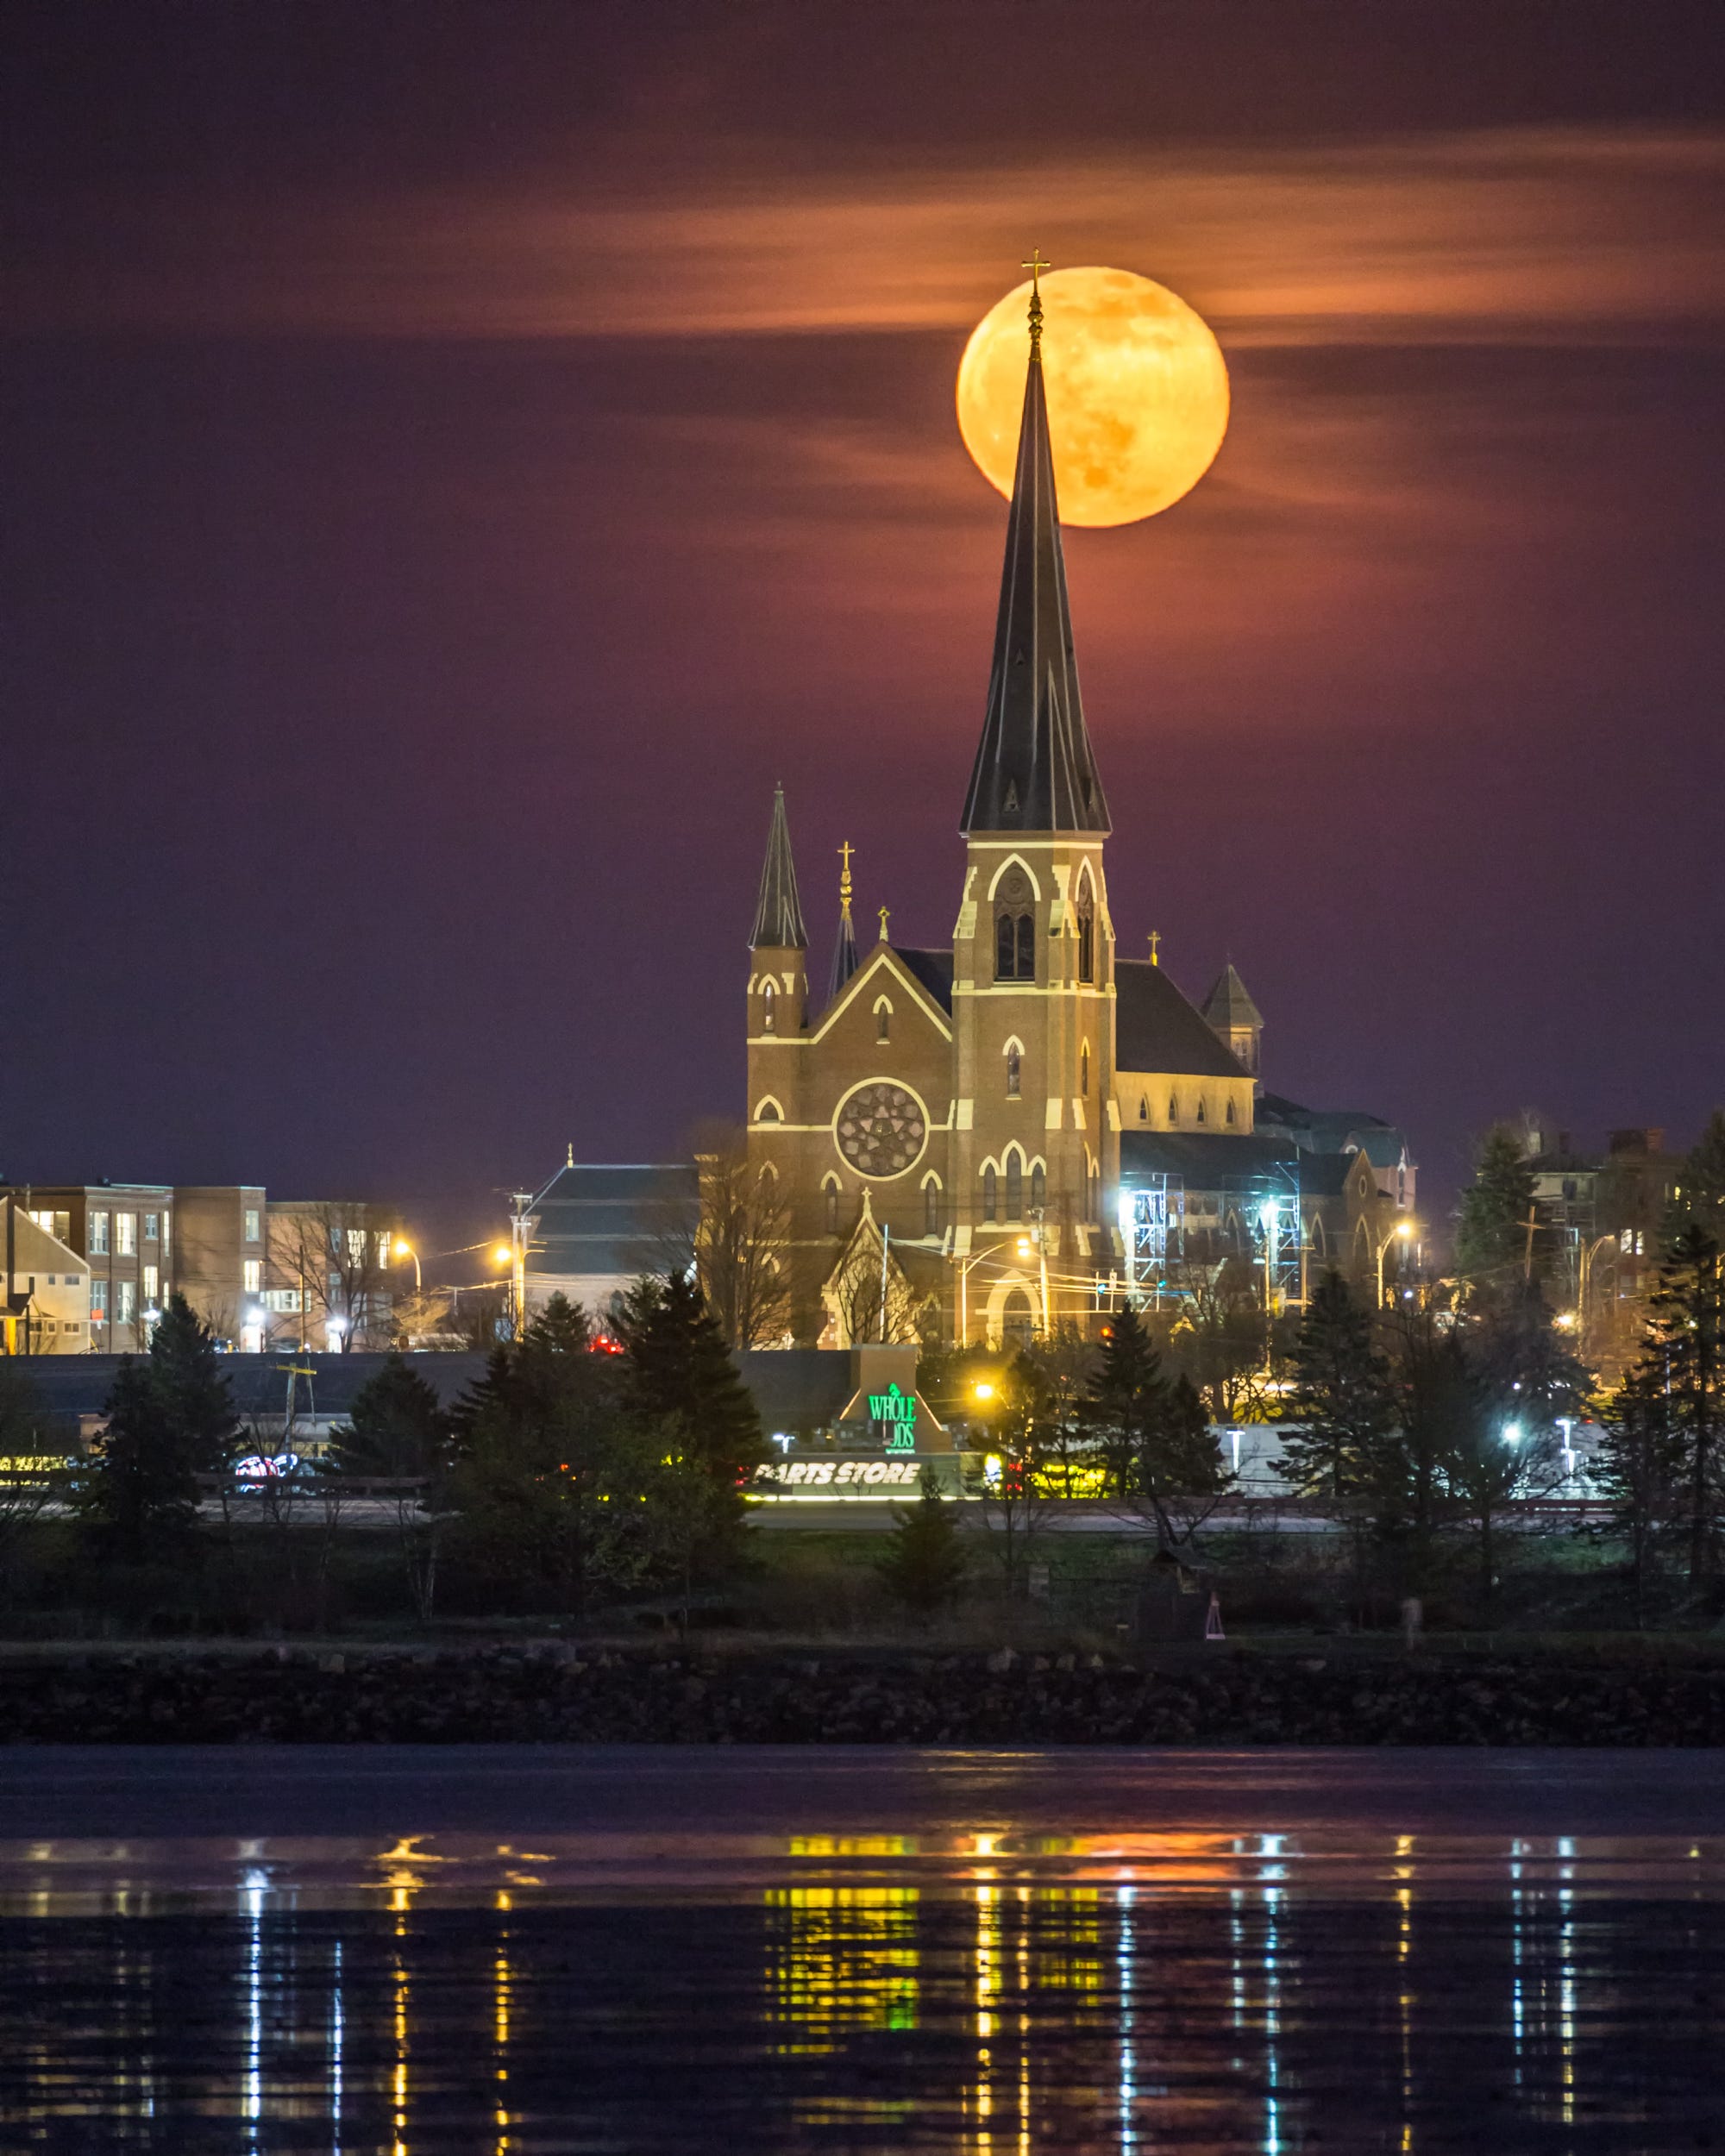
Juxtaposing the moon with a landmark is not only a fun challenge, it can tell stories and convey feelings that simply cannot be expressed otherwise.
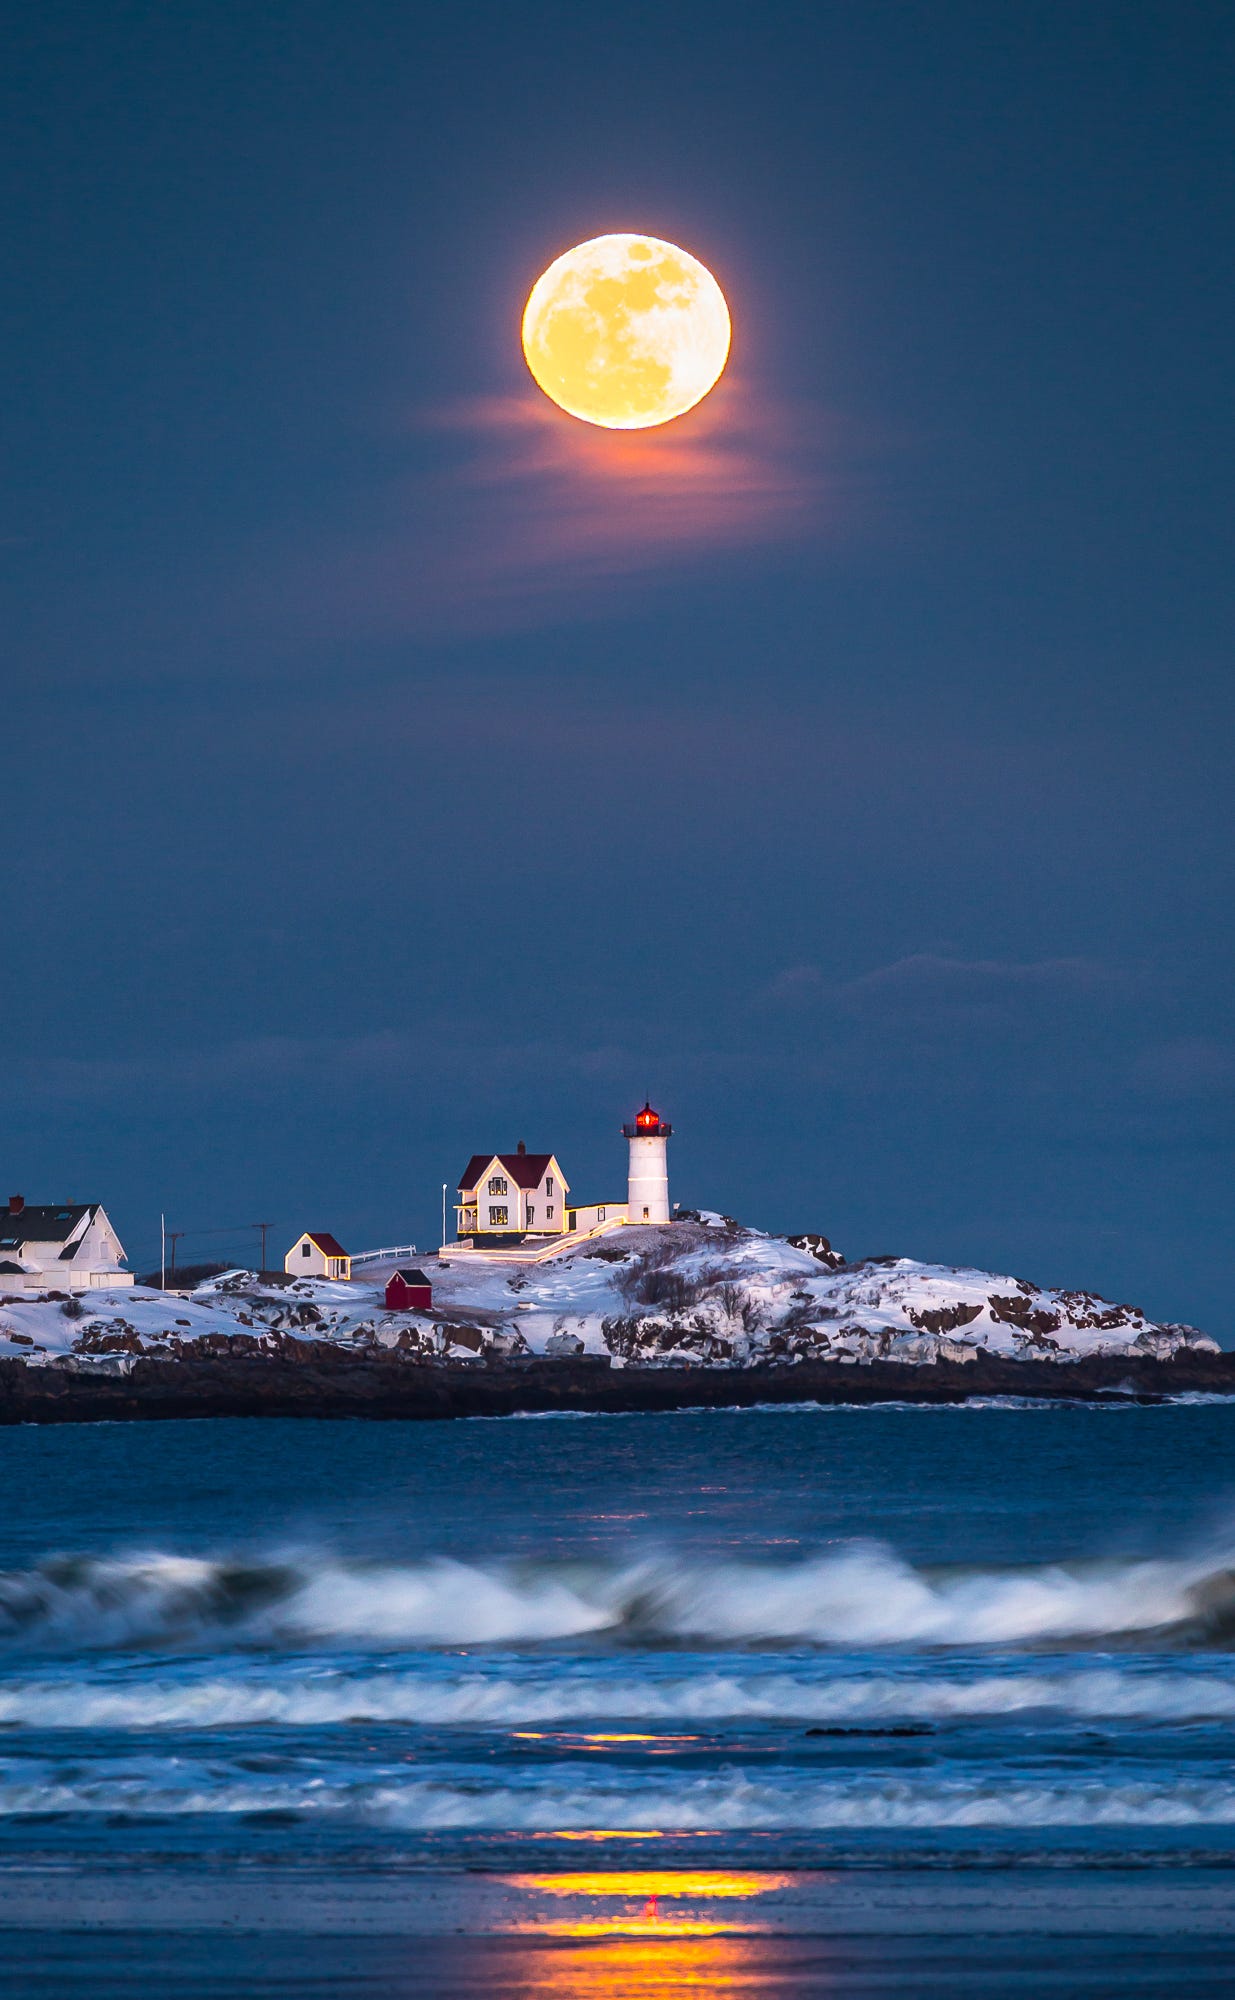
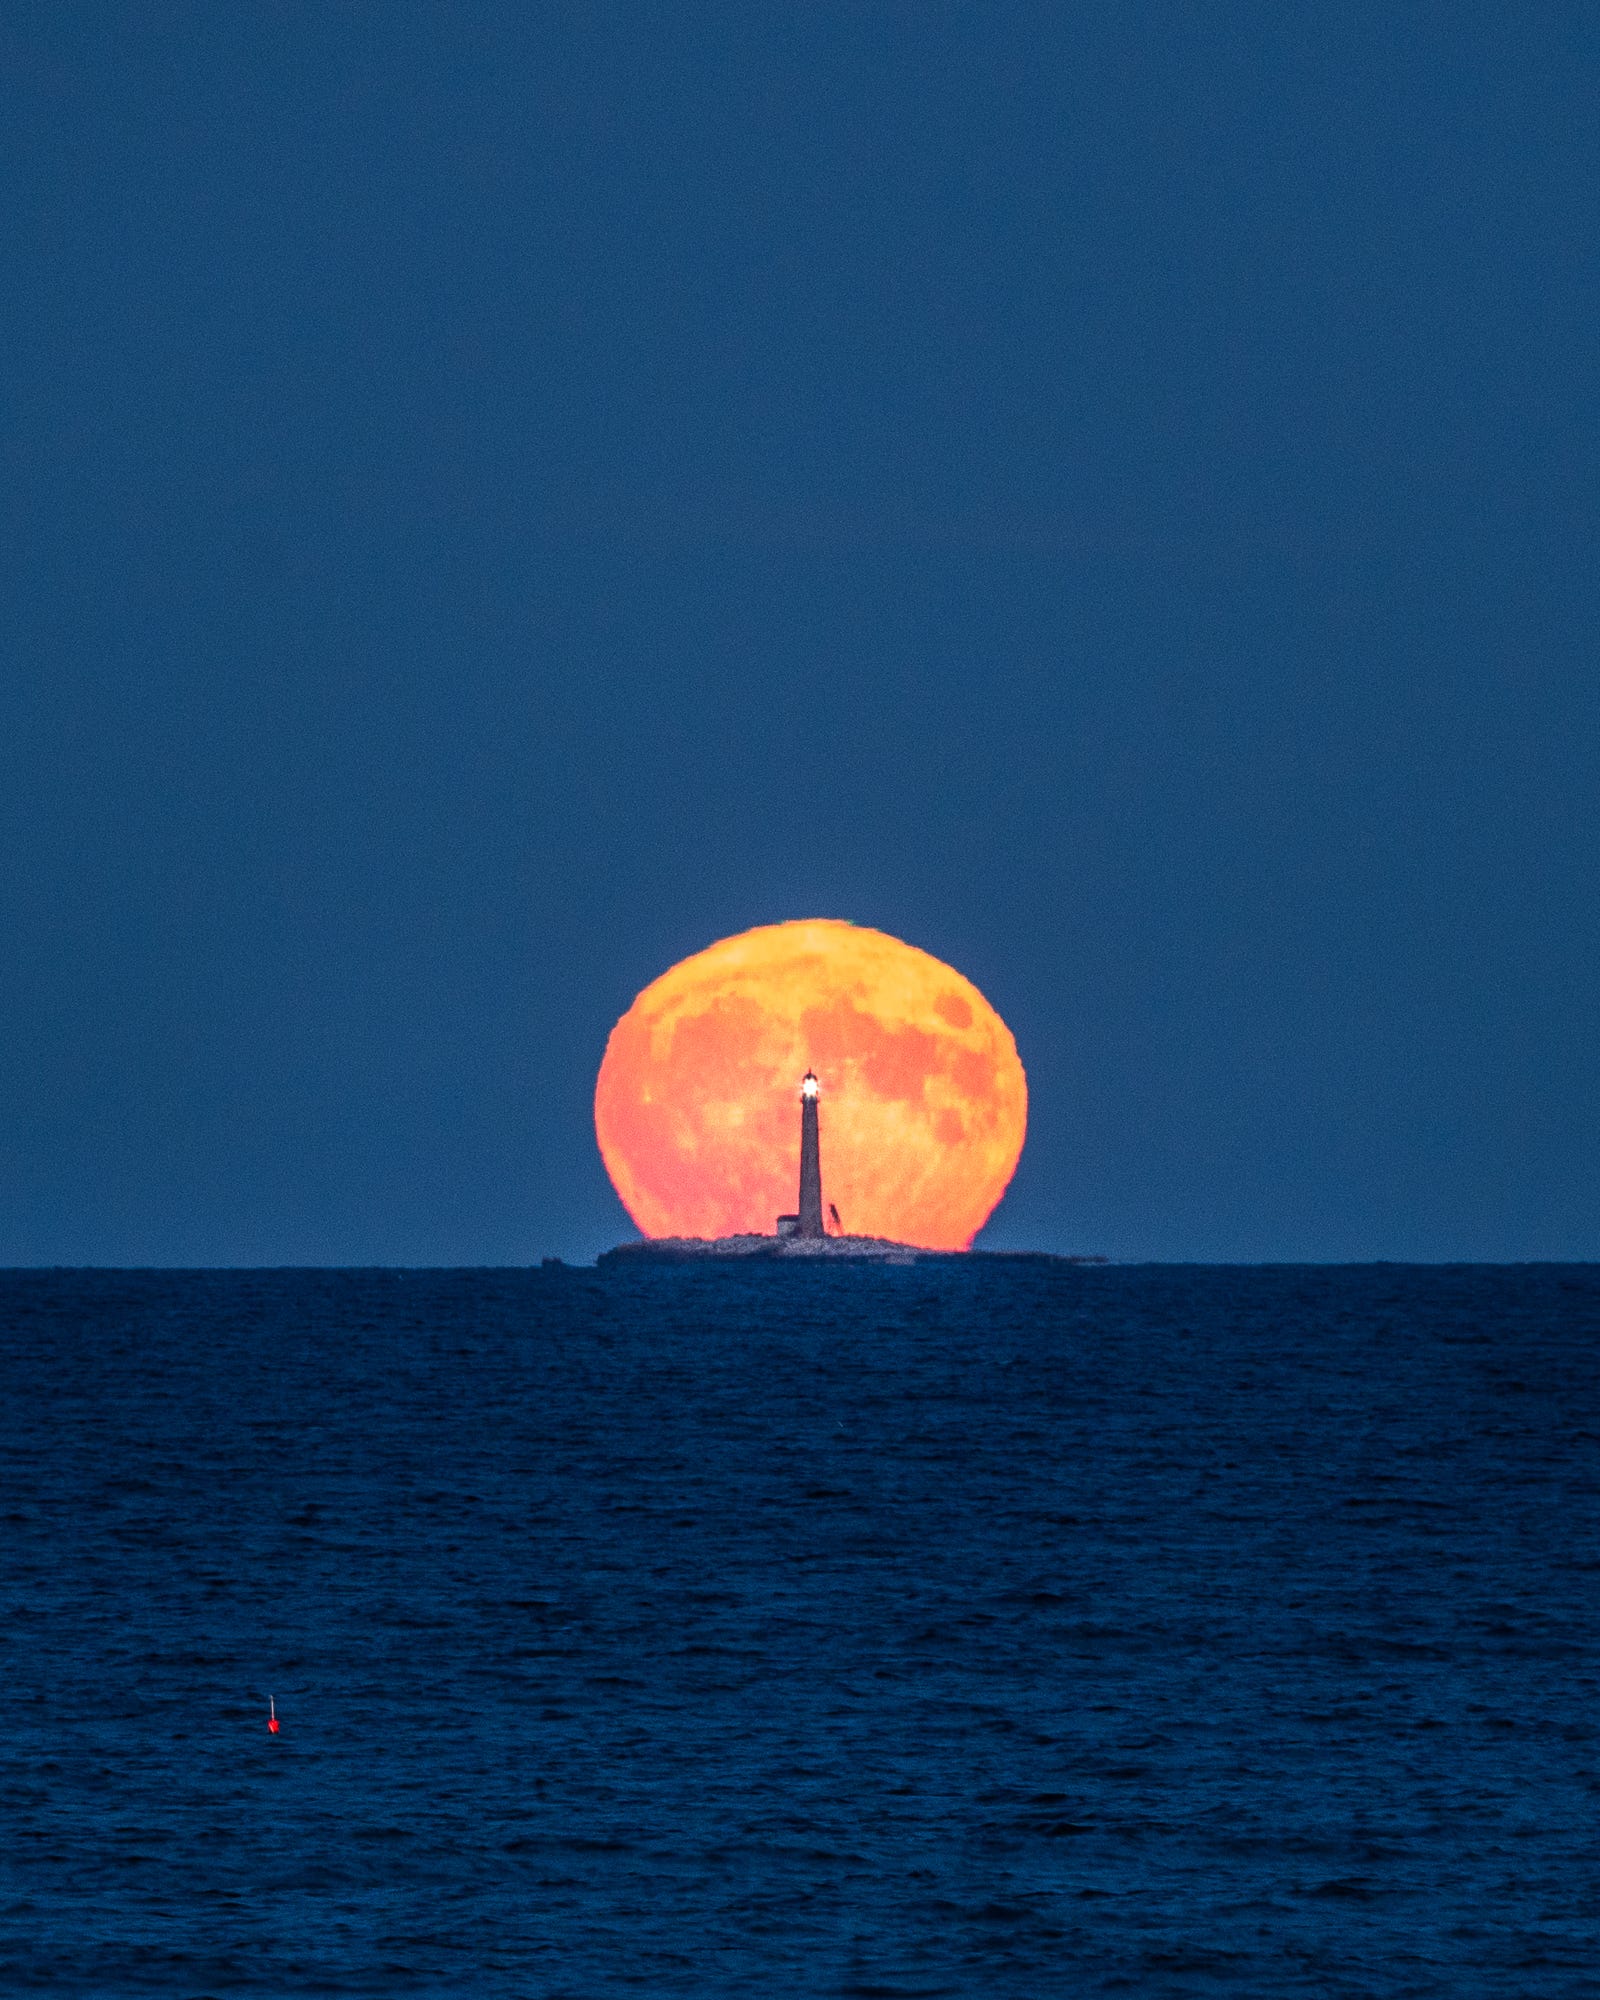
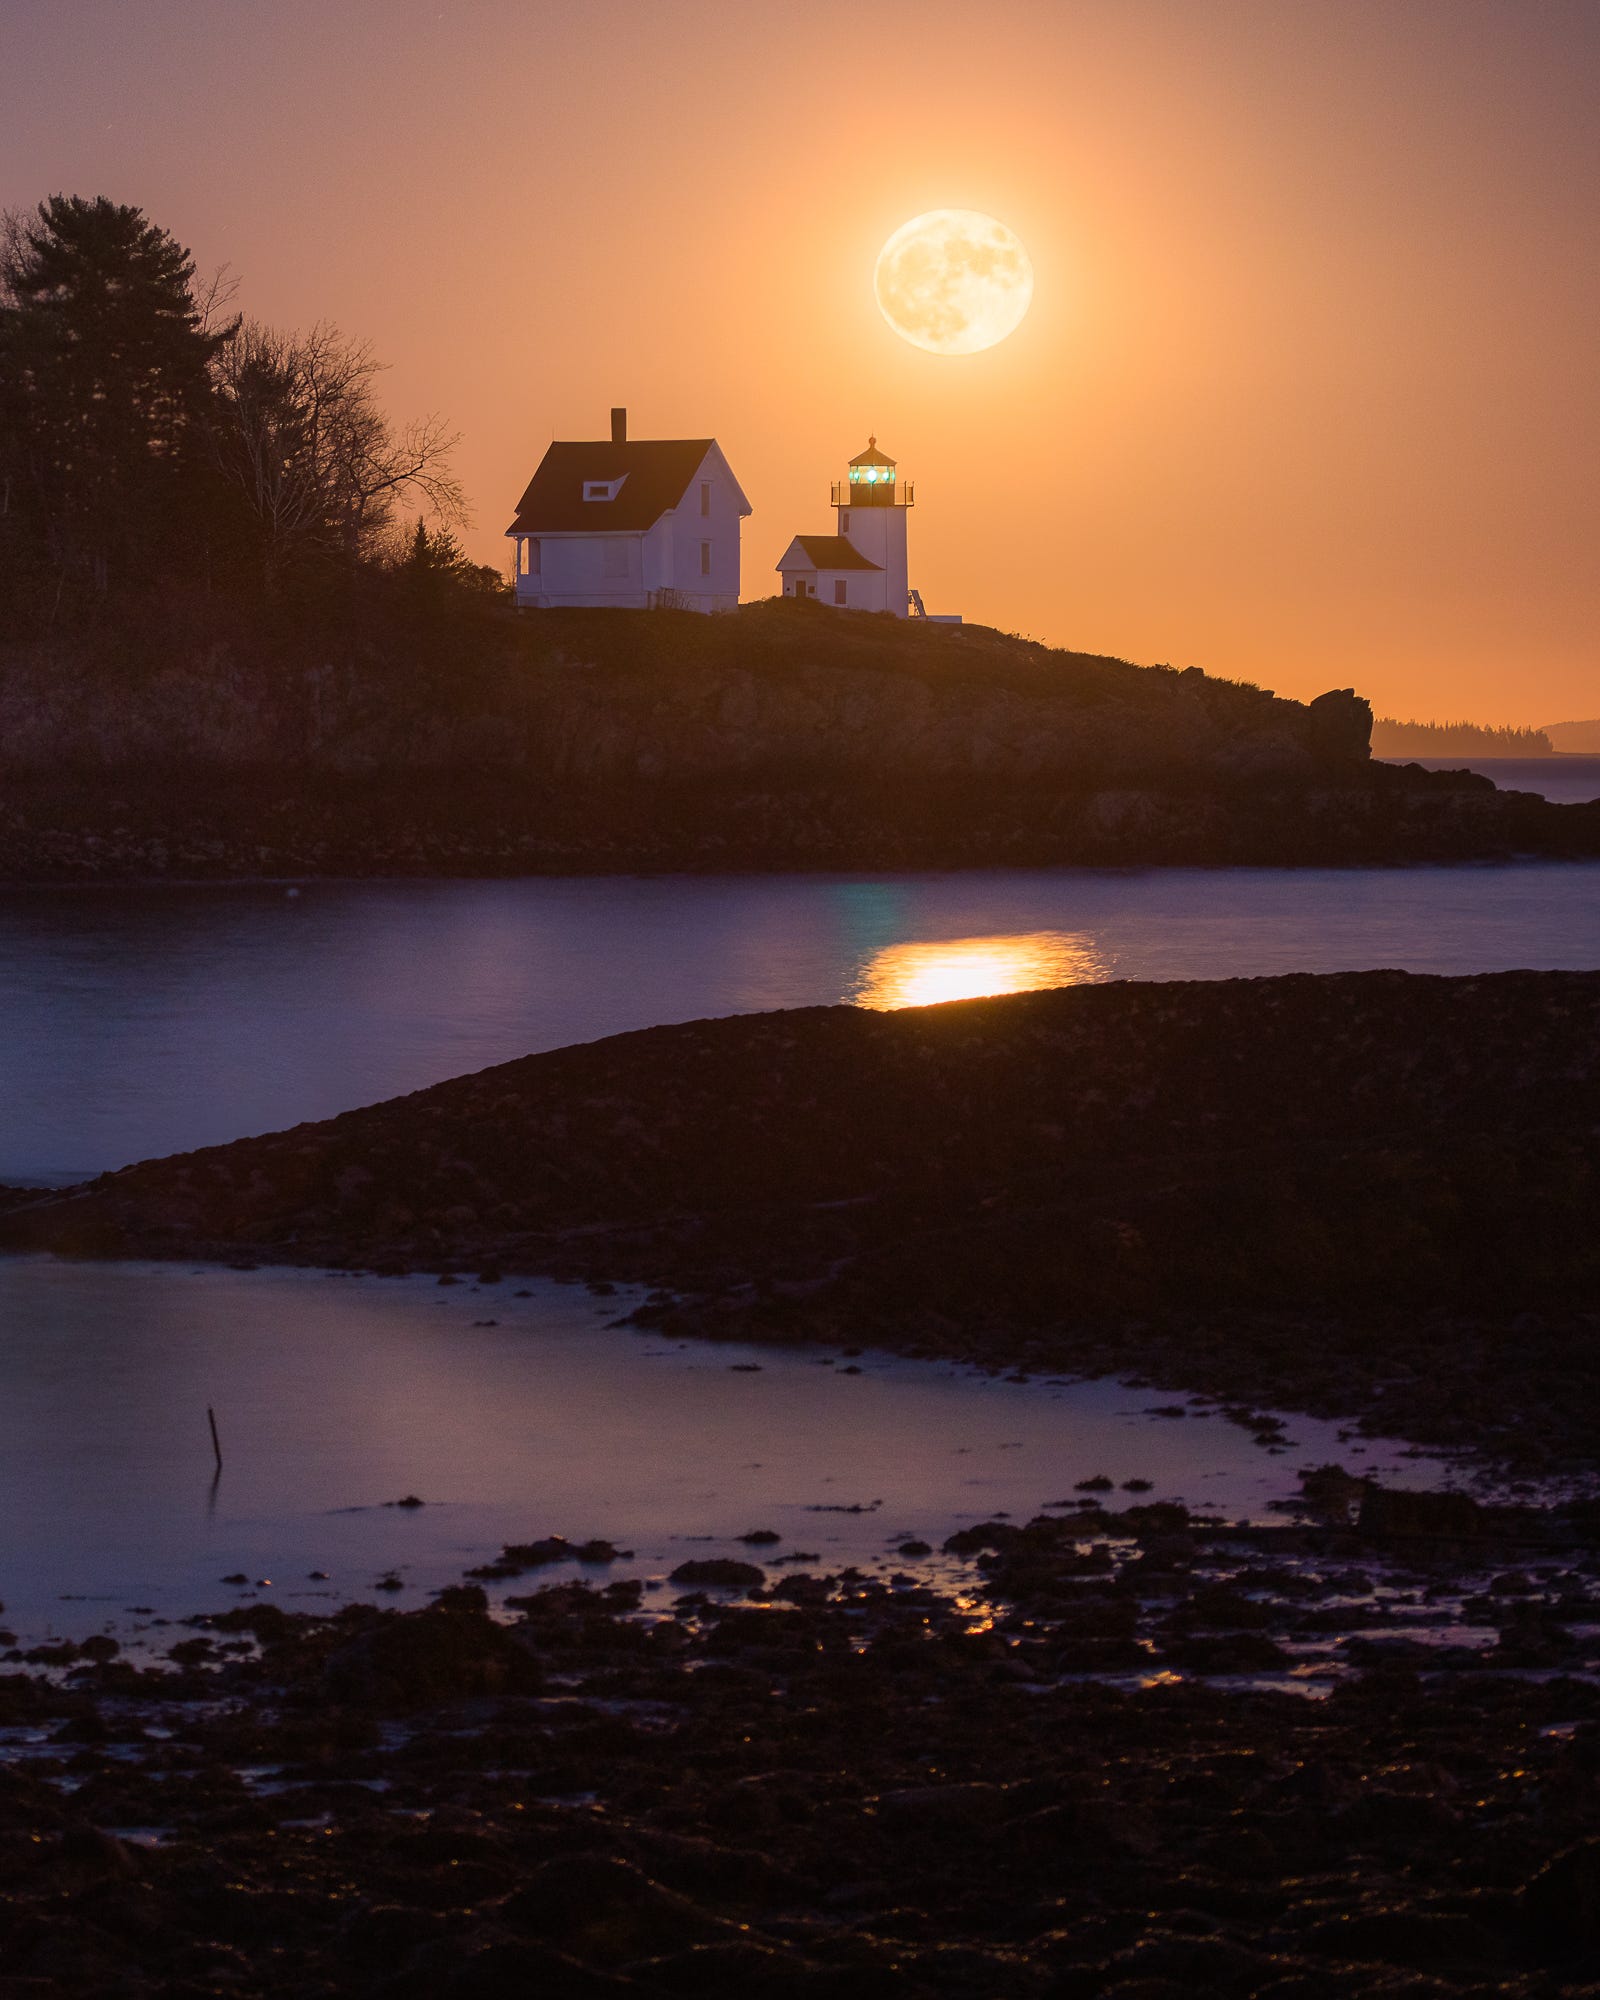
Positioning is crucial. You can guess based on past moonrises, but for precision (e.g., aligning the moon with a landmark), use apps like PhotoPills or The Photographer’s Ephemeris. They’ll pinpoint exactly where and when the moon pops up—critical information for planning shots like this:
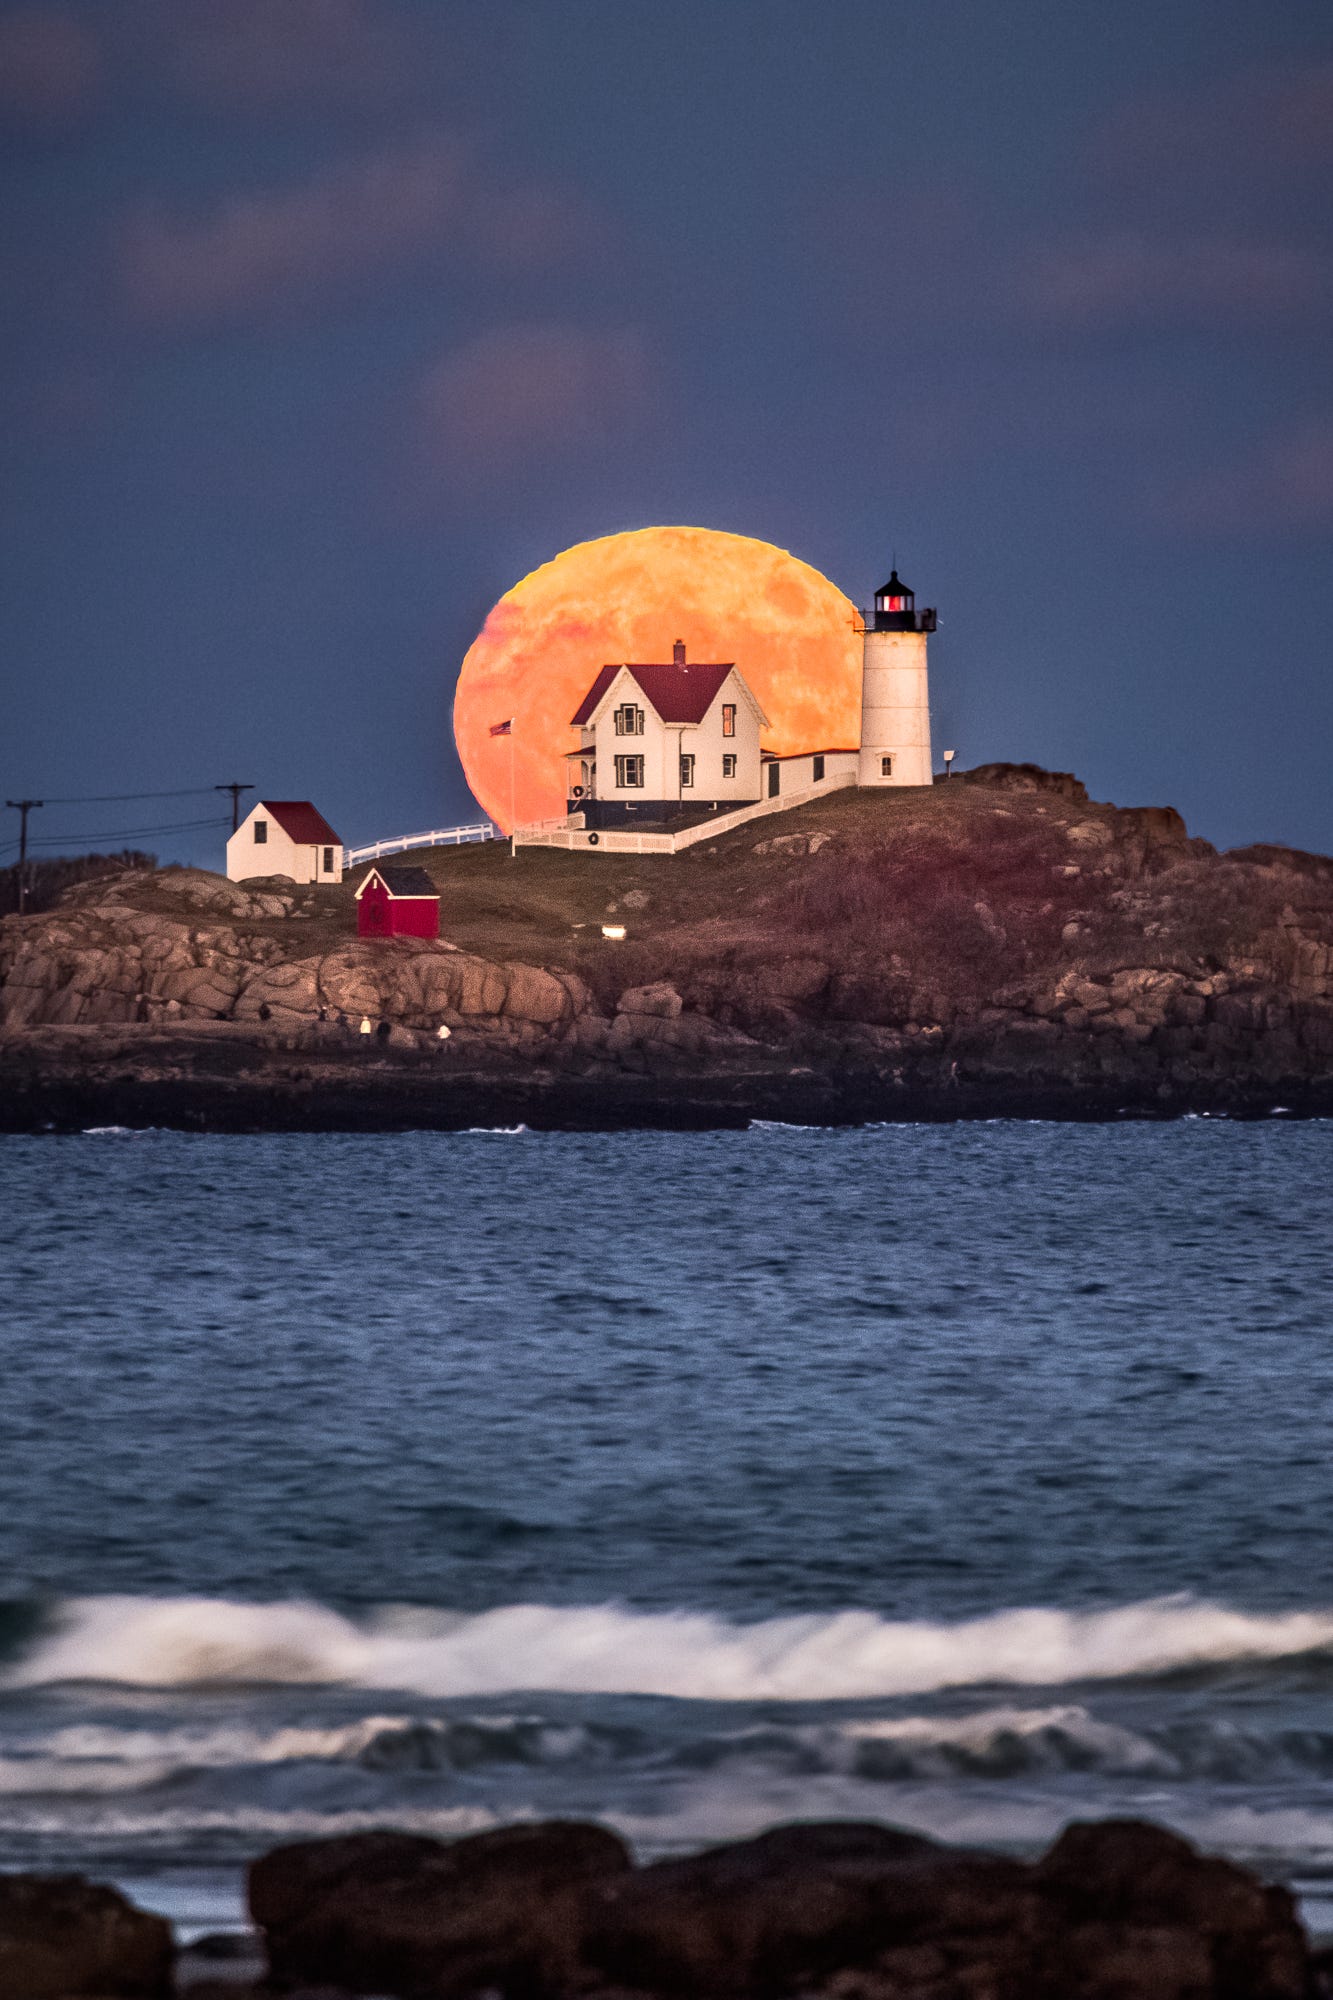
It helps to stand far away from the landmark you are trying to capture, and use a zoom lens to make the moon appear much larger in relation to the landmark. That’s where most of the dramatic impact comes in these photos. For the image above, I was about a mile away from Nubble Lighthouse on Long Sands Beach.
Finally, what you’re probably waiting for…
Planning with TPE: The March 14, 2025 Moonrise
I use The Photographer’s Ephemeris, aka TPE, to scout and plan.
Let’s plan for March 14’s full moon rising behind Whaleback Lighthouse from Fort Stark in Newcastle, NH—one of the few public spots for this well-known lineup. I can’t guarantee that there won’t be any clouds on March 14, nor if I’m venturing onto private property at this location I’ve pinpointed just north of the parking lot for Fort Stark. That remains to be seen! This is for demonstration purposes.
Open TPE—it defaults to today with a red pin you can drop at your location (hit the white arrow, top right).
Jump to March 14 with the “>I” button.
Pinch to zoom out, slide the white crosshairs to Fort Stark in seacoast New Hampshire, and drop the red pin.

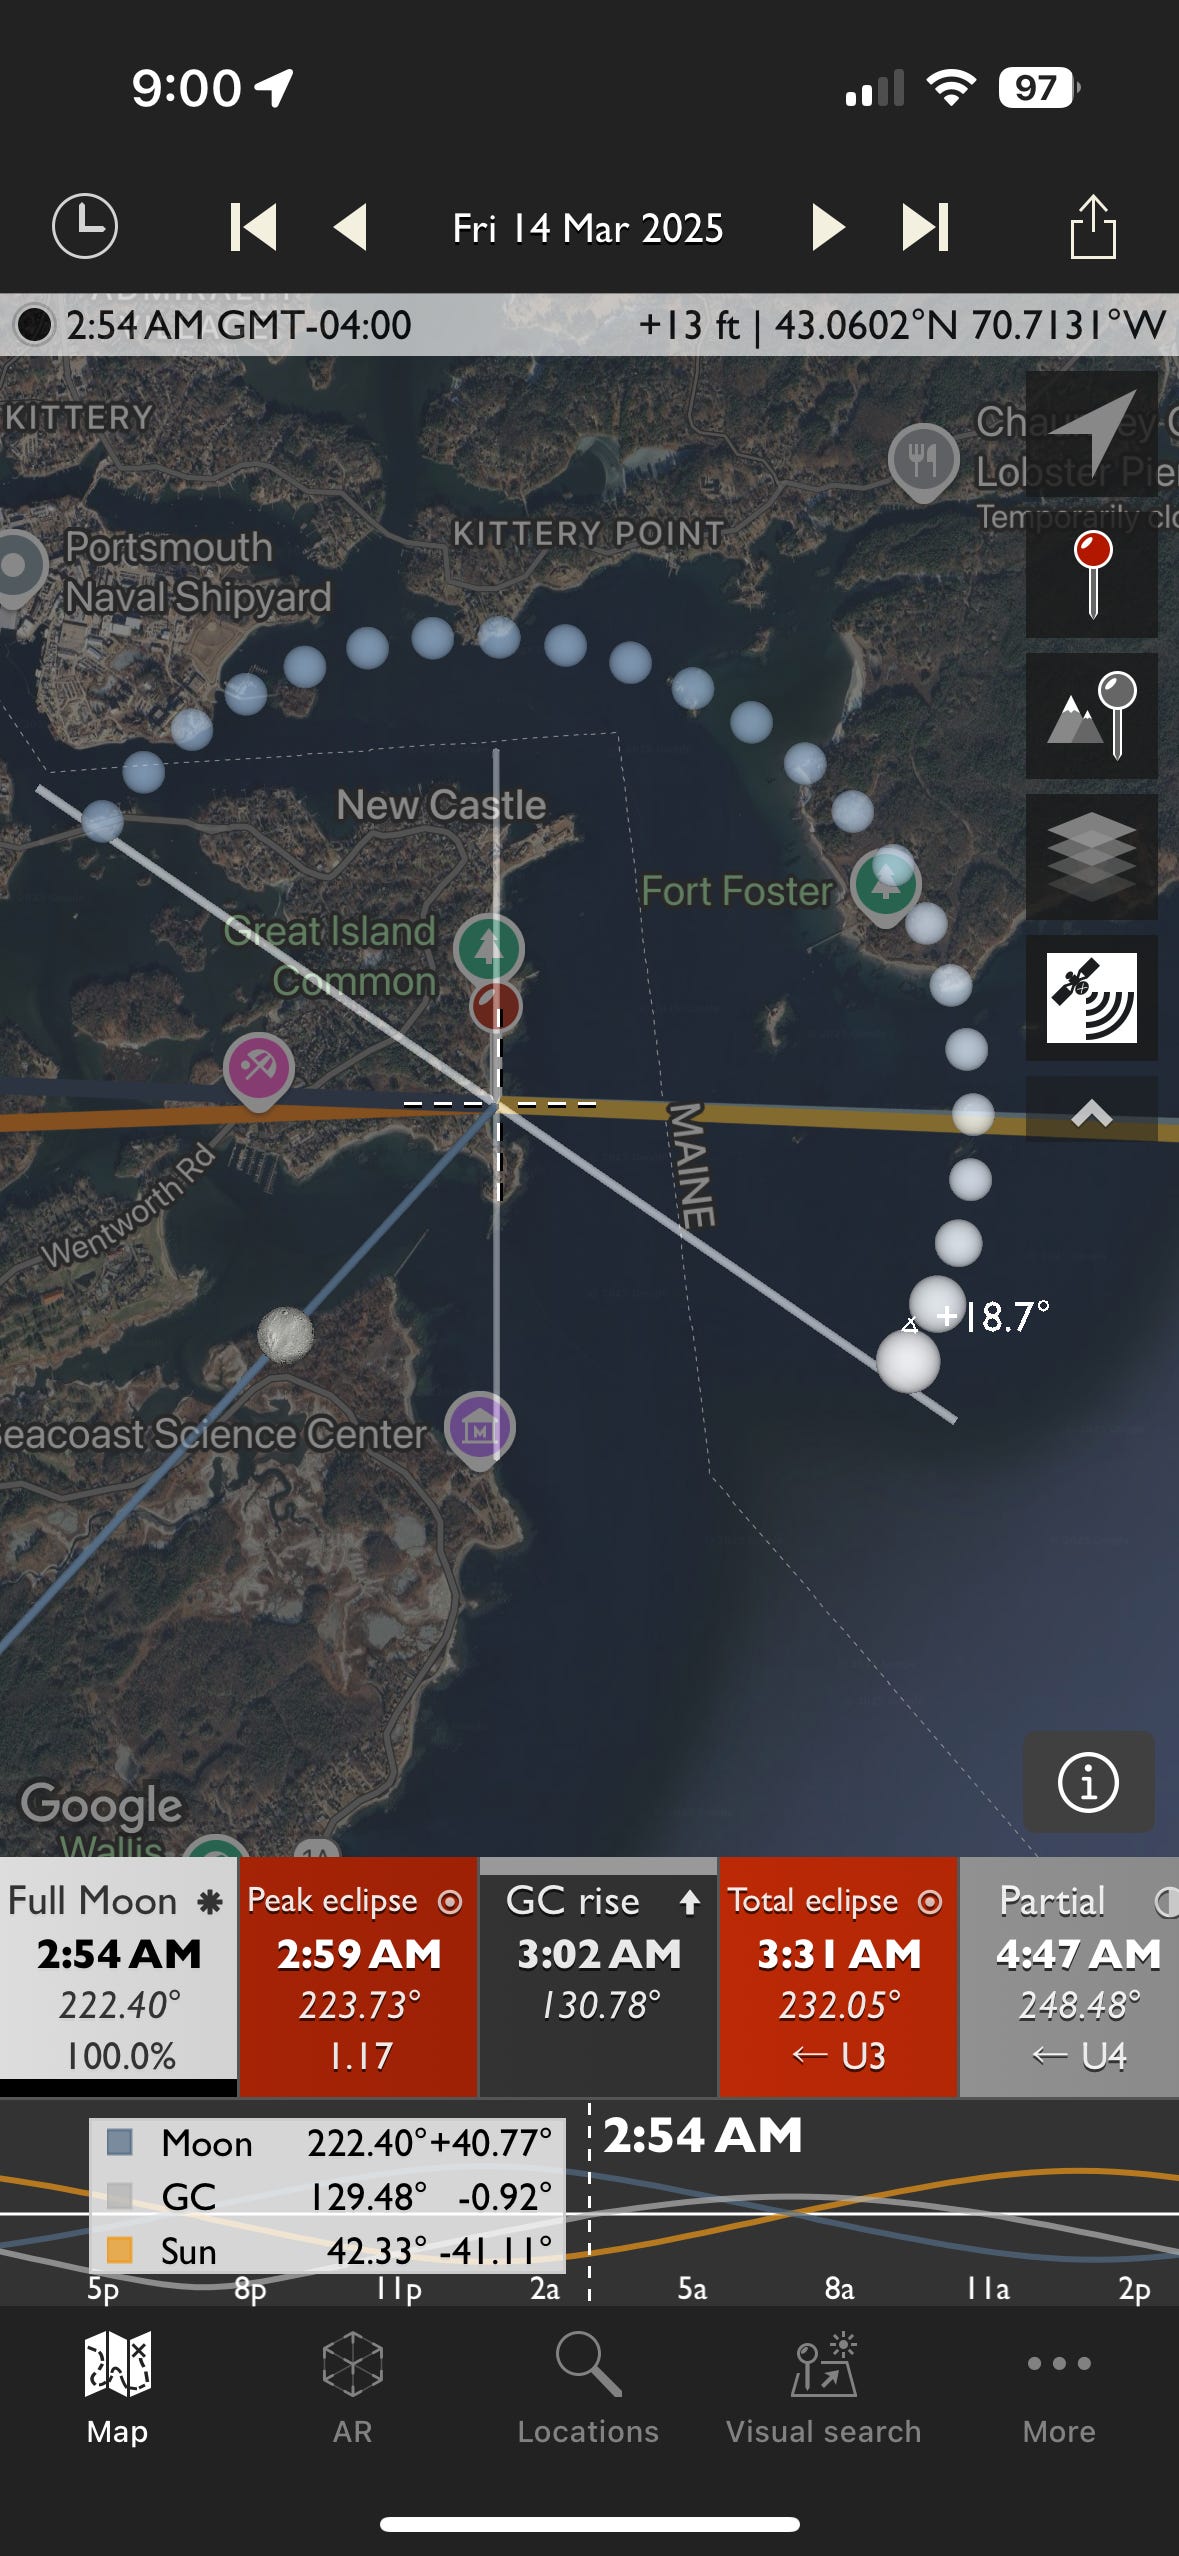
The bottom bar has many important details, for our purposes, focus on: moonrise at 7:24 PM, 36 minutes after sunset (6:48 PM), so it’s darkish twilight. A light blue line shows the moon’s path—almost due east. You might notice that there’s a total lunar eclipse at 2:59 AM! Awesome! But, we’re focusing on moonrise here, which occurs long before the eclipse, which will be high in the sky, in the dead of night, and not easily juxtaposed with any landmarks.

Tweak the red pin until that blue line cuts through Whaleback Lighthouse. When that’s lined up, your red pin is where you’ll want to stand for the start of moonrise.
Heads-up: the moon moves up and right fast in the northern hemisphere, so step left to keep it framed with the lighthouse as it rises. Once you get an idea of where the moon is, you can move around and adjust your framing until you have the moon right where you want it.
I don’t have a photo of the moon behind Whaleback that I’m happy enough with to show you, which is one of the reasons why I am eyeing it on the 14th. Check out this stunning image by Shannon McCraine, though:
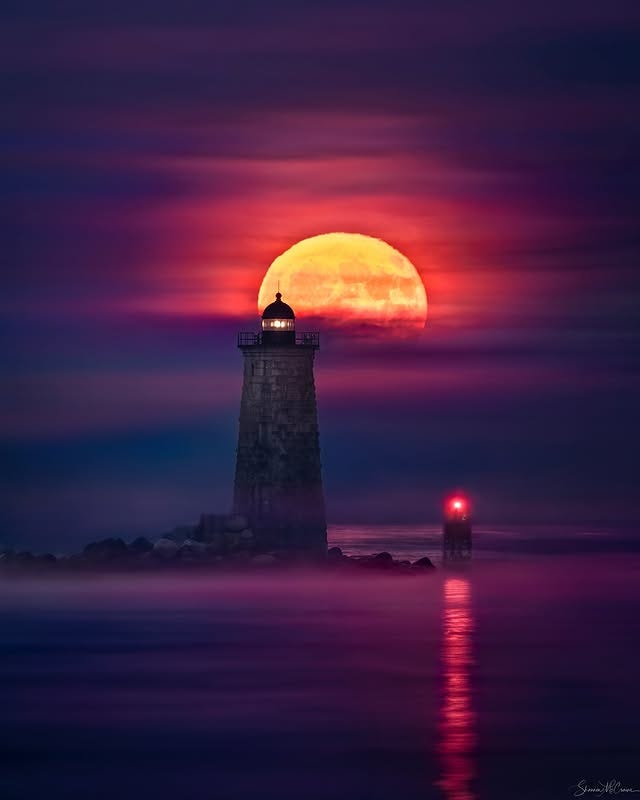
Doesn’t that make you want to go and try?
Final Thoughts
You don’t need a top-tier setup to capture the moon—just some basic gear and these techniques. Experiment with focal lengths, play with exposure, and time your shots around the full moon. Whether it’s a massive lunar close-up or a nice little moon over a landscape, you’ll be amazed at what you can create.
I hope you’ve been able to easily follow along with this written instruction. I’ll be releasing a video companion on my Substack soon—great for folks who learn better watching than reading.
Got questions? Drop them below—I’d love to help!
Our 2025 Photography Workshops are filling quickly. View the listings and sign up HERE.
Stunning, as always. Thanks so much.
I am also a mom who loves the moon. Thank you for these stunning photos.